Email is still an essential part of everyday communication and some businesses rely on emails for their survival. That is why it is essential to have your email set up on as many devices as possible so you can always be ready to respond to a client, to confirm the sales order or to get updates on the latest technology trends. Whatever the reason, it is important to have constant access to your emails wherever you are. Therefore knowing how to configure E-Mail in Microsoft Outlook is crucial.
Here are instructions on how to setup your IMAP email account with Microsoft Outlook:
1.
In your Control Panel, click on the Mail Icon.
![]()
2.
Click on Email Accounts and then click on New.
![]()
3.
On the Auto Account Setup window, click on the “Manual setup or additional server types” button and then click Next.
4.
Depending on the type of email you have setup, you will need to choose the appropriate option. For the sake of this blog, we are going to choose POP or IMAP.
5.
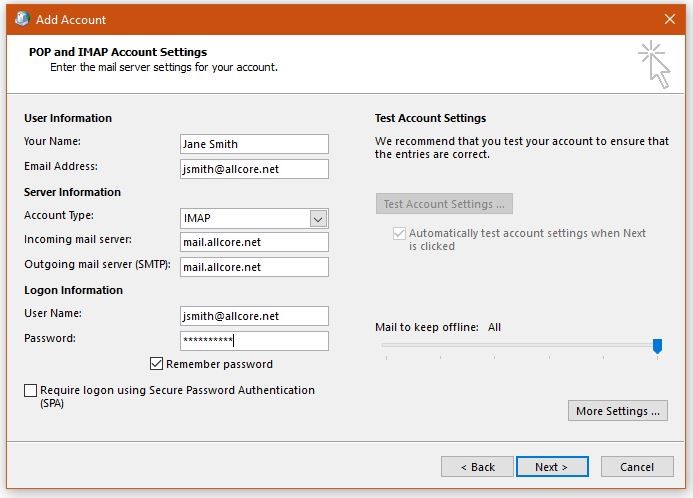
You will need to enter in the correct information, usually given to you by your email provider or IT support person. It should look similar to this:
6.
Before you click on next, you will need to click on the More Settings button.
7.
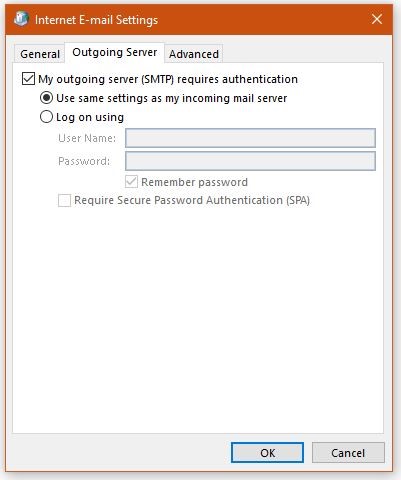 In the Outgoing Server tab, you need to click on “My outgoing server (SMTP) requires authentication” checkbox. Then make sure that the “Use the same settings as my incoming mail server” button is also selected.
8.
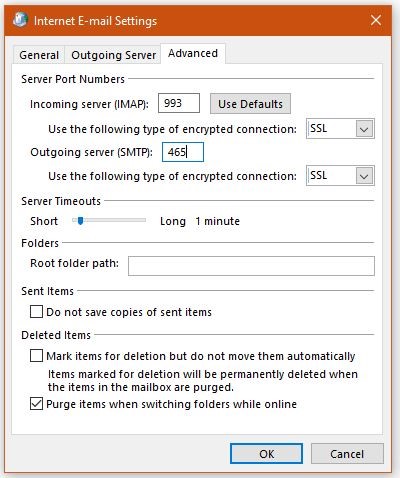 In the Advanced tab, make sure you select SSL as the type of encrypted connection. If the Port Number does not automatically change for you when you select SSL, manually change the Incoming server (IMAP) port to 993 and Outgoing server (SMTP) port to 465. The other options can be set at a later time or left with the default settings. Click OK when you are complete.
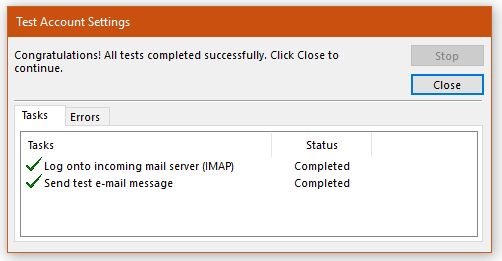
9.
Next, you will need to click on the Test Account Settings button to determine that all the settings are correct. If they are, you will see green checkmarks and the status changed to Completed. You can then click on close. If you receive an error of some sort, then you will need to revisit which settings need to be adjusted.
10.
Click on Next to complete the setup. It will do another test and when that is finished, you should get a window that confirms you have completed the setup.

Congrats you now know how to configure E-Mail in Microsoft Outlook and you are ready to receive email!