 Do you have a laptop or desktop PC that has a touch screen, but you prefer to use only the mouse and keyboard for navigation and selecting items on the screen?
If so, you can easily disable the touch screen in order to prevent accidental “clicking” with your elbow or an errant finger.
Follow the steps below to disable the touch screen in either Windows 8.1 or Windows 10:
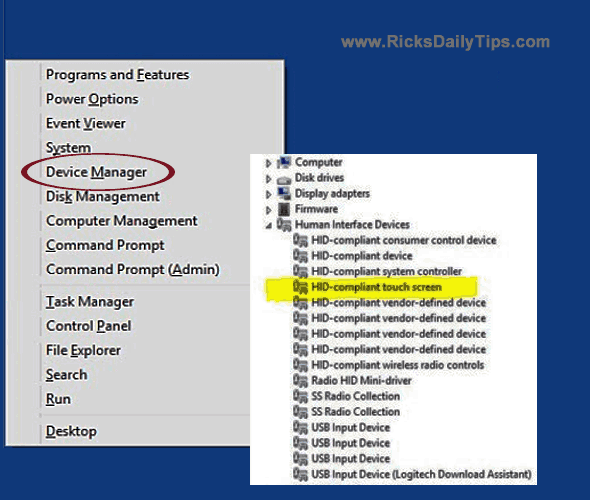
1 – Press the Windows+X key combination to open the “Power User” menu.
2 – Click Device Manager.
3 – Click the little arrow beside “Human Interface Devices” to expand that category.
4 – Right-click on HID-compliant touch screen (or whatever the touch screen entry is on your particular PC) and click Disable.
Here’s a screenshot that shows what you’re looking for:
That’s all there is to it. From now on your PC’s screen will operate as a standard screen with the “touch” feature disabled.
If you ever change your mind and decide that you want to use the touch screen after all, just repeat the steps above and click Enable in step 4.
Bonus tip #1: Click here to read about “Windows 10 for Dummies”, an excellent reference for learning the ins-and-outs of Windows 10.
Bonus tip #2: Want to make sure you never miss one of my tips? Click here to join my ’s Tech Tips Facebook Group!
If you found this post useful, would you mind helping me out by sharing it? Just click one of the handy social media sharing buttons below.