Chromebooks may have cornered a niche market as lightweight laptops and desirable computers for education, but Google’s ambitions are far bigger. The release of two new flagship Chromebooks from Samsung and the arrival of Android apps illustrate that Google envisions its operating system as a full-blown competitor to Windows and MacOS.
They do involve a learning curve, though. Chrome OS somewhat resembles Windows in appearance and functionality, but some small differences can trip up a newcomer, and some of the most productivity-oriented features are buried. Whether you’re new to Chrome or an old dog looking for some Googley new tricks, this guide will help you sidestep the OS’s most glaring flaws and squeeze as much productivity as possible out of your Chromebook.
Mouse and keyboard tips
The changes start with the Chromebook’s touchpad—specifically, the apparent lack of a right-click button. But look closer: Pressing two fingers down simultaneously on the bottom of the touchpad brings up a right-click-style options menu (as is common on many laptops now), so you can copy links and open new tabs to your heart’s content.
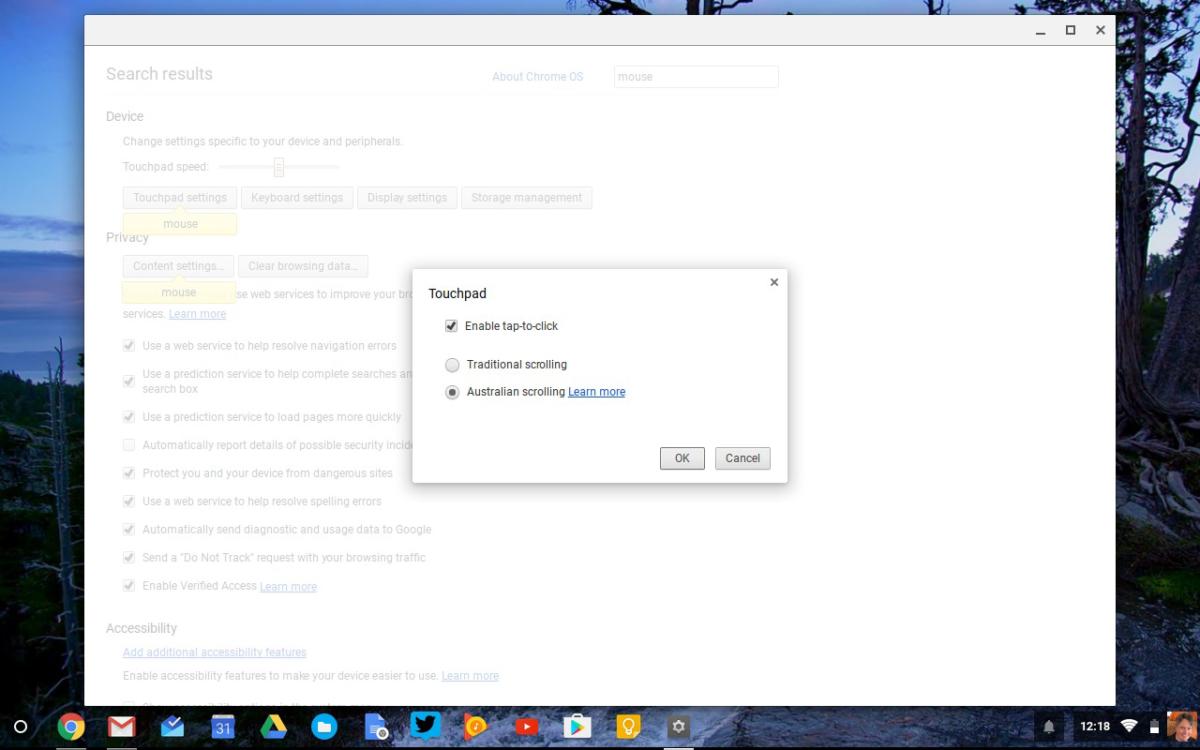 PCWorld
 Trackpad choices are simple and to the point.
Chromebook touchpads also support two-finger scrolling, and you can tweak advanced options—changing the pointer speed and enabling tap-to-click, for instance—by clicking Chrome’s menu button (the three-dot vertical icon at the top of any browser window), opening Settings, and diving into the Device section.
Chromebooks also support USB and Bluetooth mice, though you’ll need to click the system tray area at the bottom-right corner of the screen and ensure that Bluetooth is enabled for the latter. Nearby Bluetooth devices will appear in the panel; click their entries to pair them with your Chromebook.
Under Keyboard Settings, you can change the functionality of specific keys. If you miss the Caps Lock button, you can assign it to the search key and make other adjustments.
 PCWorld
 Customize the function that specific keys perform.
Keyboard shortcuts are crucial for productivity on a Chromebook, as they are on any other laptop. Your Chromebook supports all the standard Windows shortcuts and offers Chrome-specific ones as well. Even better, pressing Ctrl-Alt-? brings up an interactive diagram showing all the keyboard shortcuts available.
Taking screenshots is easy: Press Ctrl-Switch Window (on some models, this may be an icon that looks like a rectangle with two vertical bars on one side). You’ll see a confirmation dialog box, and the screenshot will save as a .png file to your Chromebook’s local storage—you’ll find it in the Files app.
Working offline
It’s true: Chromebooks thrive on an active Internet connection. Although you have many ways to stay connected to the Internet, from tethering to tracking down free Wi-Fi, sometimes you just have to unplug. Chromebooks can, however, perform a surprisingly large number of functions offline. We’ll highlight some here.
If you’re using a Chromebook, you probably already rely on Google services such as Gmail, Google Docs, and Google Calendar. The good news is that Google has optimized these services for offline use.
 PCWorld
 Install Gmail Offline to get your messages if you’re disconnected from the Internet.
Start by installing the Gmail Offline app from the Chrome Web Store. The app syncs your email in the background, so you can open it and use Gmail when you don’t have Internet access. Gmail Offline also lets you write email messages and queue them to send when you reconnect.
Google Drive functions offline as well, allowing you to view, edit, and create Docs, Sheets, and Slides. To enable this feature, install the Google Drive app, visit the Google Drive website, and click the More option at the left of the page. From there, select Offline and click the Enable Offline button. Similarly, Google Calendar functions offline after you install the Google Calendar app. Click the gear icon in Google Calendar and look for the Offline option in the menu. If you see a green checkmark, everything is synced for offline use.
 PCWorld
 Sync your Drive files offline so you’re always ready to work.
Chromebooks tend to offer scant storage space, but the typical 16 or 32GB is enough for saving Drive files for offline use. Chromebooks also support flash drives and SD Cards. While you’re offline, you can open PDFs, Microsoft Office documents, images, videos, and even music files using the Files app, which functions in a similar way to Windows’ File Explorer.
Here’s another handy trick: To access a webpage while offline, you can use the Print option in Chrome’s menu, select Save as PDF, and save the page to your Chromebook’s local storage.
Printing
The paperless office isn’t a reality quite yet. Printing is possible with a Chromebook—but you can’t make it happen by connecting a printer to your Chromebook, even if it’s a USB printer. You need to set up Google Cloud Print.
If you have a Google Cloud Print–enabled printer, you can print over the network after setting up Google Cloud Print on your Chromebook. If your boss gave you a Chromebook, your organization may have already set up a managed printer, which will appear in the Print dialog box.
 PCWorld
 Google Cloud Print lets you connect and print, even if you’re not on the same Wi-Fi network as your printer.
A Chromebook cannot directly connect to a printer that isn’t Cloud Print–enabled, alas. For all other printers, you’ll need to connect it to a Windows or Mac computer running Chrome and configure it to accept print orders sent via Google Cloud Print. To do so, open Chrome on that computer, click the menu button, select Settings, click Show advanced settings, and click Sign in to Google Cloud Print under Google Cloud Print.
Remote access
For many a Chromebook is an ideal second computer. That means you might need to get into your main machine from time to time.
The Chrome Web Store offers apps for accessing remote desktops. Ericom Software’s AccessNow lets you access Windows remote desktops over RDP, while RealVNC’s VNC Viewer for Google Chrome allows you to connect to Windows, Mac, or Linux systems running a VNC server. Citrix’s Receiver for HTML5 permits you to connect to Citrix on a Chromebook, but the staff at your organization must first set up the Receiver software on their end.
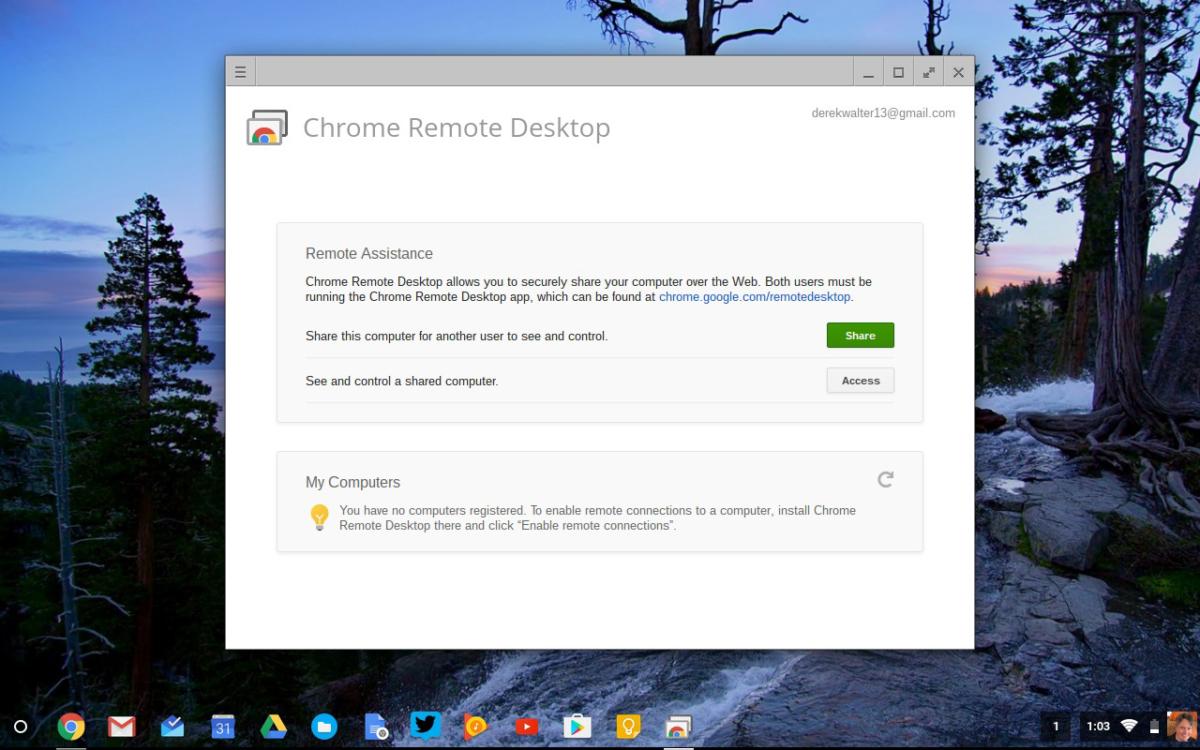 PCWorld
 Chrome Remote Desktop lets you share your machine or connect to another that has the app installed.
Google’s own Chrome Remote Desktop app offers an easy way to set up remote desktop access on your own PC. On the computer you want to connect to remotely, install Chrome. Then install Chrome Remote Desktop on both your Chromebook and the other computer.
Web Apps for getting things done
Google Docs is the obvious choice for working with documents on a Chromebook, but it isn’t the only one. Microsoft’s Office Online will be familiar to longtime Windows users.
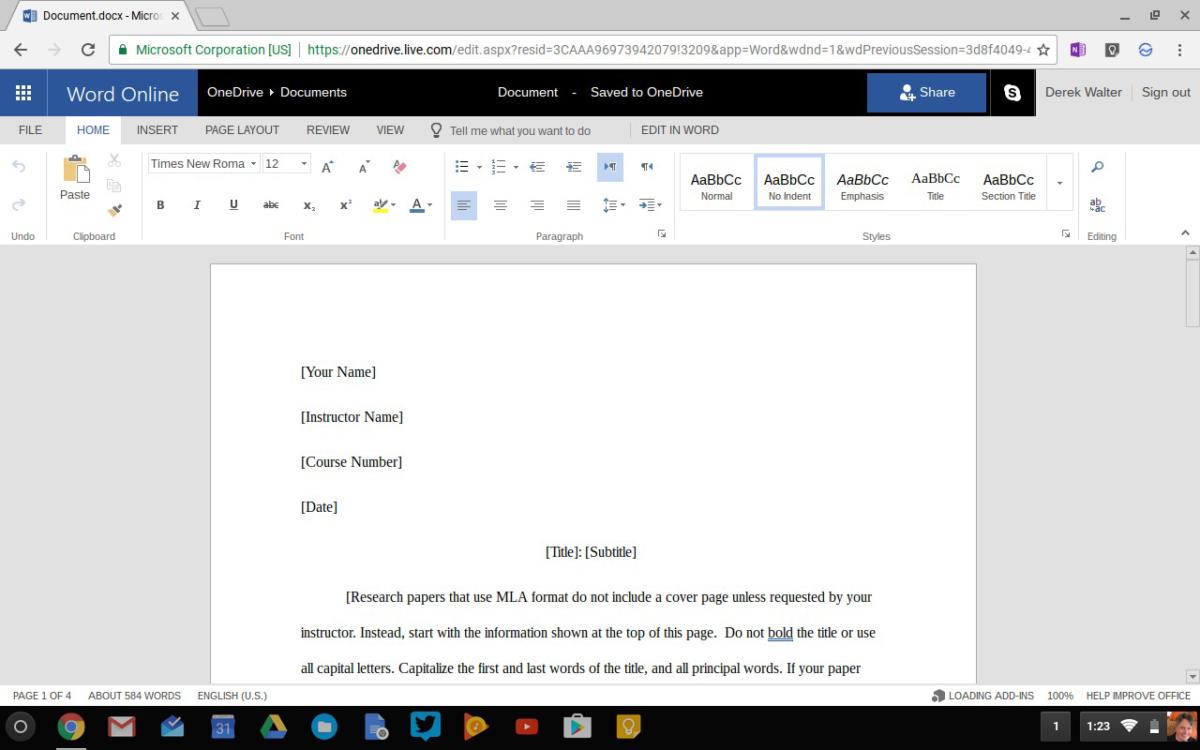 PCWorld
 Office Online lets you work on files right from Chrome.
These web-based apps are more simplified and limited than the full versions of Office, but they’re completely free and have excellent compatibility with Microsoft Office document formats. You can also use the Web-based version of Apple iWork on a Chromebook—visit the iCloud website to access it, just as you would on Windows.
PCWorld Chrome Remote Desktop lets you share your machine or connect to another that has the app installed.
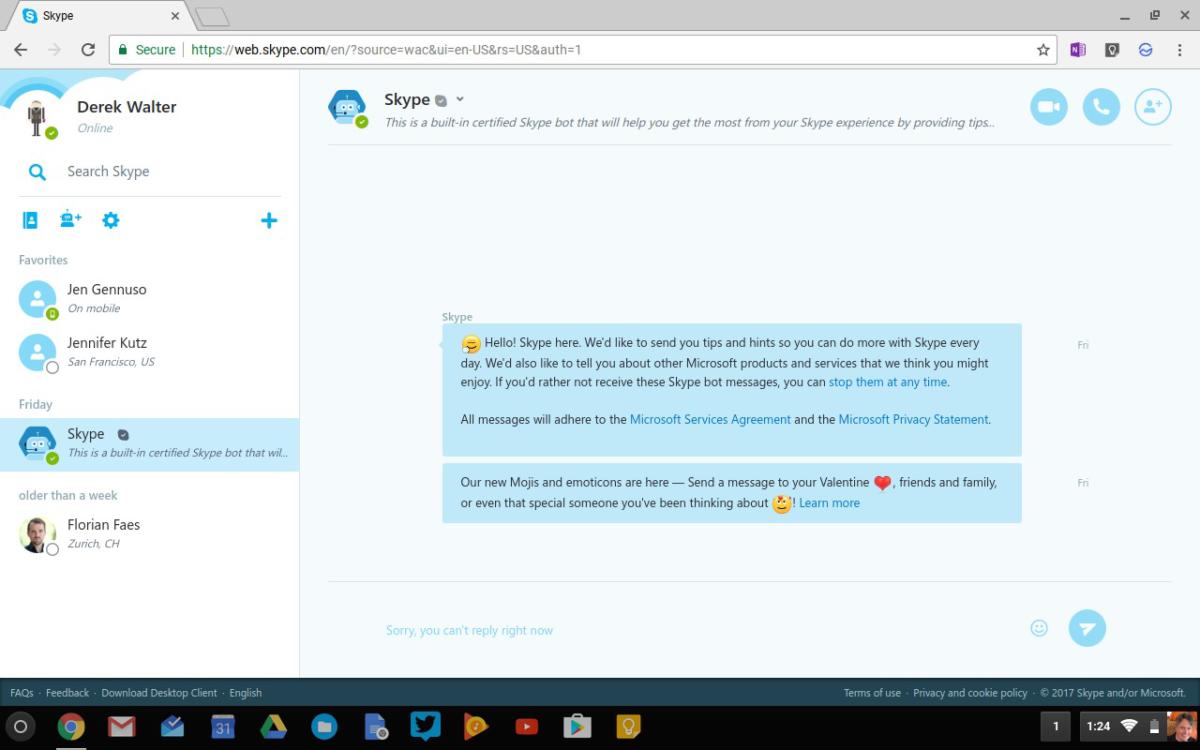
Also, you don’t have to worry about missing your Skype conversations. A web version is part of the Office Online suite.
 PCWorld
 Skype conversations can take place through the Chrome browser.
Chrome OS has an integrated image editor, although it’s rather basic. Pixlr Editor is a Web-based image editor that will surprise you with its power and features. It can edit images stored in Google Drive, too, so it integrates nicely with Chrome OS.

Pixlr is a great Web app for editing photos on a Chromebook. (Click to enlarge.)
Note-taking works with the Web-based version of Evernote, but you may also want to try the Google Keep app. Google Keep works entirely offline and syncs with Google Drive when online, so you’ll always have access to your notes. Any.do is a superb cross-platform checklist app, and it also functions offline.
Google’s Chrome Store offers a wide variety of apps, with categories such as Offline Apps and Business Tools to help you get started. Remember, however, that your Chromebook has access to the entire web via its desktop-class browser—and you can find some powerful capabilities there.
Android apps help fill the gap
The most promising change to Chromebooks is the addition of the Google Play Store, bringing the teeming universe of Android apps to your Chromebook. Still in beta as of this update, it’s due to come to all new Chromebooks and some older ones by the spring of 2017.
Check your email with Outlook, or edit files with Microsoft Word.
 PCWorld
 Microsoft Outlook is one of many Android apps available for Chromebooks.
Play music with Spotify or check in on your friends with Snapchat of Instagram. Adding Android apps gives Google the opportunity to make Chromebooks more functional with dedicated software that’s more powerful than mere web apps. Over time expect the capabilities to grow.
External displays
Chromebooks can connect to external displays through standard video cables. Paired with a mouse, a Chromebook with an external monitor could even pull desktop-like duty.

Chrome OS’s display settings. (Click to enlarge.)
Chromebooks have different video ports depending upon the model, so check the documentation to confirm what type of adapter you’ll need. After hooking your Chromebook to an external display, you can open the Settings page, scroll down to Devices, and click Display settings to configure orientation, alignment, and other options.
Google’s own high-end Chromebook Pixel (or a Windows or Mac laptop) can mirror your display wirelessly on a Chromecast-connected TV, once you’ve installed the Google Cast extension. The mirroring feature is in beta, and the Pixel is the only Chromebook to officially support it, but you can expect it to become more stable and reliable on a wider range of Chromebooks in the future.
Connecting to VPNs
Your Chromebook might be able to connect to your VPN, too. Chromebooks have integrated support for VPNs without installing an application. However, Google says you can try Pulse Secure, Cisco AnyConnect, or other VPN apps on your Chromebook.
To connect to a VPN, open your Chromebook’s Settings page, click Add connection under the ‘Internet connection’ heading, and select Add private network. Enter your VPN details.

You can manually manage Chrome OS’s security certificates if your work VPN requires user and server certificates, but ugh. (Click to enlarge.)
Some VPNs require you to import a user certificate and a server certificate authority to connect. To import these files after downloading them to your Chromebook, type chrome://settings/certificates into the address bar and press Enter. Use the Import button under ‘Your Certificates’ to import a user certificate with a .pfx or .p12 file extension and use the Import button under ‘Authorities’ to import a server certificate authority with a .pem, .der, .crt, or .p7b file extension. You might need to contact your organization’s IT department for help if the process proves to be too complicated.
To infinity, and beyond
Chromebooks started out as a sparse frontier where you needed to struggle to survive. As Chrome apps improve and cloud-connected services ascend, however, more and more people can work productively with Chromebooks. They’re simple, easily manageable, and—perhaps most important—dirt cheap. We probably shouldn’t be surprised that they’re doing so well, especially in budget-strapped schools, but you’ll still want to stick close to a Wi-Fi connection as often as possible.
This article originally published January 22, 2014, and was updated February 16, 2017.