If you’ve never heard that noise before, you’re bound to hear it someday: that amazing, dull crunch as your Mac slips out of your hands or off a desk and makes a date with the ground at 9.8 meters per second squared, gravity having played the role of a yenta-like matchmaker bringing together your computer and an admirably dense surface. The crunch registers in your brain, and you have a sudden mental image of the universe collapsing.
 julianbl/neowin.net
Here’s how to make the best of a terrible situation, get as much of your data back as possible, and avoid a similar disaster if your Mac decides to smooch the ground again somewhere down the line.
Pick it up, clean it off
After your Mac falls, calm down, pick it up, look over the damage, and clean away whatever dirt and detritus you can. From there, make sure that your Mac is turned off, and then weigh your options.
If you feel comfortable opening the machine, find a wrist strap and tools, touch a metal object to discharge any static that your body may be carrying, and carefully open the Mac to check for case fragments, damaged parts, or debris that may have ended up in the computer. Don’t turn it on; just focus on the parts that survived the fall and anything that might appear damaged, and clean out the interior as best you can.
If you don’t feel comfortable with opening a Mac on your own, remember that online guides like the ones that iFixit offers can be your best friend and will help you open the case. You can always consult the Apple Authorized Service Provider Locator to find the nearest Apple Store, service provider, or consultant to help.
The first boot is your best chance
Whether you’re working with a potentially damaged hard drive inside the computer or you removed the drive and placed it in an external casing, the first boot is the most critical. At that moment you’re confronting the drive in the best possible condition it’ll be in after its fall.
Use the drive gently, don’t try to copy too much data all at once, and treat the just-dropped drive with kid gloves no matter what.
The deep-freeze last resort
 Albert Filice/Macworld
If you’re dealing with a physically damaged conventional hard drive, putting the device in a sealed bag and inserting it in a freezer for at least an hour may temporarily contract the drive’s overheated, overexpanded metal parts back into place. If that happens, the drive can be mounted and will function normally enough to allow you to pull data from it. It sounds crazy but it works.
It’s not the best option, but if there’s a final critical file you need to get, this move won’t damage the hard drive any further and it may pull off the miracle you need in a pinch.
Back up the Users folder first
The Users folder is where most of your critical stuff lives; and if you lose it, your day is going to be that much worse. Locate your Users folder (Hard Drive > Users) and then slowly copy data from it, one file or one small folder at a time.
Remember that you’re dealing with a hard drive that has absorbed a powerful physical blow—an electronic component’s equivalent of being on the receiving end of a haymaker from the heavyweight champ when all it wanted to do was step out for a bagel. Take it easy on your shell-shocked drive.
The pricey-but-worth-it approach
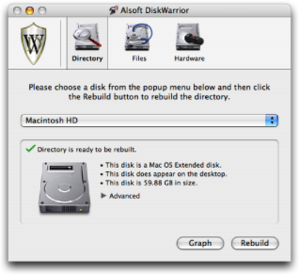
Alsoft’s DiskWarrior is a great application for taking a damaged hard drive and rehabbing it to a point at which you can recover its data. At $100, the app is pricey, but the investment pays off; I’ve rebuilt more hard drives with DiskWarrior than I care to mention.

Prosoft Engineering’s Data Rescue 3 lets you mount and work with drives that may be too damaged to mount under OS X. It can also help you work around damaged sectors on the drive to recover every savable chunk of data. At $99, it’s another fairly hefty investment; but between these two apps, you can rebuild and recover an amazing amount of data, if the drive’s mechanical functions are still operating normally after the drop.
No matter what, back it up

Back up your data to multiple destinations—to iCloud, to the $6 external flash drive you bought at the pharmacy, to Carbonite, to Backblaze, to an external hard drive via Time Machine, and elsewhere.
Hard-drive storage is cheap and backup services are affordable. Going with any of these options can save a whole lot of misery down the road, especially if the alternative turns out to involve a four-figure estimate from a drive recovery service.
The SSD option
With a solid-state drive, you pay a premium for a blazing-fast drive that doesn’t have a ton of storage space on it. But beyond its superior speed, an SSD has one distinct advantage over a traditional hard drive: It contains no moving parts and is therefore essentially shock-proof.

An SSD isn’t invincible, but it can operate under a wider range of temperatures and can endure thumps and lumps more readily than a hard drive equipped with moving parts and spinning platters.
If possible, look into upgrading your Mac with a SSD for its main drive. If the sum of your data won’t fit on that drive, look into putting your operating system and your critical data on that drive and your other data on either a second internal hard drive or an external hard drive.
Bite the bullet: Data recovery
Prices for professional data recovery tend to run in the high three figures to four figures, but the operation works. Send your hard drive off to a recovery outfit like DriveSavers, and its technicians will disassemble the drive and replace malfunctioning parts in a dust-free, clean-room environment. It won’t be cheap, but it’s the best route for retrieving all physically recoverable data from a damaged drive.
Recovery takes time
Somewhere, sometime, you will accidentally drop your Mac. Keep calm, don’t panic, get your thoughts in order, take care of your data, keep backups in safe locations, and you’ll be all right. Look at the bright side: Ladies dig scars and guys love war stories. The more impressive the drop, the better the story you’ll have to tell.