Heading out the door? Read this article on the new Outside+ app available now on iOS devices for members! Download the app.
The jumpback transition from Bakasana to Chaturanga is mostly mental. Overcome doubt and practice.
I used to stare at yogis in the Mysore room as they’d gracefully float their legs off of their arms from Bakasana into Chaturanga. I wondered what kind of pixie dust they applied before practice to score such a move. I would then plop myself onto my arms in Crow thinking of every alignment cue I could muster only to realize I had been in the pose for over a minute trying to figure out how the hell to get out of it! It’s funny in retrospect but was extremely frustrating at the time. This is a transition that can be extremely mental for most of us. We get stuck in our heads or tell ourselves that we can’t do it.
So, the first step is to tell yourself you can. The second is to stop thinking so much and be in the moment! The third is to be like the arrow being shot from a bow—if you don’t create plenty of tension in the string by pulling it back to full extension, the arrow will simply fall out of the frame straight to the ground or just fall off to the side. When you create the full amount of tension it shoots straight and true. It’s the same with our shoot back from Crane Pose (or Crow). We have to create so much energy and tension in the legs before we shoot them back to give us that extra oomph. Read the below instructions to help you aim true and hit your mark.
See also YJ Gratitude Challenge: 7 Things on Kathryn Budig’s List

Step 1
Jumping back into Chaturanga from Bakasana requires first being really comfortable in the starting pose. Master Crow (or Crane Pose), and practice, practice, practice before attempting this transition.

Step 2
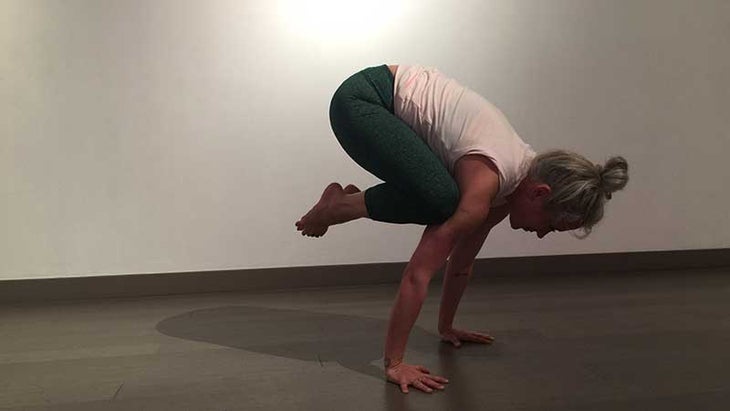
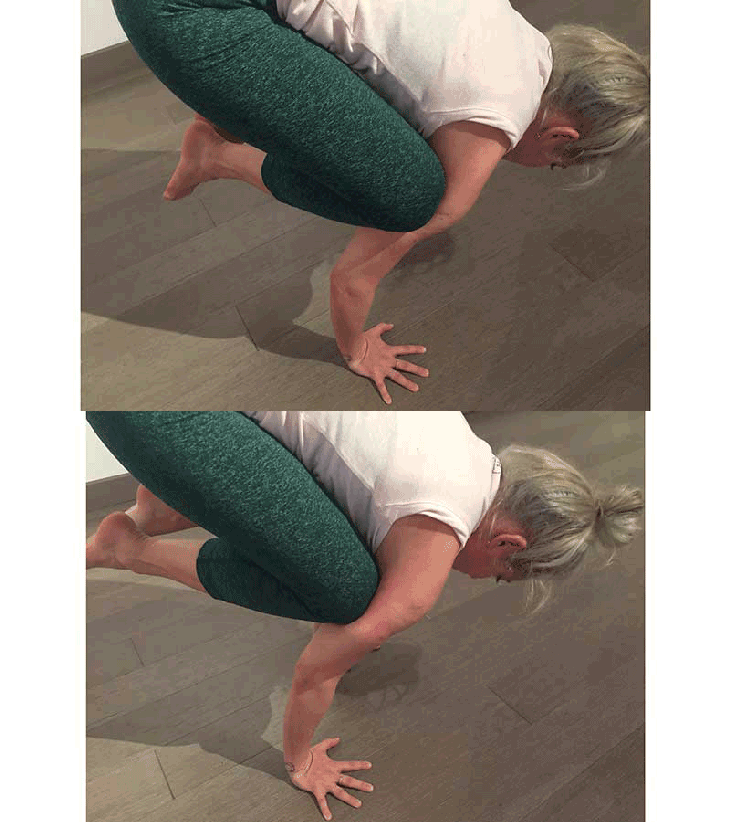
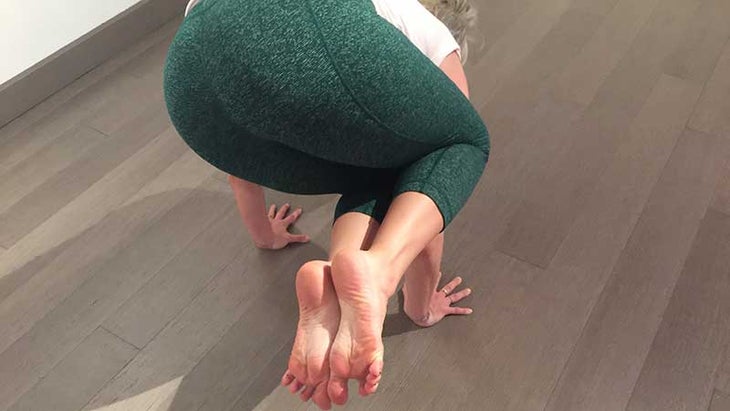
Come into Bakasana starting with your knees wrapped around the outer edges of your arms. Don’t worry about going into the straight arm version of the pose but do start off pressing the ground away to gain some height. Imagine a Thighmaster in between your arms, and squeeze. It’s an isometric action at first. Keep drawing the energy of your inner legs and knees toward each other as if magnetic. Continue this hugging action with so much gusto that your knees can actually start to move. Try to get your knees to slide from the outer edges to the backs of your arms. They may not move much, but anything counts! This is the energy we want to garner to get ready to shoot our legs back off of our arms.

Step 3
Come into the pose again but this time pick a stationary leg and a moving leg. Let’s say we’re moving the right leg first. Keep all of the alignment qualities of Bakasana and begin the same sliding action from Step 2 but only with your right knee/leg. Once you can’t stay on your arm any longer, keep your core engaged and thigh tight to the chest (big bend in the knee) to bring that right knee all the way over to your left arm. It’s similar to Side Crow without being on the outside of your arm. Once you get your right knee to your left arm hold it like a sandwich. Tightly squeeze both knees around the arm to maintain. If you’re feeling SUPER strong try to whip that leg back to the right arm again (this will prepare you for the strength of Eka Pada Bakasana). Most likely you’ll want to put your feet down and take a break. Don’t worry about getting the knee to the opposite arm at first. This is challenging! More importantly, focus on the energy shift needed in your body to make movement happen. Do both sides.

Step 4
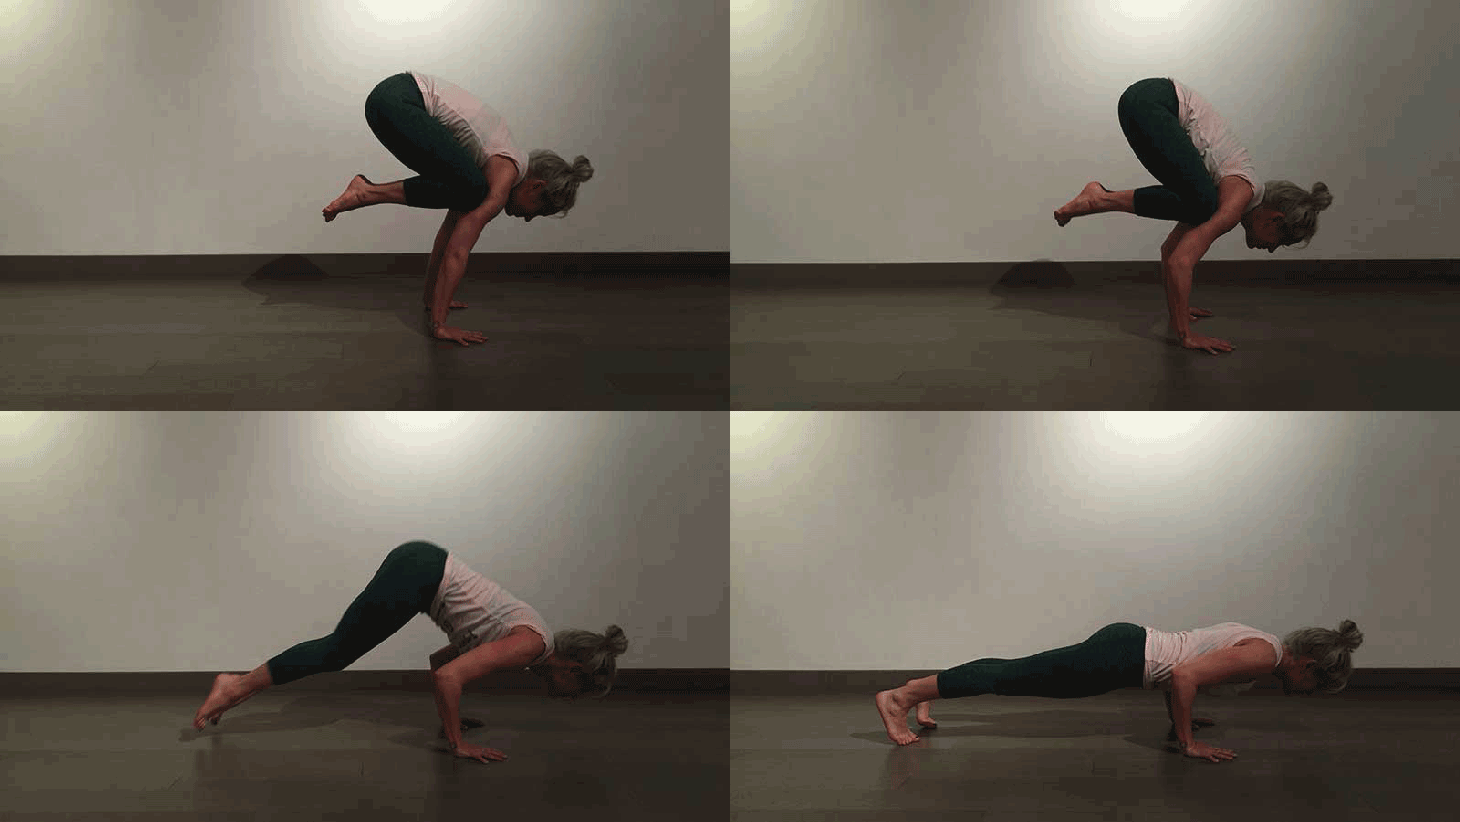
Time for the ultimate wind-up. So we know our goal is to think into the midline first and then shoot back. Get as much tension and “Thighmaster” action as possible before shooting the legs back. Now here’s the trick: To actually leave your arms you need to stop thinking so much or you’ll get caught in your head (and on your arms). Give yourself a “yes-I-can” pep talk and do a 1,2,3 count, out loud. On 3, shoot those legs back! As you do your countdown get the actions of Step 2 firing . . . hug the inner thighs, start to slide the knees to the midline. As you get your knees closer to the midline start to bend your elbows slightly deeper. Once you get the throw of the legs let your elbows bend deeper. This will act like a see-saw allowing your chest to go down and legs up and back. Keep your elbows bent (or allow them to drop to full Chaturanga) as the legs go back. It will be tempting to land in Plank with straight arms. This will only bring your legs quicker and heavier to the ground. Try this several times! The first time will likely be frustrating; this takes patience and discipline.
OPTION
I almost don’t want to offer this because it can easily become a crutch move BUT you can shoot one leg back at a time just to prove to yourself that your legs can actually leave your arms. Just don’t stick with this modification or it becomes very difficult to get the legs to leave as a team. Remember to bend the elbows as the knees wind up and let them drop into a full push-up as the legs fly back. Good luck!
See also Kathryn Budig: Yoga + Martial Arts = Perfect Match
ABOUT KATHRYN BUDIG
Kathryn Budig is jet-setting yoga teacher who teaches online at Yogaglo. She is the Contributing Yoga Expert for Women’s Health Magazine, Yogi-Foodie for MindBodyGreen, creator of Gaiam’s Aim True Yoga DVD, co-founder of Poses for Paws and author of Rodale’s The Women’s Health Big Book of Yoga. Follow her on Twitter, Facebook, Instagram or on her website.
