
Understanding the Role of the Folders Panel: Part 1
The Folders panel may be one of the most used panels in all of Lightroom Classic, but it may also be one of the least understood. Questions relating to the Folders panel have been my bread and butter on the KelbyOne Help Desk since the beginning, so my hope is that this two-part series will help you get the most out of it, and avoid the most common problems.
Folders Panel
There’s actually quite a bit of functionality in this little panel, and it puts a lot of data at your fingertips. One of the most important distinctions to make is that the Folders panel is not a file browser. You will only see folders that have actually been through the import process. Just like the photos that reside within them, nothing appears in Lightroom unless it was introduced to the catalog first.
The Folders panel consists of two elements—Folders and the Volume Browser. Folders are exactly that, the folders on your hard drive(s) that you have imported into Lightroom. You can import any number of folders and subfolders, and they will always be sorted alphanumerically. Subfolders will nest under their parent folders, which mirror the structure you see in your file browser (i.e. Finder or Windows Explorer) when looking at your disk because they are one and the same set of folders (assuming you’ve imported photos from all of the folders you are viewing in your browser).
The Volume Browser
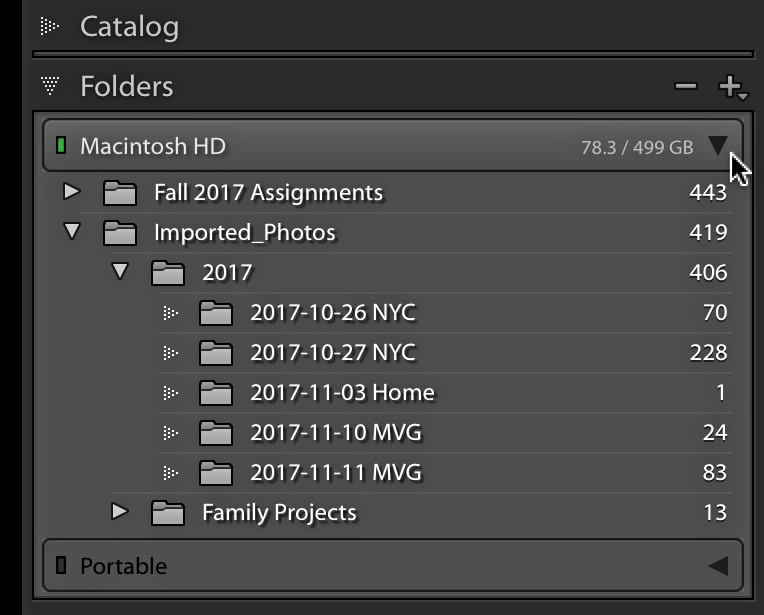
I have two Volume Browsers, labeled Macintosh HD and Portable. Macintosh HD is my internal drive and Portable is an external drive. These are the names I gave these drives on my Mac. On Windows, you would see the relevant drive letter.
With a glance at the Volume Browser I can tell a few things about my drives. First, the Macintosh HD drive shows a green indicator, which means that the drive has ample free space. In fact, it shows that 78.3 GB out of 499 GB are free. This value fluctuates a lot for me, as I constantly move data from the internal drive to the external drive as I complete projects.
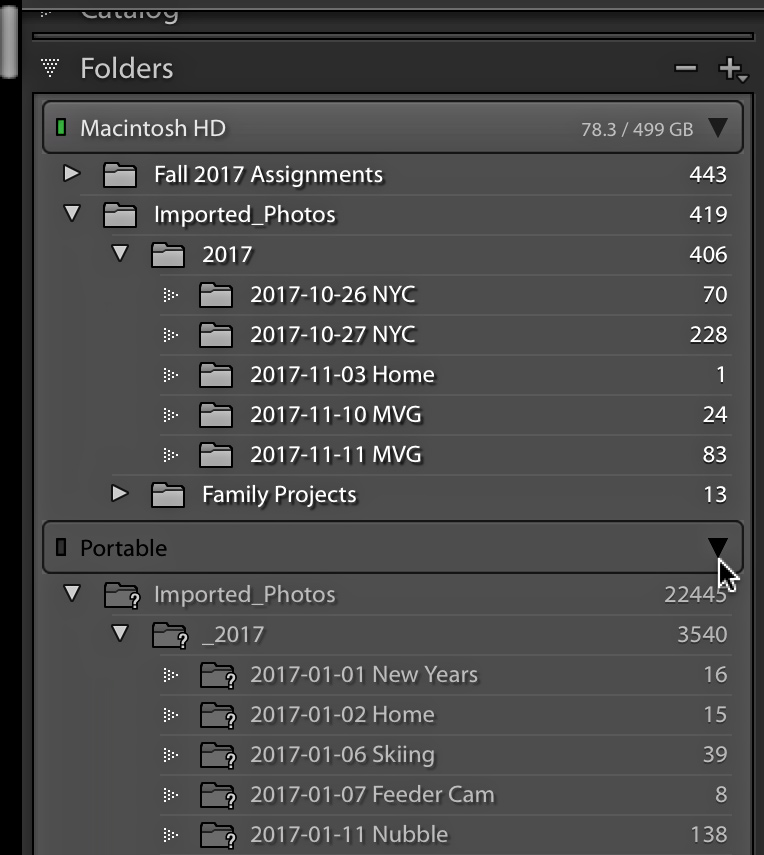
Second, I can see that Portable is offline since it displays a gray indicator and the name is faded out. Since it’s offline Lightroom can’t display how much free space it may have. Once that drive is reconnected to my computer and comes online, the Volume Browser will change from gray to green, and any question marks on folders will go away. Just so you know, the color indicator will turn yellow as free space gets down to 10GB, orange as the free space gets down to 5GB, then red when the disk has only 1GB free remaining (hopefully you won’t let your drive get that full).
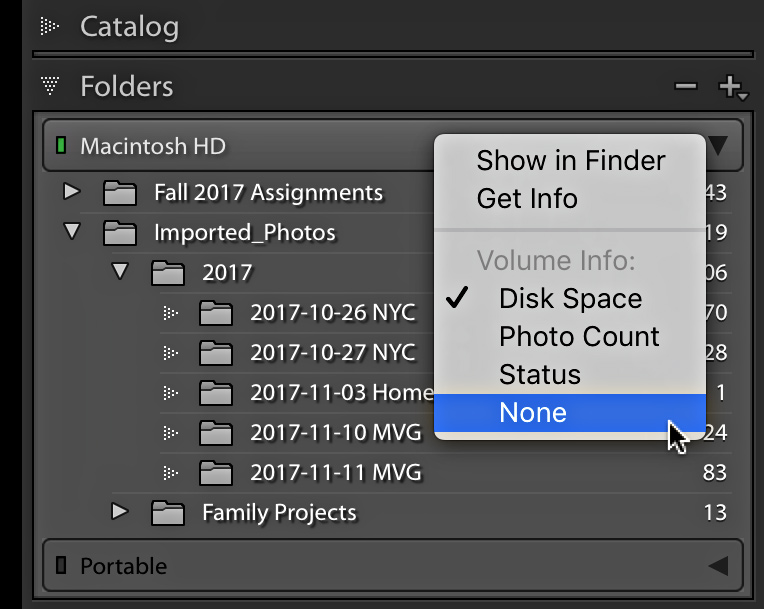
Free space isn’t the only information the Volume Browser reveals. If you right-click the Volume Browser, you can choose to display Disk Space, Photo Count, Status, or nothing at all. In addition, you can open that disk in Windows Explorer or Finder and even access information about that disk.
Another nice aspect of the Volume Browser is that it’s collapsible, which makes the Folders panel much easier to navigate, especially if you have multiple drives with multiple folders on each. The previous screen captures showed Portable collapsed, but once it is expanded I can see my folder structure underneath.
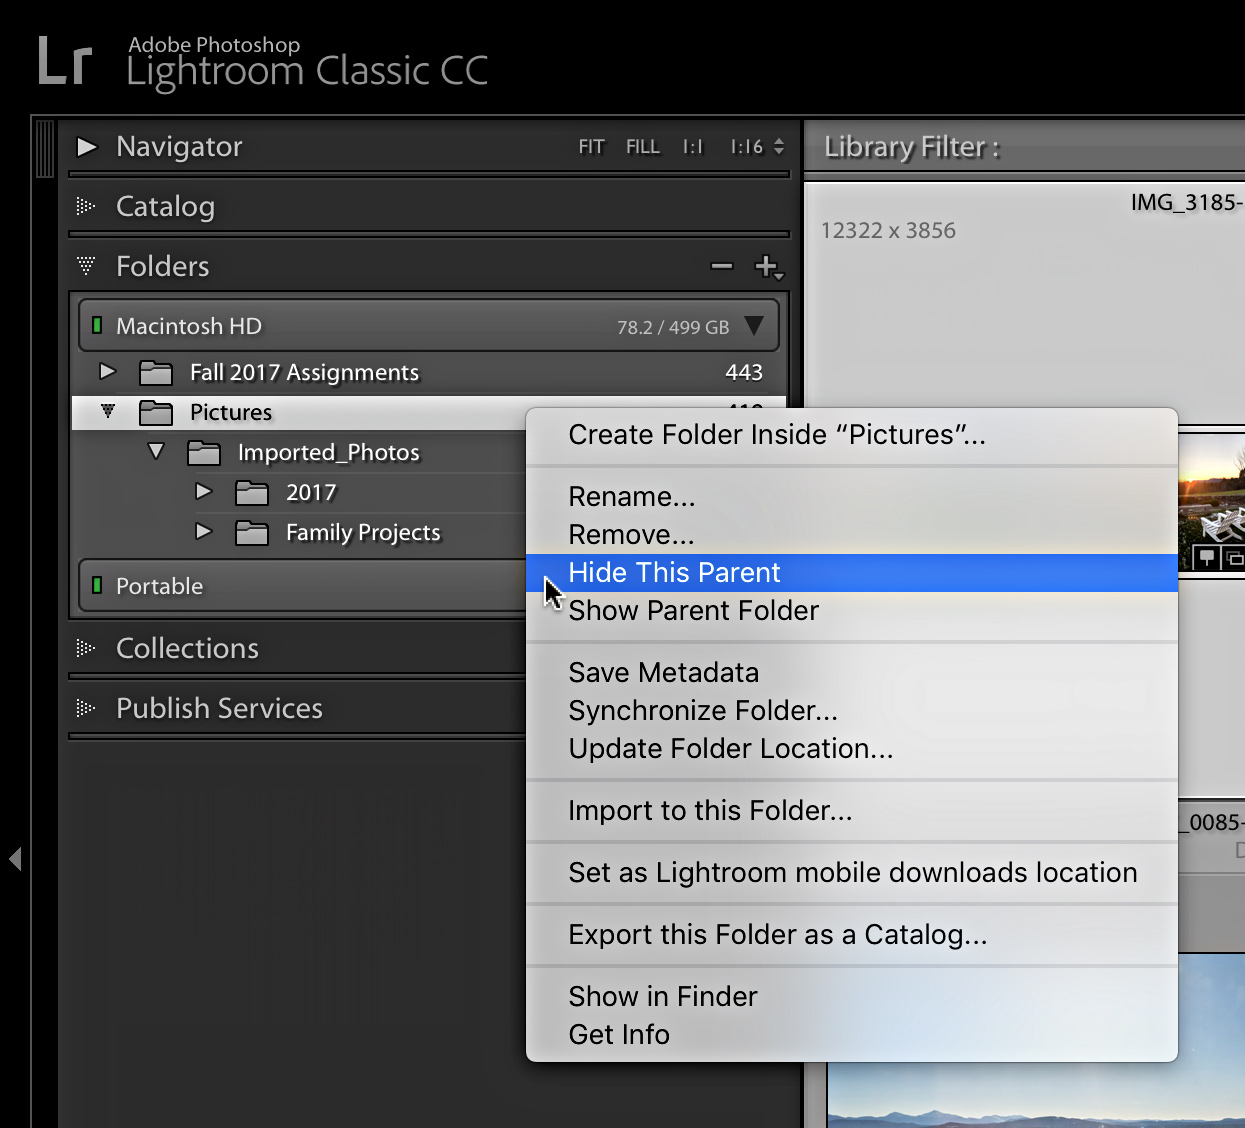
Remember, you will only see imported folders displayed in the Folders panel. I find it preferable to always import the top-level or parent folder that contains all the subfolders where my photos stored. This provides the benefit of being able to collapse that group of subfolders so the list doesn’t run on forever, and it makes it much easier to move that entire tree of folders to a new drive if necessary just by dragging and dropping the top level folder. Don’t worry if you haven’t imported the parent folder containing your photo sub-folders because it can be done right from the Folders panel. Just right-click the top-most folder in the panel and choose Show Parent Folder. The parent folder will automatically appear in the folders panel, and all of its subfolders that were showing previously in the Folders panel will be nested underneath. For example, you can see that I have a top-level folder named Imported_Photos, but I know that folder is stored inside my Pictures parent folder. If I right-click the Imported_Photos folder and choose Show Parent Folder it will add the Pictures folder to the panel, and Imported_Photos will appear nested underneath, just like it exists on my drive.
Alternatively, if you have a top-level folder that you don’t want to see displayed in Lightroom, you can right-click that folder and choose Hide This Parent to make it go away. I don’t want to see the Pictures folder showing at the top of my Folders panel, so I will hide that parent to keep Imported_Photos at the top.
Check out Part 2, to learn about finding where your photos are on disk, as well as how to add, remove, and rename folders from inside Lightroom.

