
Jailbreaking iPhone XR with unc0ver

Seeing and acquiring all the data stored on an iPhone is not always an easy task. To collect this information, something called a Full File System (FFS) acquisition is performed – this collects enormous amounts of data present on the phone, including system databases, third-party application data, messages, potentially deleted information, and more. This process is not straightforward, but it is doable.
The type of access and level of permission you have to access an iPhone determines what and how much information can be acquired. With FFS images, the permissions needed to collect all data present is often achieved by jailbreaking. Jailbreaking a device removes some restrictions placed by the manufacturer and allows the installation and use of unauthorized software. It provides access to the root of the phone’s operating system and allows the acquisition of all information on the device.
Unc0ver is one such jailbreak. It is a semi-tethered jailbreak, meaning when the phone turns off and reboots, the jailbreak is no longer active on the phone, and it turns back on to its original unmodified state. However, the phone can easily be re-jailbroken using the unc0ver app that’s installed to the phone. The process of installing the app to an iPhone and jailbreaking for the first time is documented below.
Materials needed for this process include the following:
Hardware
· An iPhone running iOS versions supported by unc0ver. At the time of writing this article, these included iOS 11 – 14.8
· Mac computer or laptop
· Lightning cable (with dongle attachment for MacBook Pro if needed)
Software
· unc0ver .ipa file, downloaded from https://unc0ver.dev
· A free Apple developer account
· XCode
· iOS App Signer, downloaded from https://dantheman827.github.io/ios-app-signer/
The unc0ver website includes multiple methods to load its app to the iPhone. The method I used involved XCode and iOS App Signer. The steps I followed to jailbreak my iPhone XR are outlined based on this article: https://www.idownloadblog.com/2020/03/12/how-to-install-jailbreak-with-xcode/
First, I factory reset the phone with the “Erase all content and settings” option under Settings > General > Transfer or Reset iPhone > Erase all content and settings. Then, I went to https://unc0ver.dev to download the latest version of Unc0ver. While that was downloading, I continued the setup.
First, I made sure that XCode and all command line utilities were up to date by opening the terminal and running “xcode-select –install”. If the result says that command line tools are already installed, then XCode is up to date.
Then, I created a new project in XCode, creating a new iOS App.


After the project was created and details filled out, I plugged my iPhone into my laptop so it will appear as a connected device in the drop-down menu on the top of XCode.

There were a few settings I had to change before I could successfully build to this iPhone. First, when I tried to run the build XCode showed an error saying that the iPhone “didn’t match the deployment target”. What happened is my default OS version in the XCode project was 15.2, while the iPhone I was using had an OS version of 14.1. So, I had to change the deployment target version under the Build Settings to 14.1 (shown below).

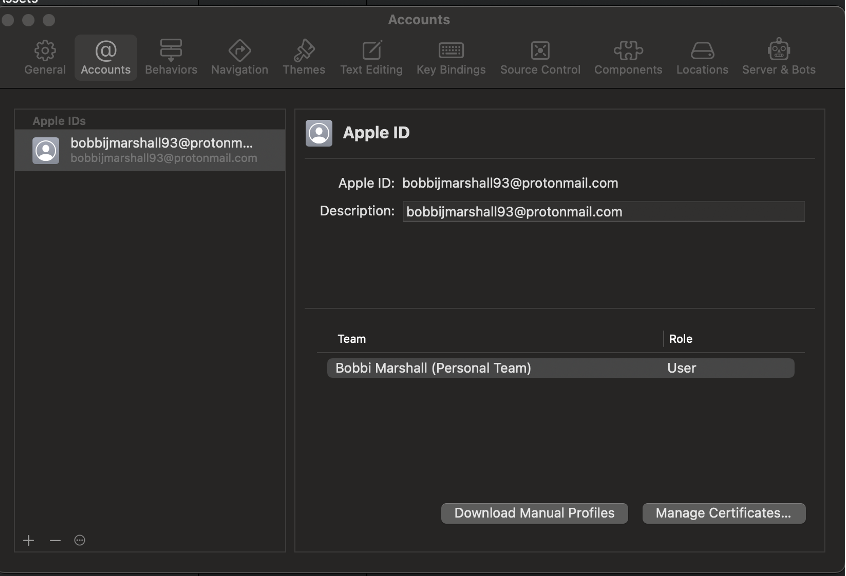
Second, I had to add my apple developer account to the “Signing and capabilities” settings so this project could be verified and run successfully on the phone. I went to “Signing and capabilities” and chose to add a new team. I used my free Apple developer account to sign in here.
Next, I used iOS App Signer to sign the unc0ver application file.
I opened the app, and filled out the following fields:
Input: path to Unc0ver .ipa file downloaded earlier.
Signing certificate: Apple developer account used in XCode
Provisioning Profile: iOS team provisioning profile
App display name: unc0ver
App version: 7.0.2 (version of unc0ver downloaded at the time)

After hitting start, I chose the output location of where to put the signed file. I chose my desktop.
Then, it was time to load this onto the phone. Navigating back to XCode, I opened Windows -> Devices and Simulators. My iPhone was the only option to choose on the left.
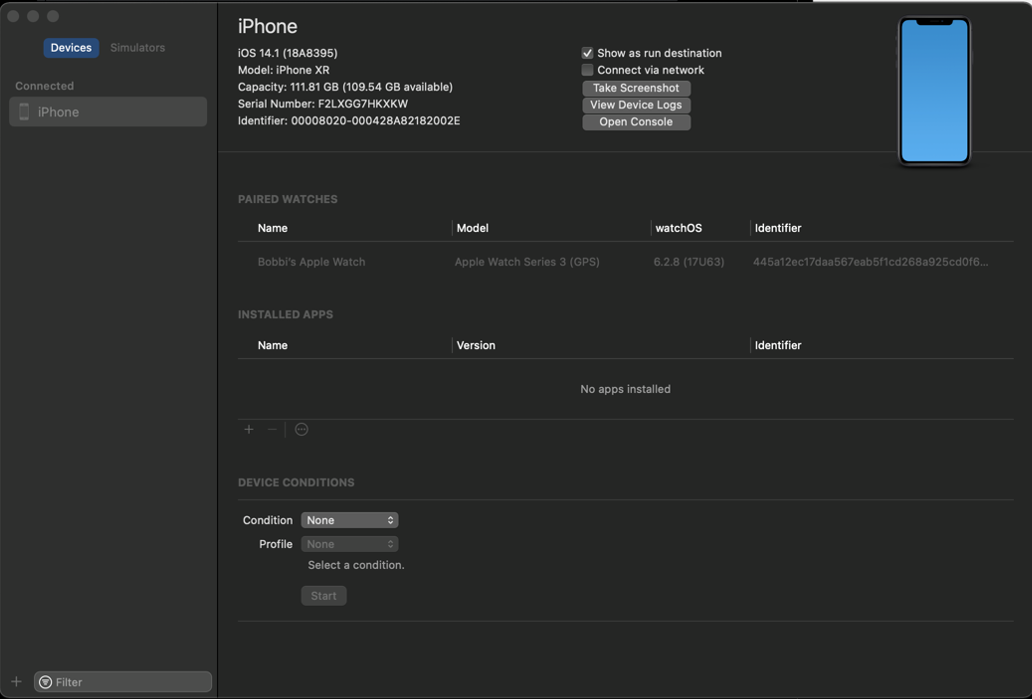
Then, I selected the small plus sign to add the signed .ipa file I just created.

Selecting “Open” will begin to load the .ipa file to the phone.

One the app is installed, I needed to “trust” it on my iPhone so it would run properly. On the iPhone, I navigated to Settings -> General -> Device Management and selected the Developer App listed.


Once that is done, I opened the “Unc0ver” app back on the home screen and choose “Jailbreak”.

I did run into some issues here. The jailbreak was not 100% successful every time that I ran it. Sometimes it would fail or get stuck on one step. While unc0ver is generally a reliable jailbreak, this is inconsistency is a common issue. One potential fix that I found is to put the phone into airplane mode before jailbreaking. This appeared to work in some instances, but overall, I had to re-initiate the process of jailbreaking often two or three times.
Once the jailbreak is complete, a pop up will appear saying “Jailbreak Completed” and the phone will need to reboot to fully apply it. The phone will reboot automatically as soon as you select “OK”. Then, I had to run the process one more time for it to take effect.


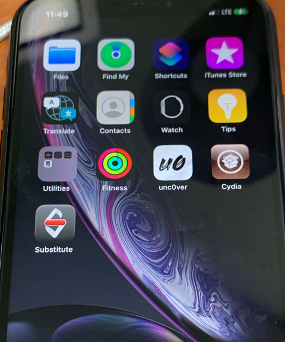
After the phone rebooted, I knew it was successful because of two things:
1) When re-opening the Unc0ver app, it shows a “already jailbroken” message.
2) The Cydia and Impactor apps have now been downloaded as well and are present on the home screen.
Since unc0ver is a semi-untethered jailbreak, this process of opening the app and re-jailbreaking the iPhone must occur every time the phone reboots.
As a test, I left the phone jailbroken and on for a few days to see if it would last. Interestingly, after a period of about a week, even though I had not powered off the phone, the jailbreak seemed to error out on the phone. I could no longer open the Unc0ver jailbreak or Cydia app.
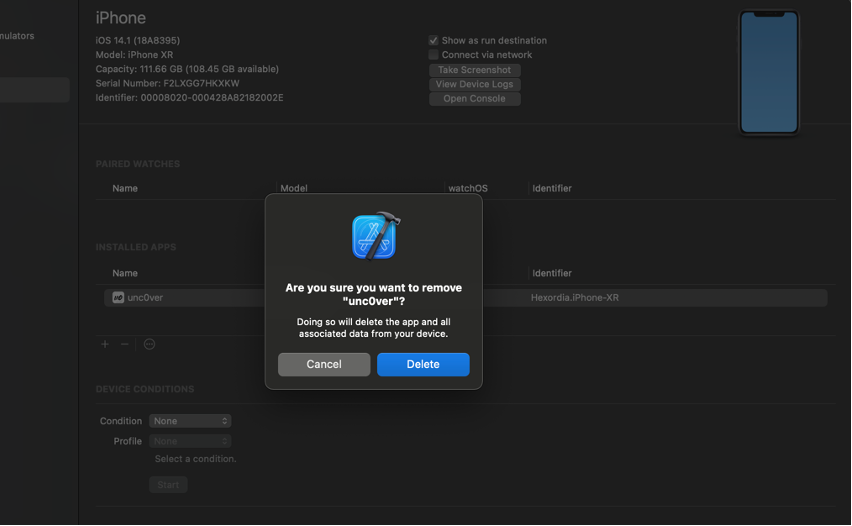
To fix this, first I removed the old unc0ver app from the phone using XCode. I connected the phone to my MacBook, opened XCode, and navigated to Windows -> Devices and Simulators. This time, the uc0ver application is already existing on the phone and shows up under “Installed Apps”.
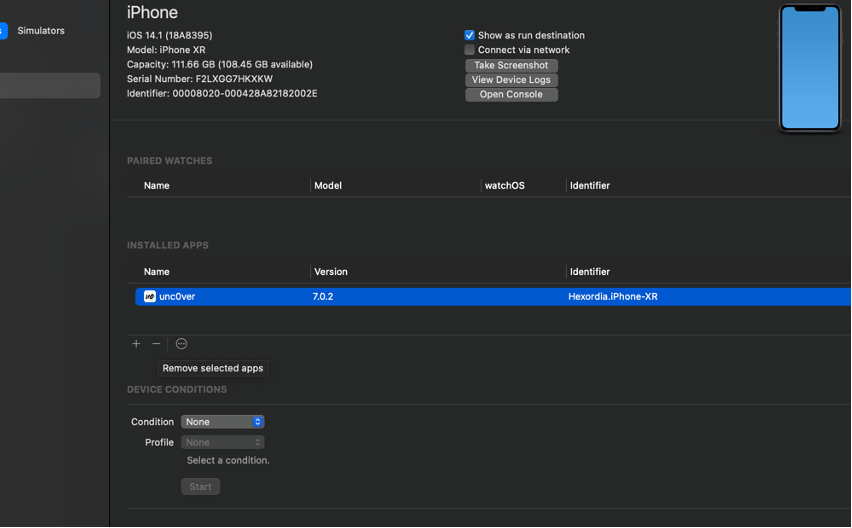
I highlighted unc0ver and selected the “-“ icon underneath to remove it from the iPhone.
Once the old unc0ver app was removed, I re-followed the steps of downloading the most recent version of unc0ver, signing it using iOS App Signer, and loading it onto the phone using XCode.
Overall, this process involved a lot of trial and error, but the steps are repeatable and easy to follow. I did not find that the unc0ver jailbreak deleted any application data, which makes it perfect for acquiring a FFS after data population. Stay tuned to the Hexordia blog to learn more about how to utilize the unc0ver jailbreak to create a full file system image of an iOS device.