Connected Field Service - Part 2
Connecting a physical device
In the first part of this blog series, which can be found here, we looked at how it is possible to rapidly deploy connected field service for Dynamics 365. In this part we will look at connecting a physical device to that environment to provide real world capabilities and bring the solution to life. There are many options when it comes to connecting physical devices, including various boards such as the Raspberry Pi and Spark Electron, and it is possible to buy sensors for them such as the DHT 11 that will monitor Temperature and Humidity.
Before setting up a physical device we need to have a device registered. This can be done directly through D365. With CFS installed from the previous blog go to the 'IOT Device' record. Create a new device and click register, refresh the page after a minute or so and the registration status should change to 'Registered'. You can use the simulator to test or move straight onto connecting a device.
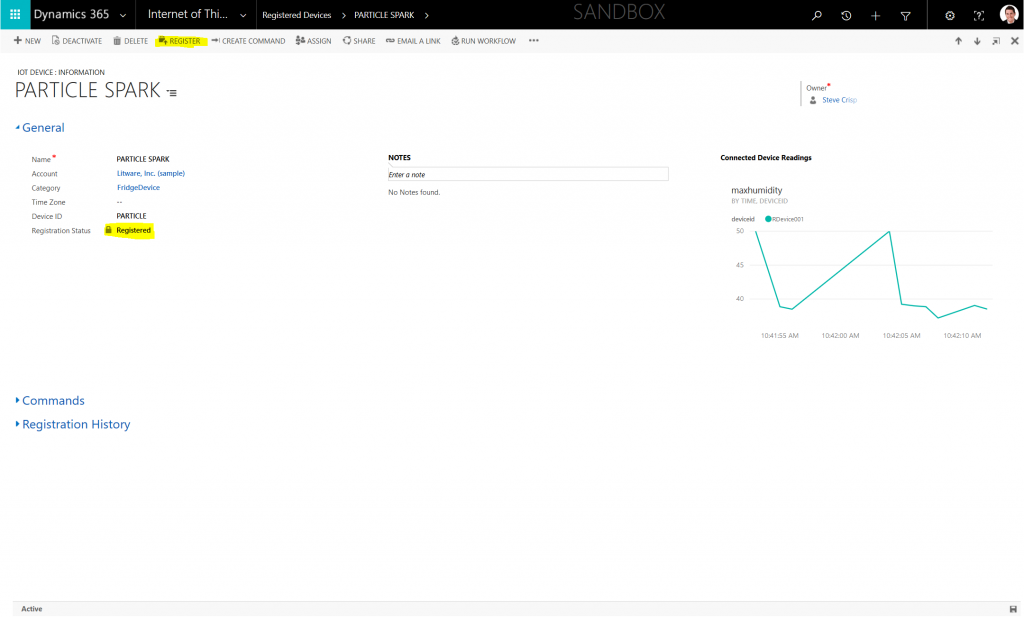
Once the device is registered the connection settings will be available in Azure, these settings allow the physical device to authenticate and send data. These can be found in the IoT Hub resource that was previously configured (there is a screenshot further on when these details are needed)
Connecting a physical device - Pi
A great starting device is a Raspberry Pi 3 with a SenseHat. The SenseHat has sensors including Temperature and Humidity.
https://www.raspberrypi.org/products/raspberry-pi-3-model-b/
https://www.raspberrypi.org/products/sense-hat/
https://www.raspberrypi.org/products/raspberry-pi-touch-display/ (whilst it is possible to create headless apps this screen works great for giving real-time feedback)
The Pi is able to run Windows core which will allow the Pi to run UWP programs. This works well for the prototype because there are a number of libraries available and IoT core has features such as auto restarting a App if it closes deployed (follow these instructions to setup a device https://developer.microsoft.com/en-us/windows/iot/getstarted ).
Having a display allows for real-time visualization of the data on the device before it appears in D365 or PowerBI (more on that later). The code for this has been shared on GitHub so that you can deploy your own device. If you don't want to use a screen then the 'Windows IoT Remote Client' can be used to display what is happening on the device from a windows machine that can see the device. Or a quick internet search and you should be able to find another sample that could run headless.
The source code for the physical device can be found on GitHub here: https://github.com/SteveCrisp/CFS-PiSample 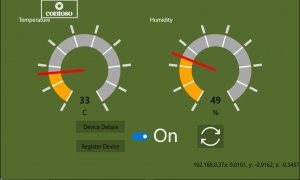
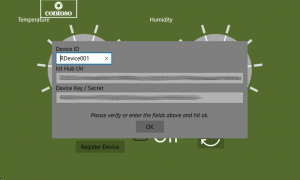
Using Visual Studio you can review the code and deploy the UWP app to the device. When the app runs you will be prompted for the setting of your device. As there is no onscreen keyboard with IoT Core, a usb keyboard will be required. The parameters will persist so that when the device restarts it can reconnect. However with the source code available you can also hardcode these values if you don't want to change the device. The device IoT Hub details can be found in Azure, a screenshot below shows the device explorer which holds details of each device. The IoT Hub URI can be found on the 'Overview' section within the IoT Hub resource (this is the default section that loads when you first select the IoT Hub in Azure). 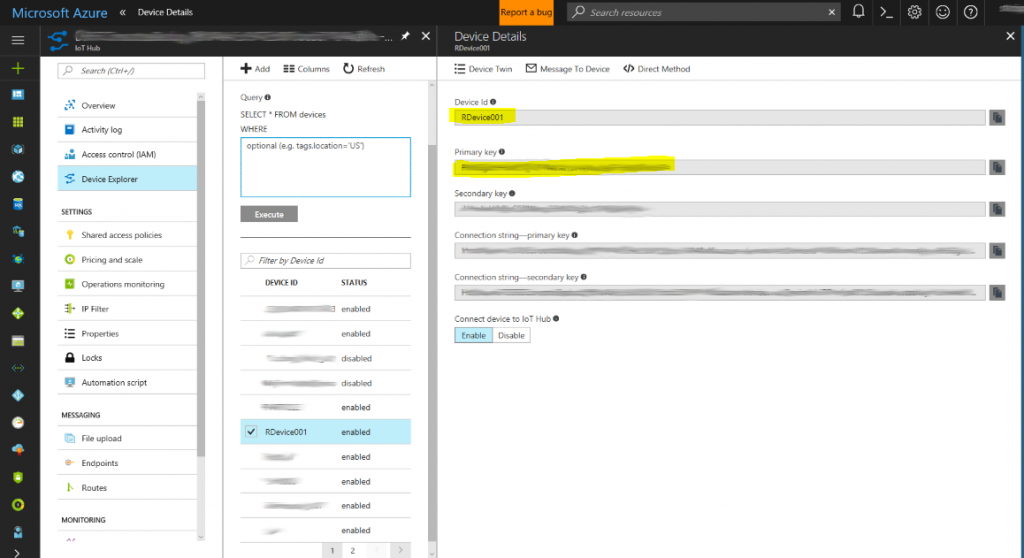
With the device details and IoT Hub details entered you can go ahead and test your device, click 'OK' to save the details. Then move the central toggle to 'ON'. If the device is working you should get an IP address in the bottom right and the dials should start registering values. Spiking the temperature should produce alerts in D365.
The source code is commented however here are some highlights to help explain the essentials public async void InitializeIoTDevice() { try { deviceClient = DeviceClient.Create(iotHubUri, new DeviceAuthenticationWithRegistrySymmetricKey(deviceName, deviceKey)); } catch (Exception ex) { //Most likely there is no internet. MessageDialog dialog = new MessageDialog("There was an error setting up the device client with IoT Hub", "Information"); await dialog.ShowAsync(); } }
The Initialize device function allows the device to register with IoT Hub. Using the secret and correct URI the communication will be encrypted between the device and IoT Hub. If the connection cannot be made then an error message will be displayed this will most likely be because of an error with the connection parameters. For this to work the correct Microsoft.Azure.Client.Library needs to be installed from the NuGet gallery packages. There are a number of great blogs on this including https://blogs.windows.com/buildingapps/2015/12/09/windows-iot-core-and-azure-iot-hub-putting-the-i-in-iot/#yFsIpJEtuHSXkuXv.97
Wrap up
There are many other boards out there that can sense data and pass the information to Azure. This blog has shown how easily a physical device can be connected to a business application in Dynamics. For a manufacturer this opens up possibilities of not just getting information off devices but creating actions. Automating processes around service to shorten the potential down-time of a customer.
This can be extended to incorporate preventative capabilities like predictive maintenance that could bring a customers unplanned downtime even lower.
In the final part of this blog, which can be found here, we will look at taking an IoT Suite remote monitoring solution and combining it. This will rapidly add some more features, such as a webapp that could be shared with visualisations, device rules, and device management capabilities.