Whether you’re designing a pathway, patio, or stepping stones, pebble mosaic compositions offer a unique blend of beauty and durability. In this comprehensive guide, we’re diving deep into the process of creating stunning pebble mosaics, providing step-by-step instructions, expert tips, and inspiring design ideas.
Nature’s Canvas: The Beauty of Pebble Mosaic
Plain, striped or spotted, long and thin, thick and round or flat like a coin – Mother nature has worked a lot, giving a unique shape to every river rock or pebble. She also checks its strength: the raging waves of the sea or the river floods once ripped angular stones and polished them, as the best jeweler in the world did with gems. Only after a long and careful workmanship for a perfectly smooth surface, they appear on the river or sea shore. Only the most resistant stones,”the wrestlers”, are worthy of the test! Indeed, durability, patience and variety make natural stones an ideal material for creating stunning pebble mosaic compositions for your patio or pathway.

Stones in different colors, sizes and shapes – an excellent foundation for creative outdoor projects. What is pebble mosaic? Pebbles arranged in different patterns and set in mortar. Even if the natural stones are identical in color and size, it looks like a work of art. The process of laying the mosaic itself is very fun, but it requires patience, imagination and time. That doesn’t scare you? Then do it! The potential applications of pebble mosaic are amazingly diverse: stepping stones, pathways, patios, walls, steps, ponds, fountains are just some of them.
We recommend practicing on a small project like a stepping stone to get used to the technique before undertaking more ambitious projects like a walkway or a patio. Big projects require a lot of pebbles and mortar, as well.
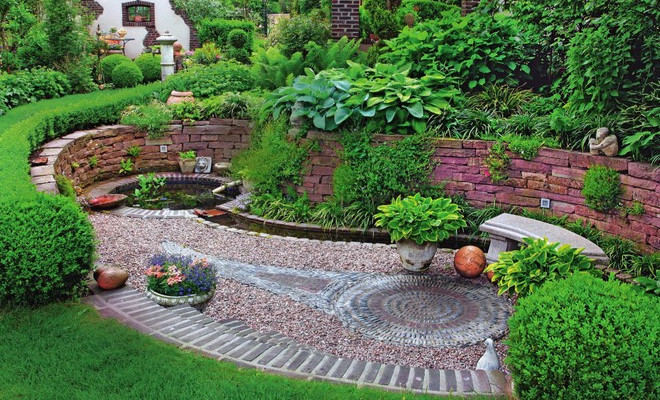
How to make a pebble mosaic walkway for your garden

Getting Started: Essential Materials and Preparation
To ensure the longevity of your mosaic masterpiece, it’s crucial to use the right mortar mix. Opt for a dry mix of 4 parts sand to 1 part cement. Alternatively, premixed concrete from gardening or hardware stores can be used for smaller projects like stepping stones.

Solid Foundation, Solid Results
In order to create a mosaic that will last for many years, it is important to take care of a reliable foundation. Begin by excavating the area to the subsoil level, approximately 22–25 cm (8.6 – 9.8 inch) deep. For driveways or high-traffic areas, a more robust construction is required. Layer crushed rock to a depth of 10–15 cm (4 – 5 inch), followed by a 3-inch (7 cm) bed of mortar.
Additionally, edging in cement footing enhances strength and stability. This could be slabs, stone, bricks or pavers.

Once the edging is in place, spread the crushed gravel over the bottom of the hole and tamp it down by stomping with your feet until it’s firm.
Prepare your dry mixture of sand and cement. Wear your gloves when working with cement, as it burns the skin. When the mortar is ready, pour a 7 cm layer over the compacted gravel. It should be about a 3/4 -inch (2 cm) lower than the finished grade so that when the pebbles are pressed in, they will be at the desired height.
Laying the Mosaic: Techniques and Tips for Success

Arranging the Stones
Start by marking the mosaic’s shape using a nail, then lay the stones upright in the mortar in your desired pattern. Depending on the size of the stones, some mortar will be displaced. So just scoop some mortar out. Lay out the biggest or deepest stones first. Most of each stone needs to be beneath the surface with just the top edge showing. They should also be packed together tightly. Mosaics look best if the stones are spaced closely and there is as little mortar as possible showing.
Pebbles between brick pavers

Finishing Touches: Sealing and Curing
Once all the stones are in place, press them firmly to level the surface using a wooden board. Next, fill the gaps between the stones with a topping mix of 3 parts fine sand and 1 part cement and use a paint brush to spread the mix, ensuring thorough coverage. Gently pour water over the mosaic to allow the mix to absorb and set. Use a stiff-bristled brush to wipe away any displaced mortar until that area of mosaic is clean. Cover the mosaic with a plastic tarp to hold in moisture while it cures, and leave it covered for three weeks. The slower the mortar cures, the stronger it will be.
DIY Pebble Mosaic Patterns and Inspirations

Mandalas, Spirals, and Beyond
There are lots of patterns that you can use for creating your pebble mosaic: mandalas, spirals, flowers, even a recreation of a classic Persian carpet. In addition to pebbles, you can include colored glass marbles or porcelain pieces, as well.
On the image above for example you can see bees composed of beige-colored river rocks and black and gray glass pebbles.

Combining Colors and Textures
Further, you can combine natural stones in different colors for more interesting appeal. Black and white pebble mosaic for example would suit perfectly to a contemporary landscape design. Brown pebble mosaics can be integrated smoothly into the overall picture and blends harmoniously with the ground.

The image above shows a great example of combining pebbles. Next to the white stone flowers are flowing ribbons of red, brown, beige, gray and black pebbles. Such a bizarre drawing gives the garden landscape elegance and sophistication.

Two beautifully matched materials – shards and elements of frost-resistant ceramics – will make an effective contrast to small rounded cobblestones of earthy and grayish colors.
Pebbles fill the spaces between large flat stones

How to make pebble mosaic stepping stones

Using a mold and mortar mix you can first try making these beautiful stepping stones. Prepare the sand-cement mixture and dilute with water. Rub the mold with oil or use nonstick spray to ensure that the hardened concrete can be easily removed. Fill the mold with the wet concrete. The layer should be about 2 to 3 inches thick (5 cm). Loosen trapped bubbles by gently swirling the mold. Even the surface using a paint stick or other scrap wood.

The pattern can be thought up spontaneously or made using printed out pattern. Press the stones sideways into the mortar mix.

Let the stepping stones set inside, away from direct sunlight. Wait at least 48 hours before removing the mold. After that brush the stone off to remove any loose mortar and rinse it with clear water. If there is still a film of mortar on the pebbles after the mosaic dries, remove it with muriatic acid and a rag. Note that the cement mix completely dries after 14 days.


Here we offer you 5 easy geometric patterns that you can try out. Using pebbles in contrasting colors makes a pattern more visible. Have fun making your pebble mosaic!


