In this article we will cover
all aspects of replacing a
pool pump motor. Typically pump motors will last for many
years, but if they are exposed to excessive water, they can sometimes burn out
quicker than normal. If you find yourself in this situation, then we’re here to
help!
A basic understanding of
electrical wiring and using a screwdriver and other basic tools is all that is
needed for this repair. Although this repair is not overly technical, you will
need the ability to follow step-by-step instructions, disassemble and
reassemble several different parts and pay close attention as you go. Let's get started, but first:
WARNING: If you are unfamiliar with
codes and regulations and/or unfamiliar with the voltage of your motor then you
may want to consider having a professional perform this repair for you. Failure
to perform this repair properly by wiring the motor correctly can result in
electrical shock and can void the warranty.
Most pool pump motor replacements are very
similar, the following steps are written specifically for a
Pentair WhisperFlo pump.
There are several steps involved in replacing your pump's motor, so we've split up this article into three sections to make the information a little easier to follow:
- Buying replacement motor and parts
- Breaking down the pump to remove the old motor
- Assembling the pump with the new motor
We'll begin by gathering the supplies you need, including the replacement motor.
Step
1 – Make sure you order the correct motor for your pump.
There can be confusion
about the motor and pump as sometimes the motor is referred to as the pump.
Just to clarify, the pump is the “wet end” and the motor combined. The WhisperFlo motors are located here. Note that not all pumps use the
same motor. Certain pumps require round faces, or flanges, and other use square flange motors. The WhisperFlo uses
a square flange motor.
Feel free to call us at 888-836-6025 and we can help you find the
correct replacement motor for your pump. e offer a full selection of replacement pool pump motors from Emerson, AO Smith, US Motors and more. We will need the make and model of
your pump, typically located on a sticker on the wet end. It is best to have the
make and model of the pump as opposed to the information found on the sticker
on the motor itself. The motor sticker will give specs pertaining to the motor
(hp, RPM’s, voltage, etc.) but not include any information about the pump. We
need the pump information to determine the motor needed.
Step 2 – We highly recommended replacing the shaft seal.
|
This is where most leaking originates, so it is best not to try to reuse the old one. These seals are inexpensive and will save you a lot of headache and hassle if you replace it while the pump and motor is disassembled. In fact, the shaft seal can be purchased as part of a kit with all gaskets and o-rings. These kits (GO-KITS) are typically available for all pump models and are very reasonably priced. It's not necessary to replace all of the gaskets and o-rings, but it's nice to have them just in case you find any of the old ones are worn out, stretched or torn when you tear down the pump. |
Now that you have the correct motor and
gasket/seal kit, It’s time to break down the pump.
Before starting any work on the pump it is imperative that you turn off power to the pump. Make sure you turn off the breaker so all power is shut off.
Step 1 - Start by removing the six bolts that hold the seal plate and housing together. This will allow you to pull the motor away from the housing that is plumbed in and will give you more accessibility to remove the wiring.
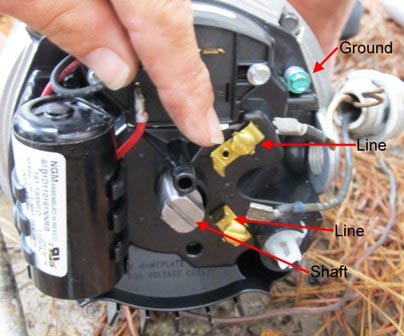
Step 2 – Remove the wiring and conduit from the end of the motor. Take notice of how these wires are connected as they will need to be connected to the new motor in the same manner.
|
Step 3 - Remove the diffuser by removing the two small allen screws.
Step 4 - The impeller is now exposed and there is a screw in the center of the impeller that is screwed into the motor shaft. Remove this screw by turning RIGHT as it is an anti-spin reverse threaded screw.
|
|
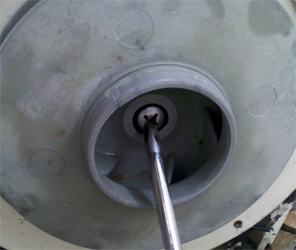
Step 5
– The impeller can now be removed by spinning it to the left. You will need to
remove the access cover on the opposite end of the motor to reveal the other end
of the shaft motor. Spin the impeller with your hand and you will see this
shaft move on the other end. You will notice there are flat edges on each side
of the shaft that are used to hold the shaft with plyers or Channel Locks so
you can spin the impeller off.
Step
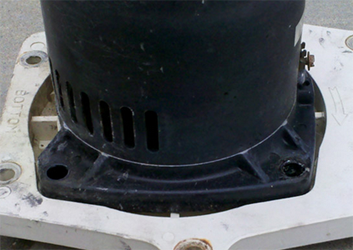
6 – Now with the impeller off, you can remove the four bolts that hold the
motor to the seal plate. Once the seal plate is removed, you will see the two
halves of the shaft seal. One half is inside the impeller and the other half is
inside the seal plate. You can use a flat head screw driver to remove both
halves. Pry the half out of the impeller and pop the other half out of the seal
plate.
|
Step 7 - There is a large seal plate gasket that is notched in on the top left and right corners and you will see a groove in the seal plate where it fits. Use the new gasket in the GO-KIT if the old one is compromised. |
You are now ready to start assembling the removed parts
to the new motor. But first, make sure the breaker/power is still off!
Step 1
– Insert the new shaft seal into the impeller and seal plate just as the old
one was installed. The rubber part with the ceramic face should be very clean
after inserted. Try not to touch the ceramic part. The other half needs to be
inserted into the seal plate. It’s best to apply a thin layer of Magic Lube to the seal plate first. You can
easily drop the seal in and set it in place with your fingers with the seal
plate flat. Then use a 1” PVC coupling to seat the seal evenly and fully by placing it on the seal and then gently tapping it in with a rubber mallet. The
coupling is the exact diameter of the seal and it works perfectly.
|
Step 2 - Bolt the seal plate to the new motor with the previously removed four bolts. Make snug, but do not over tighten.
Step 3 - Screw the impeller back onto the motor shaft. Then screw the anti-spin REVERSE threaded screw - remember to turn left to tighten!
Step 4 - Attach the diffuser over the impeller back to the seal plate with the two previously removed allen screws.
|
|
(Did I mention to make sure the breaker/power is still off?!)
Step 5 – Connect the electrical wires to the new motor just as they were connected to the old motor.
Step 6 – Now you can slide the completed assembly with new motor back into the housing and secure with the six bolts previously removed in the first step of breaking down the pump. Make snug, but do not over tighten.
|
|
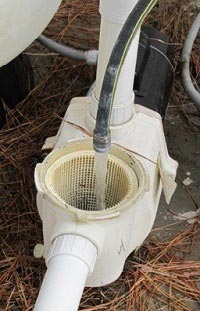
Remove the pump pot lid and fill with water using a garden hose. Once full, remove the hose and put the lid on. This will help prime the pump.
You can now turn the breaker back on and turn on the pump. Check for leaks, noise, etc. to make sure all is working properly.
Please call or email any of our representatives at Pool Supply Unlimited should you have any questions or need assistance with this repair.
|