In our previous IPAM article we’ve started discussing about this brand new technology that was introduced with the release of Windows Server 2012. We’ve seen how to install and configure IPAM and we’ve also managed to add a server to our IPAM database. In this article I want to further dive into the features that this technology provides so we’ll mainly talk about managing IP address spaces. With IPAM you can manage, monitor and add/remove IP blocks and ranges. By now you should have deployed IPAM in your testing environment on two Windows Server 2012 machines. Please do not proceed further if you haven’t covered the steps described in our previous IPAM article.
Remember that you can interact with IP blocks once you’ve manually added them to the IPAM database. This is a requirement before you can actually interact with any type of IP address or range. Although IPAM will automatically discover any DHCP scope, it’s the job of the System Administrator to add those scopes to the IPAM database. Note that static IPs and blocks must also be added manually.
Before we proceed further please perform the Retrieve all server data task from the IPAM console to ensure that the latest data has been added to our IPAM database. Because the server that I’m monitoring through IPAM is a Domain Controller with the DNS service installed, it will also get all DNS zone data from my domain:
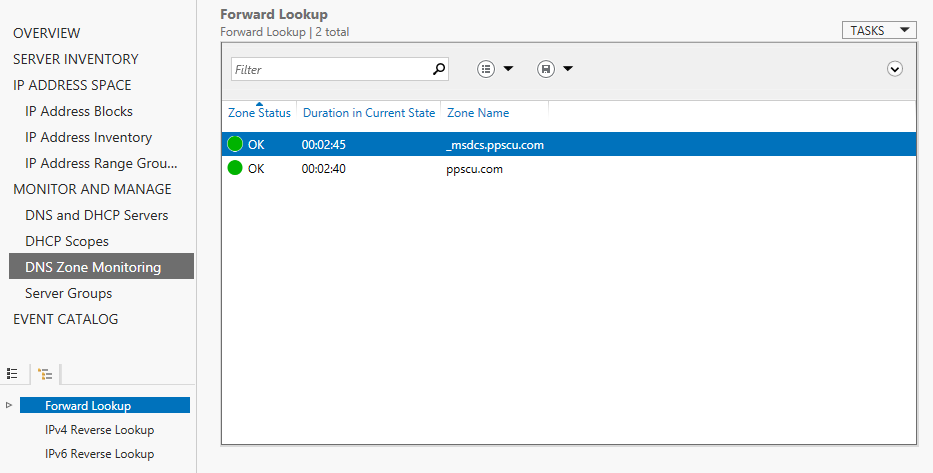
In the Monitor and Manage section you can view all sorts of useful information from DNS and DHCP servers, DHCP scopes or DNS zone monitoring. You can easily determine what DNS servers currently operate within the infrastructure by checking the DNS servers section:
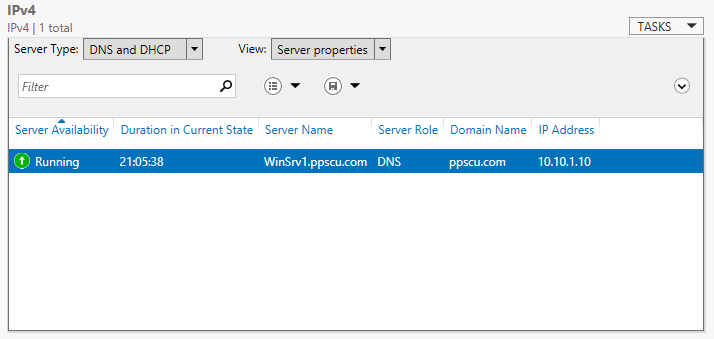
In scenarios where you have a distributed DNS infrastructure with a huge number of servers, this section becomes really useful for determining what servers are used, where you should create DNS entries, what zones are hosted by each server, etc. You can determine similar information for DHCP servers.
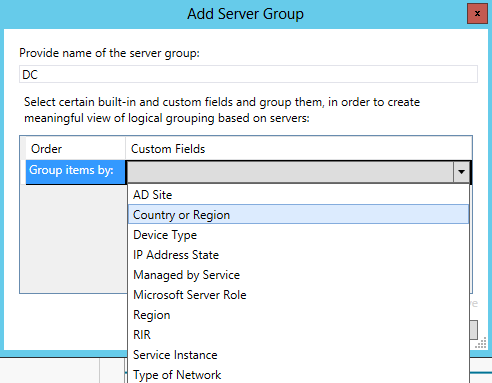
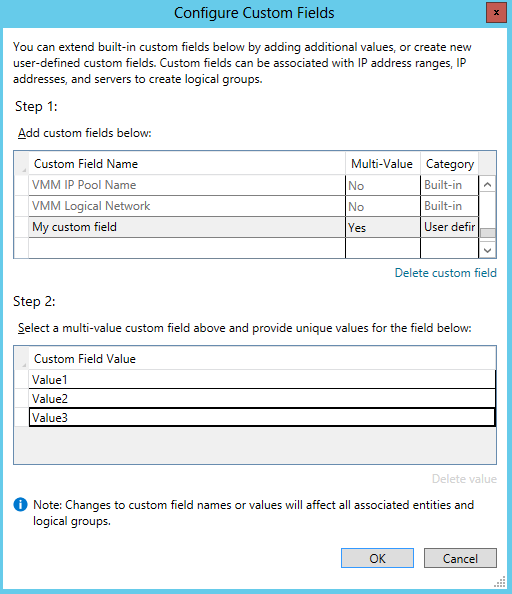
IPAM allows you to group servers based on some pre-defined custom fields that you can choose from. Some of these fields are displayed in the image below:
This section becomes useful when there are a lot of servers running within the network and the search for a particular machine becomes difficult. You will find this filtering method really important once you’ve understood how all these pieces come together. IPAM allows you to create your own custom fields that you can then apply to your machines. Navigate to the Manage menu from the upper section of the console and select IPAM settings:
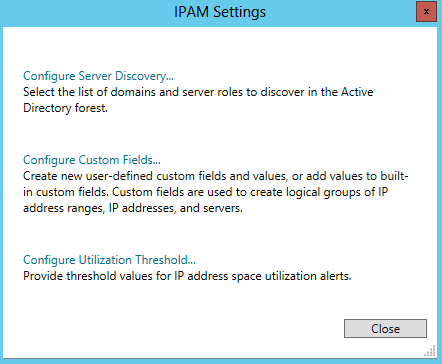
From this panel select configure custom fields to create a new user-defined field. Add a name identifier and then set the values for the newly defined field:
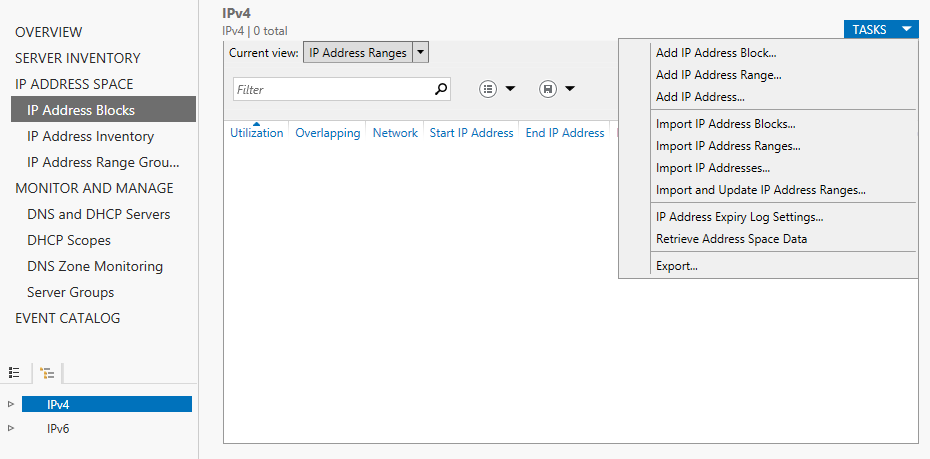
To add an IP block to the IPAM database, navigate to the IP Address Blocks section and select the appropriate action from the Tasks menu:
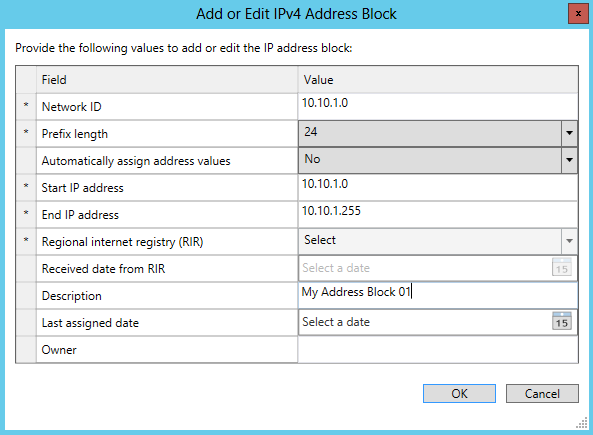
You’ll need to add the IP Address Block details as follows: network ID, subnet mask, start and end IP address, etc. All this information will help the IPAM server to monitor each address block:
To add a new IP address range select Add IP Address Range from the tasks menu. Set the indicated fields just as proceeded previously with the IP Address Block. Note that once you’ve added the IP range, it will automatically appear in the IPAM database:
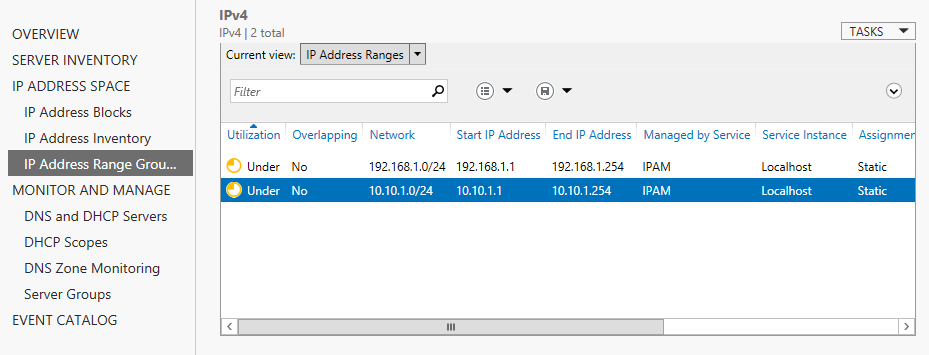
IPAM allows you to visualize the configuration details of the IP address ranges, check out utilization trends or view the event catalog. You’ll find that all this information is quite useful when there are a lot of subnets and IPs allocated within a large network.
You can right click an IP address range and select find and allocate an available IP address to assign it to a particular host.
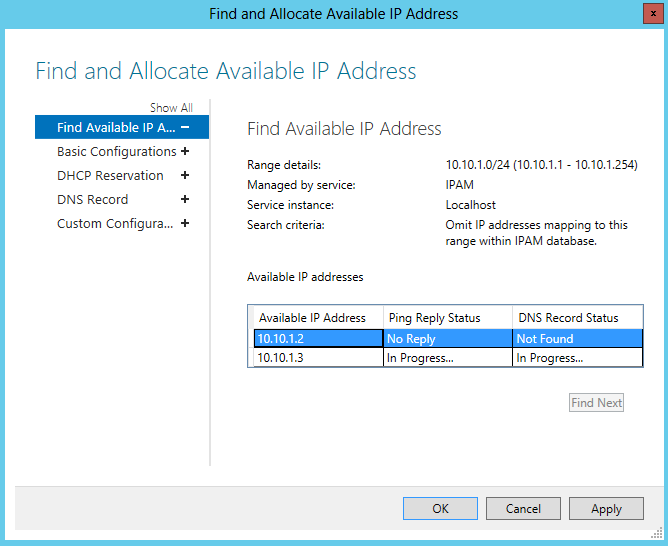
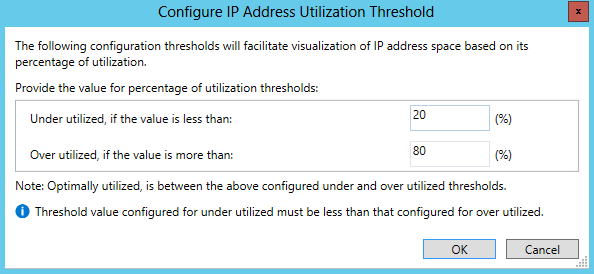
There are several options available within this wizard. You can search for a particular IP address, create a DHCP lease from a managed DHCP server, add a new DNS entry in a specified zone or create a custom configuration. Once an IP address has been assigned to a host, the range will automatically be updated to display the usage status. Note that there are several usage stages an IP address range can go through:
· Under – utilization under 20%
· Over – more than 80% usage
· Optimal – when the IP range usage is between 20% and 80%
These IP address utilization thresholds can be modified by accessing the Actions menu in the IPAM Overview section. By default, 20% and 80% values are used to indicate a low or high utilization, but these values can be changed as desired:
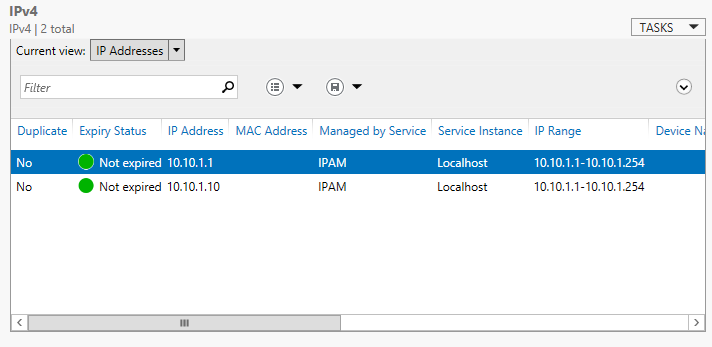
Used IP addresses can be visualized from the IP address inventory menu:
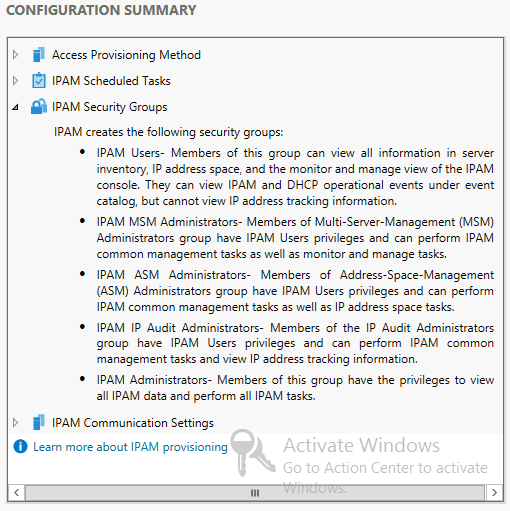
IPAM offers the possibility to delegate administrative tasks to certain users. IPAM will automatically create five security groups in Active Directory that you can later use to assign certain permissions to users. You can view a short description of each security group by checking the IPAM Security Groups section in the configuration summary page of the console:
As we’ve seen in this article, IPAM offers a really good method for monitoring the IP addressing scheme of your Windows infrastructure. Although there are some aspects that you need to remember about this technology, it’s easy to implement IPAM if you take them into consideration. I personally think that IPAM is service that really needs attention because helps Systems Administrators a lot in having a good networking overview and control the way IP addresses are allocated to servers. One big disadvantage of this technology that I want to point out is that it does not offer support for non-Windows systems so it can potentially become a problem in networks that use other Operating Systems. Hope this article was enough to get the grasps of how to interact with IPAM and you now have a good understanding of the principles behind this technology. Don’t forget to subscribe to our newsletter and read the following articles.