
In this tutorial, I'll show you how to tear a cloth apart in 3ds Max using cloth modifier.
I'll show two variations of tearing the cloth. First, I'll tear the cloth with dragging and in the second version I'll tear the cloth with a sword.
It's worth mentioning that if you'd like to get started quickly, there's a great torn cloth simulation on 3DOcean that you can buy for $5.
1. Tearing the Cloth by Dragging
Step 1
Open 3ds Max.

Step 2
Create a plane in the perspective viewport. Keep its Length Segs and Width Segs as 100.


Step 3
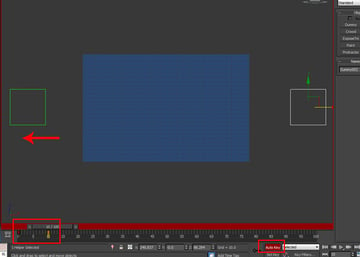
Go to Helpers > Dummy and create two dummies at both sides of the plane.


Step 4
With the left side’s dummy selected, turn on Auto Key button. Go to tenth frame on the timeline and slide the left dummy to the left side a bit.

Step 5
With the right side’s dummy selected, turn on Auto Key button. Go to tenth frame on the timeline and slide the right dummy to the right side a bit. Turn off Auto Key button.


Step 6
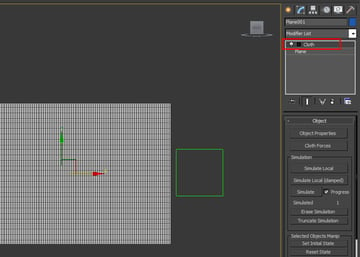
With the plane selected, apply the Cloth modifier onto it.

Step 7
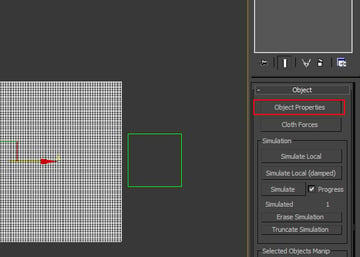
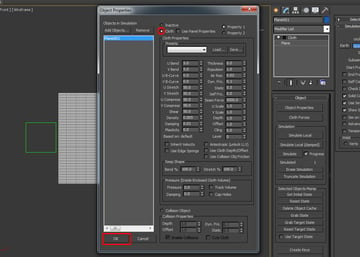
In the cloth modifier, click on the Object Properties tab.

Step 8
In the Object Properties window, select plane and turn on Cloth radio button. It turns the plane into cloth. Click on OK button.

Step 9
Open the cloth modifier roll out. Select Group.


Step 10
With the extreme left column of vertices of the plane selected, click on Make
Group button.


Step 11
In the Make Group window, rename the group name as Left Group.


Step 12
With the Left Group selected, click on Node button and the
select the left dummy. Thus, the left group vertices get attached to the left
dummy.


Step 13
With the extreme right column of vertices of the plane selected, click on Make
Group button.


Step 14
In the Make Group window, rename the group name as Right Group.


Step 15
With the Right Group selected, click on Node button and the
select the left dummy. Thus, the right group vertices get attached to the right
dummy.


Step 16
It’s time to create the tear. Select the vertices or the part of the cloth which you want to tear. Click on Make Tear.


Step 17
In the Make Group window, rename the group name as Tear 1.


Step 18
You can select random vertices and make several separate tear groups as Tear 2, Tear 3 and so on.


Step 19
Click on Simulate button. The simulation starts and you can see the tear simulation in the viewport.


2. Tearing the Cloth by Sword
Step 1
Create a plane in the perspective viewport. Keep its Length Segs and Width Segs as 50.


Step 2
Create two cylinders at both sides of the plane.


Step 3
With the plane selected, apply the Cloth modifier onto it.


Step 4
In the cloth modifier, click on the Object Properties tab. In the Object
Properties window, select plane and turn on Cloth radio button. It
turns the plane into cloth.


Step 5
Click on Add Objects button. It opens Add Objects to Cloth
Simulation window. Select both cylinders and click on Add button.


Step 6
Both cylinders are now the part of the simulation. With both cylinders selected, turn on Collision Object radio button. Click on OK.


Step 7
Open the cloth modifier roll out. Select Group.


Step 8
With the extreme left column of vertices of the plane selected, click on Make Group button. In the Make Group window, rename the group name as Left Group.
With the Left Group selected, click on Sim Node button and the select the left cylinder. Thus, the left group vertices get attached to the left cylinder.


Step 9
With the extreme right column of vertices of the plane selected, click on Make Group button. In the Make Group window, rename the group name as Right Group.
With the Right Group selected, click on Sim Node button and the select the right cylinder. Thus, the right group vertices get attached to the right cylinder.


Step 10
The next task is to create the tear. Select the vertices or the part of the cloth which you want to tear.
Click on Make Tear. In the Make Group window, rename the group name as Tear.


Step 11
I have created a small box. I have animated it from up to down and through
the cloth. This will act a sword which is cutting the cloth apart.


Step 12
In the cloth modifier, click the Object Properties tab. In the Object Properties window, click on Add Objects button. It opens Add Objects to Cloth Simulation window. Select the box and click on Add button.


Step 13
The box is now the part of the simulation. With the box selected, turn on Collision Object radio button. Turn on Cuts Cloth option also. Click on OK.


Step 14
Click on Simulate button. The simulation starts and you can see the box is tearing the cloth apart.


Conclusion

Using this technique, you can now tear the cloth in many styles and variations.


