In the Scrivener walkthroughs and workshops I've done, one of the most common complaints from new users is that the interface is confusing and overwhelming. People find it difficult to get used to new software, and so they give up before they even get started.
Now that you have a sense of the history of creative writing (and where Scrivener fits in this historical context), I'm going to give you a Scrivener walkthrough about the important pieces of Scrivener's interfaces, their names, and what each one is used for.
[wp_ad_camp_4]
Scrivener Walkthrough
Starting from the top!
File Menu
![]() The “File Menu” is where you can find a full list of actions and functions, whether that's adding links and images to documents, printing, compiling, formatting, etc.
The “File Menu” is where you can find a full list of actions and functions, whether that's adding links and images to documents, printing, compiling, formatting, etc.
I like to spend some time with any new piece of software familiarizing myself with the File Menus, because they're always different, and always very powerful.
Don't just look at the actions, but try to perform each one. If you can't figure out what an action does, there's a handy (but dense) Scrivener Manual which you can search. Find this by going to Help > Scrivener Manual in the File Menu.
Binder
The “Binder” is the left-most area of the interface. Its job is to contain all of the documents and folders in your project.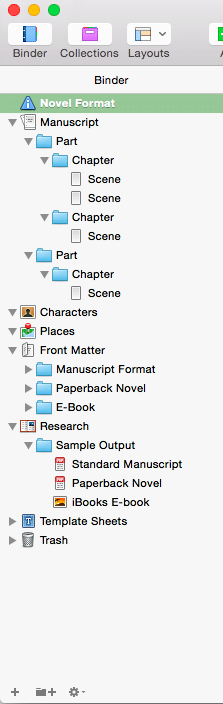
While most new projects come with a basic Binder structure, it is completely customizable. The structure I took a screenshot of above is what you will see if you open a new project using the novel template that comes with Scrivener. Opening a blank document will provide much fewer items in the Binder.
The Binder is one of Scrivener's greatest advantages over other word processing software because it allows you to quickly and easily jump between sections of your manuscript, research, and other folders with scene-level granularity.
Toolbar
The “Toolbar” is the gray bar across the top of the program where common actions are located.![]()
The screenshot above is the default configuration, but you can customize the Toolbar by adding and removing buttons. Simply right click and select Customize Toolbar to check out the additional buttons and options.
Inspector
The “Inspector” is the menu on the right hand side. Open and close it by clicking the Inspector button (the blue “i” in the circle) at the far right of the default Toolbar.
Within the inspector you have several panes. They are:
- Notes
- References
- Keywords
- Custom Meta-Data
- Snapshots
- Comments & Footnotes
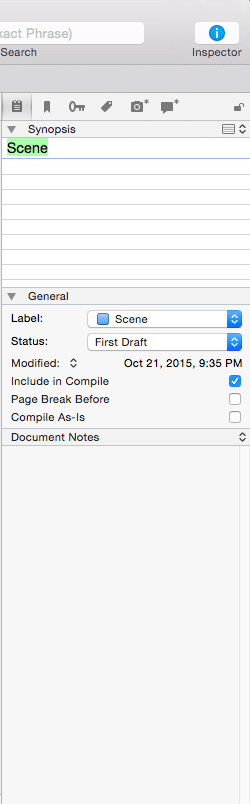
In Notes, I use everything. I use the Synopsis pane to write a summary of the scene I'm working on, the Labels and Status to (duh!) label and set the status of my draft. I also use the Document Notes section to take notes while I'm writing, as a kind of scene-specific scratch pad. Each document you create in Scrivener has a Synopsis and Notes section as pictured below.
Then we have the Snapshots pane. This is a crucial tool for me during the revision process. I take snapshots at the end of each draft so that I have rollback points saved in case I screw something up, change my mind, or dislike the edits I made for whatever reason.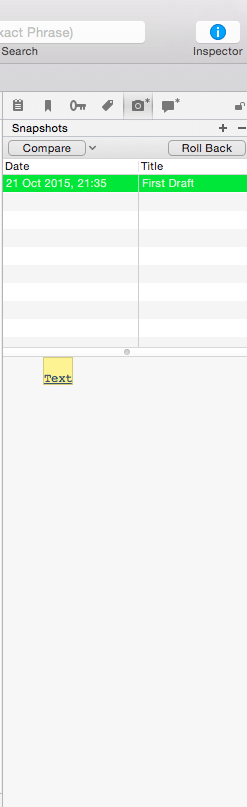
Finally, here's a screenshot of the Comments pane. This is for leaving comments within your manuscript. To insert a comment, use the Format > Comment action in the File Menu, or click the Comment button in the Toolbar, or use the shortcut Command+Shift+* (on a Mac).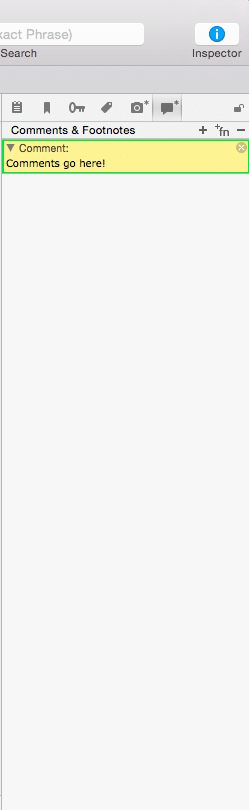
Explore the other panes, Custom Meta-Data and Keywords, if you want to, but don't worry about them too much yet. I’ll re-introduce them if we need to use those sections of the interface in future articles. Personally, I use them very, very rarely.
Editor
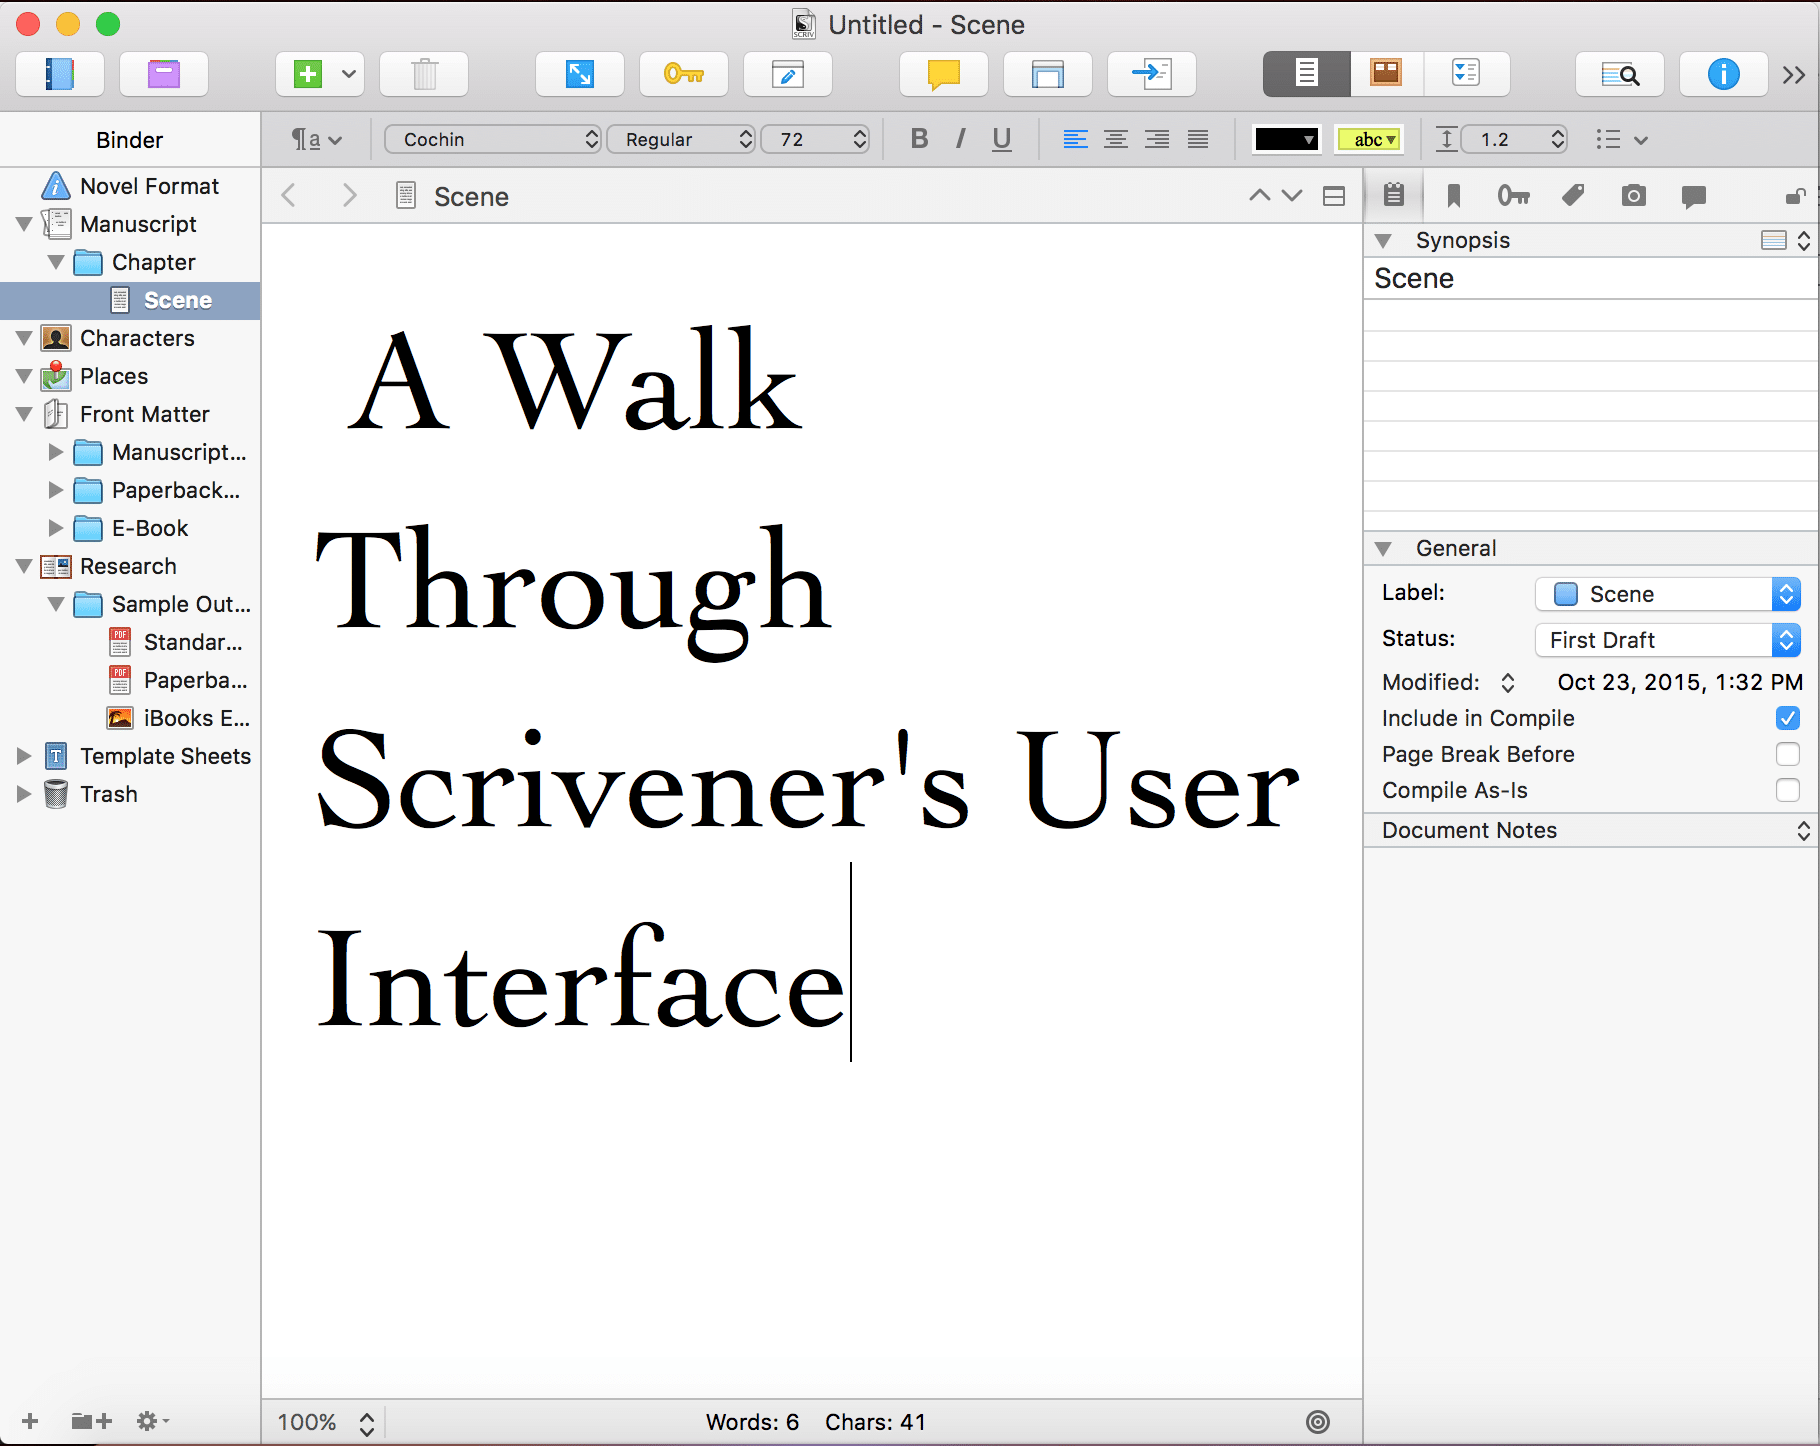
The “Editor” is the important part in the middle, the blank page that you write in. This is where you make words and create your stories, and where you’ll be spending most of your time.
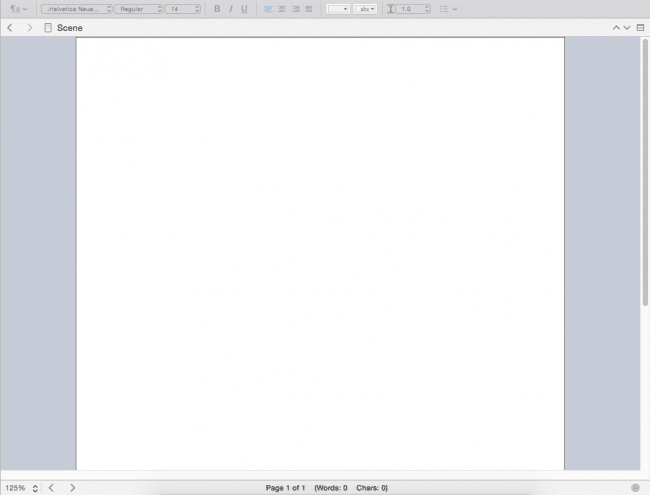
The editor can be full screen, or swapped to Page View like I have it above. I like Page View because it shows the gutters at both sides of the page, which feels cleaner somehow. You can toggle Page View on or off by going to View > Page View > Show/Hide Page View in the File Menu (Mac only as of the time of this article).
There are other view options as well, such as showing a Ruler at the top of the editor so you can adjust tabs and margins. Do whatever makes you happy. Play around with it! The Editor, too, is completely customizable, so you can make the background bright pink if you want to.
Group/View Mode
Depending where you are, these three buttons in the toolbar will be labeled either “Group Mode” (when viewing a group of documents) or “View Mode” (when viewing an individual document).
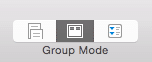
They allow you to seamlessly switch between seeing your documents and subdocuments in the Editor. From left to right they are called “Scrivenings” (“View the document/group of documents”), “Corkboard” (“View the document’s subdocuments on the corkboard”), or “Outliner” (“View the documents subdocuments in the outliner”) viewing modes.
These are the most powerful buttons in Scrivener because they allow different perspectives on your manuscript, one of Scrivener's big advantages over linear, single-column word processing softwares.
Corkboard
The Corkboard is used to simulate the experience of a real-life cork board. You can organize and edit multiple documents using a card-based interface. The cards can snap to a grid or be moved around freely. The size of the cards can also be changed. While it doesn't have the flexibility of a real-life cork board, I find it can be faster to use.
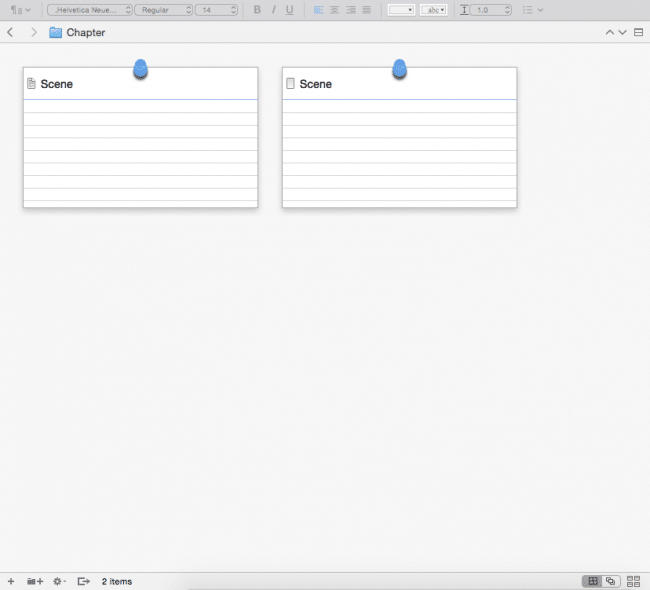
You might outline a story using the notecards, rearrange the order of scenes by dragging and dropping them, view all of your sketches in one place for a high-level overview, and more. The front of the index cards can take text or an image.
Outliner
The “Outliner” allows you to see all your documents and meta-data in a structured list view.

You can view your entire manuscript in the outliner, or drill down into a specific folder of files for a closer view.
The columns and data you see in the screenshot above are completely customizable. Add columns such as word count, created data, target, etc. by right-clicking on the column headers.
That concludes our tour! Are you feeling a little more comfortable now? I hope learning the vocabulary helps you start exploring how Scrivener can work for you. What we've covered here only scratches the surface.
Windows vs. Mac
One more thing: Scrivener offers both Mac and Windows versions of their software. There are some slight differences between them, but for the most part the functionality is comparable. I’ve included Mac screenshots in this article because I write on a Macbook Air and that's what is available to me, but most of the functions I reference are also available—and can be found in more or less the same place—on the Windows version. There are, however, a few places where the Windows version lags behind.
If you have trouble translating my instructions to Scrivener on Windows, refer first to Scrivener's Help Manual. If you can't find what you're looking for in there, leave a comment below, and I'll be happy to pitch in!
Next time, we'll use some of the interface elements I introduced you to today, like the Corkboard, to plan and storyboard a story in Scrivener. Until then, spend some time with the software and see what fun new functions you can find and play with.
What is your favorite feature in Scrivener? Let me know in the comments section.
PRACTICE
For today's practice, just get to know Scrivener a little better by freewriting in the program for fifteen minutes. (If you don't have it, you can get a free trial here for Mac and here for Windows).
When your time is up, copy-and-paste your practice into the comments section. And if you post, please be sure to encourage to a few other writers in the comments as well.
Happy writing!
[wp_ad_camp_5]


A point I have problems finding information about is how to insert images/illustrations/photos into the text… if it is ~ for example ~ a cookbook or a children/young adult book… how can I put my illustrations in place in the midst of my text? Do I have to convert everything and work in InDesign? But then… how to put it back into Scriveners to publish it to e-book platform?
For the rest of it, I almost got everything right… thanks to you 🙂
Thank you greatly
Hi Amyah.. You can do this straight in Scrivener. Drag photos and images straight into the text. You could also add them by going to `Edit > Insert > Image From File…` in the File Menu.
As for making sure these images are formatted correctly for ebook publishing, that’s a more nuanced discussion. For instance, ebooks don’t float text around images very well (if at all). My recommendation for ebook images is: place them in blocks above and/or below your text; don’t try any fancy formatting on ebooks, simply center the image and put space above and below it; and make sure that your images look good in black and white, because the majority of ereaders still render in black and white only (i.e. kindle paperwhite and earlier). If you follow these rules, Scrivener can compile your images into an ebook successfully.
Thank you Matt… I’ll try that…
I’ve tried different writing apps like Ulysses and iA Writer Pro, which were great, but Scrivener is by far, the best one for me. It’s great for outlining and research– all the materials I need are right there in the app. I don’t need another app for research or notes, because I can just click and drag a photo, a website or a file into the research area of the writing project I’m working on.
True, Scrivener’s interface looks a bit complicated at first, but once you’ve discovered how it works– it’s a breeze. Scrivener’s website, http://www.literatureandlatte.com, offers tutorials and help when you need it. I have yet to learn about other features, but the ones I know now are more than enough for me to say it’s the best writing app in the world.
Although I have tried it, I don’t use apps like Scrivener.
Firstly, I don’t like the complexity as I find it too distracting. If I could, I would go back to a typewriter. I do miss my cast iron Remington Rand.
Secondly, I don’t like the suspicion that the app is watching what I am doing. Given all the privacy-theft that goes on, I simply do not trust it. The trouble with our modern tech is that happens an awful lot. I find it dehumanising.
I am going to stick with my Linux laptop and its simple word-processor.
I assure you that Scrivener is not monitoring your activity 🙂 That said, more power to you and your unplugged-ness if that’s what works for you, man!
I am a blissedly unplugged SF writer and former teacher of computing!
Viva Luddites!
Am I missing something? What’s wrong with a good word processing program? Heck, what’s wrong with a pen and some paper?
This is a good word processing program. Pen and paper are still close to my heart, of course. You can do a lot with very little.
Hi Matt, I did look at the program and felt the learning curve would take me away from writing time, plus the cost would cut into my potential millions in royalties. Your post will be saved for future reference between my multitude of sequels. Cheers.
Haha! I appreciate both your confidence and sense of humor. With promised millions in royalties, who gives a shit what I think, right?
However, my counter to your argument that the learning curve is not worth surmounting is this: the time it takes to learn to use Scrivener (a few hours at most, with proper instruction) is a pittance compared to the corresponding increase in productivity a writer gains on the back end. The tools Scrivener provides (project goals, meta data, revision snapshots, containers for research, a built-tool for character and setting sketches, a corkboard view, a name generator, etc etc.) will make you write faster and better. You’ll regain the time you invested in short order.
Second, learning to use Scrivener will also allow you to format your own books efficiently (a few notable exceptions, one of which is illustrated kids books). This is great for self publishers, especially novelists and short story writers, because it can save them thousands of dollars otherwise spent on book formatting early in their career.
But if it’s not for you, then make like Scrooge McDuck and dive into your millions where you’ll write with whatever word processor or notebook and pen makes you happiest. I’d never advise otherwise 🙂
Thanks for the useful walk-through! It’s also great timing since I had a question regarding the Mac vs Windows functionality this morning!
Scrivener has a great feature for tracking your daily word count under the Project Targets menu. However, one annoying thing about the “Session Target” is that it counts negative numbers by default. If you are editing and removing text, it subtracts those edits from your daily writing count.
Anyway, in the Mac version, there is a further Options menu on that screen where you can turn off the “Allow negatives” feature. Yet, on the Windows version I can’t find that option! I don’t think it exists for the Windows version.
I just wanted to confirm if that was correct?
Thanks
Dennis
Hey Dennis, Scrivener published a complete list of the Scrivener features that Windows doesn’t yet have on their forum: http://www.literatureandlatte.com/forum/viewtopic.php?f=30&t=16056
The article says “The Mac has a few additional options for Project Targets (e.g. setting a deadline and choosing when the counter resets),” so I believe you are correct.
D’oh! I thought that might be the case!
Thanks for taking the time to look that up though!
No problem, man! It is unfortunate, but I’ve been told that the Scrivener team is working to achieve feature parity between the Windows and Mac version, so just hang in there for a while longer 🙂
Sweet – that would be great. I switch between Windows at work and Mac at home.
Can you import Word documents into Scrivner and then use its functions on those documents?
Scrivener has changed my life…. and I’ve only barely begun to use it.
So far, all I’ve done is drag files into it and see them as one with ‘composite’ or group mode; and the other thing is the writing of the synopsis, the accompanying cards you can create with inspector, and then seeing them all together in the cork board function.
For these two things alone its been well worth it. I look forward to discovering more in time…
Appreciate the walk through. Starting a large project (have drafts) and I’m looking forward to using Scrivener to pull it all together. Free write text: The Art of Bending
The art of getting any program to work for the writer, I believe is the ability to be flexible. And by flexible, I mean the ability to know that you cannot break whatever it is you are trying to create or make with your hands, instead you have the permission of whatever gods are in charge of such things to keep you on track, and will not allow you to fail in that way, whatever that way may be, but ultimately it returns you to a time, when you were a child, when you had no intent other than to have fun, to play in the sand, to swing as high as the stars, to roll around in the grass as if shot by the cowboy you’d just drawn upon… poetry came to your lips as easily as sun came to your shoulders, and the streetlamp was your wristwatch telling you when it was time to go home. But in the end, what was most important is the willingness to get out there, to get lost, to gain new friends, new adventures, to be open to what may come and how this was really all you ever needed was the weather to be decent, a fellow traveler and that willingness; and out you went and went for years with the ignorant bliss of bees, and then soon enough you wonder if others were watching or if you were watching others what was the ultimate point and how you might or might not rank amongst the greatest or the worst and how you wanted all the stickers to be gold and then you wanted all the words to be yours and the feats to be yours and yours alone and when you discover it is not always possible you find different ways to define success and wonder and finally come to understand that every one else is doing the same things, trying to get by, to get some love in return, to find ways in the world to know how to continue the play and the game, the sand, and the swings, the openness of a day before you without the worry of annihilation or destruction, to know that you cannot break this thing, this freedom, only use it for what it is and try your level best with anything that is before you as this is the case for anyone else it is the case for you, free as bees and willing to know what there will be defeats and their will be struggles and you will misunderstand, and you will not cry, and you will not be defeated ultimately, because the goal is not to succeed so much as to be, to be a part of whatever endeavor is played in front of you and you have the ability to be a part of it only if you wish it to be so, like the time you were not yet known and you stuck up for yourself; or when she placed magical sequins in your hand and you knew that magic existed, but that it did not always come to fruition; to come out of wild and to be tamed too; to funnel the madness; to ply glue to your hand and peel off the skin; to feel the body of another; to drink and sing; to roll around in the high grass under a dark night, the sound of campfires and music nearby; to allude death, to watch the snow and think; to think and watch the snow melting; to every season, turn, turn, turn, turn, and you turn along with it, and on it and through it and you are not ultimately harmed; like when you came to know you could be upon the stage, you could run fast, you could make them laugh; you could get the girl of your dreams even after all the awkward fumbling and mumbling with others; that you could run and would run and would leave and would return and would lose and would gain and in the end finding it all so deeply and wonderfully epic to be alive and in the air knowing that there are others out there just like you and not like you who have the same dreams and wonders and different ways of mumbles and tumbles and awkwardness; how you came to learn more and more; to get what no one in your family ever got and few of your friends ever thought was possible of you, and to do so and know it is because when you were young and you looked at the openness all around, you knew it was about getting yourself out there to at least try and be, just be, who were are, instead of who they, or you thought you should be, a animal, a creative creature, a wonder of the world, your world, where even your thoughts can build the space around you and you are able to sit quietly and see it for the first time again and again, and again, that this is the measure of allowing oneself to live and not be destroyed, to not be discourage, to take one day as it is the last, the breath a gift illuminating the lungs, the heart, the soul with an unquenchable fire that burns night and day, light or dark, kindling the love within you to be all that you can be…… and are, you are thou.