

1. Creating Custom Attributes for Control
Step 1
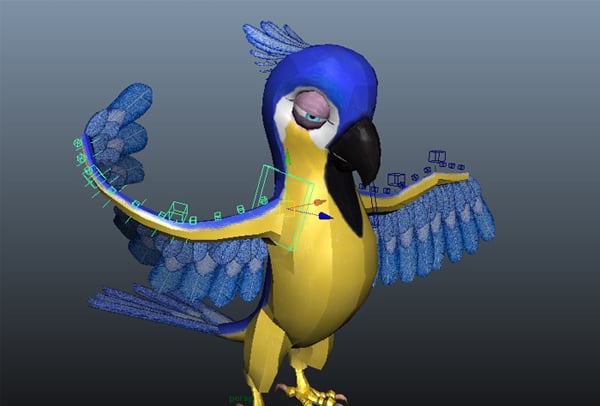
Open the parrot file in Maya which was saved in the previous part of the tutorial.


Step 2
You'll need to isolate the control curves and joints. Go to Show > Polygons and turn off the check box to hide all polygons in the viewport.


Step 3
Select all R_CtrlC_Wrist, R_CtrlC_Elbow and R_CtrlC_Shoulder
control curves.


Step 4
With the control curves selected, click on Modify > Add Attributes command.


Step 5
In the Add Attributes option window, keep the Long name as Feather and turn on Displayable radio button. Click on Add button.


Step 6
Repeat the process. This time, keep the Long name as Fan and turn on Keyable button. Click on Add button.


Step 7
With the same control curves selected, write the Long name as Twist and turn on Keyable radio button. Click on Add button and then close the window.


Step 8
Now, you can see the added custom attributes in the Channel Editor as shown in the following image.


2. Connecting Custom Attributes with Joints
Step 1
You need to connect the custom attributes to the joint transform node. With R_CtrlC_Wrist_c01 selected, go to Window > General Editors > Connection Editor.


Step 2
In the Connection Editor window, you can see the R_CtrlC_Wrist_c01 attributes in the left side. With R_bn_feather_Three_c01 selected, click on Reload Right button to load its attribute to the right side.


Step 3
First select Fan custom attribute in the left side and then select rotateZ in the right side to connect them.


Step 4
Select Twist custom attribute in the left side and then select rotateX in the right side to connect them.


Step 5
Following the same way, connect the rest control curves R_CtrlC_Wrist_b01, R_CtrlC_Wrist_a01, R_CtrlC_Elbow_c01, R_CtrlC_Elbow_b01, R_CtrlC_Elbow_a01, R_CtrlC_Shoulder_d01, R_CtrlC_Shoulder_c01, R_CtrlC_Shoulder_b01 and R_CtrlC_Shoulder_a01.


3. Rigging Feather Fold Controls
Step 1
Go to Edit > Group command to create a null object.


Step 2
With the null object selected, go to Attribute Editor. Click on Display tab and check on Display Handle option.


Step 3
With the null object and the move tool selected, press and hold V key and then snap the null object to the R_bn_feather_Three_c01 as shown in the following image.


Step 4
With the null group object selected, go to Display > Transform Display > Local Rotation Axis.


Step 5
First select the null group object and then select R_bn_Wrist_c01. Press P key to make the null object as the parent of the bone.


Step 6
With the null object selected, check its rotation values in Channel Editor. There should be 0 value in all rotation axes.


Step 7
With the same null object selected, go to Modify > Freeze Transformations and click on its option box.


Step 8
In the Freeze Transformations Options window, keep only Rotate property turned on. Click on Freeze Transform button.


Step 9
After applying the Freeze Transformations command, all rotation values become 0.


Step 10
First
select R_bn_feather_Three_c01 joint
and then select the null object. Press P
key to parent the null object.


Step 11
Without selected anything, press Ctrl-G key to make the group of the null object. Turn on Display Handle option as well.


Step 12
With the newly created null object selected, go to Display > Transform Display > Local Rotation Axes.


Step 13
With the null object selected, snap it with R_bn_feather_Three_b01 joint.


Step 14
With R_bn_Wrist_b01 joint and the newly created null object selected, press P key for parenting.


Step 15
Do not forget to use freeze transform with the null object as I have done in the previous steps.


Step 16
With the newly created null object and the R_bn_feather_Three_b01 joint selected in order, press P key to make the null object as the parent.


Step 17
Following the same way, do complete all feathers’ joints.


Step 18
Rename all null objects. With the first null object selected, rename it as Grp_R_feather_Three_c01.


Step 19
Rename the second null object as Grp_R_feather_Three_b01.


Step 20
In this way, rename all null objects as Grp_R_feather_Three_c01, Grp_R_feather_Three_b01, Grp_R_feather_Three_a01, Grp_R_feather_Two_c01, Grp_R_feather_Two_b01, Grp_R_feather_Two_a01, Grp_R_feather_one_d01, Grp_R_feather_one_c01, Grp_R_feather_one_b01 and Grp_R_feather_one_a01 respectively.


4. Creating Feathers' Middle Controls
Step 1
Create four circles. Put them all between the feathers as shown in the following image.


Step 2
Rename these circles as CC_FeatherMiddle_a01, CC_FeatherMiddle_a01 and CC_FeatherMiddle_a01 as image shown.


Step 3
With all CC_FeatherMiddle controls selected, go to Modify > Freeze Transformations.


5. Parenting Feathers' Controls
Step 1
Select CC_FeatherMiddle_a01 curve and R_CtrlC_Wing_a01 selected in order, press P key.


Step 2
First select CC_FeatherMiddle_b01 and then R_CtrlC_Wing_b01. After that, select CC_FeatherMiddle_C01 and then R_CtrlC_Wing_c01 as shown in the following image.


Step 3
With all three feather middle control curves selected, select Rotate X, Rotate Y, Scale X, Scale Y, Scale Z and Visibility inside the Channel Box.


Step 4
Do right click. Select Lock and Hide Selected options in the popup menu.


6. Creating Expressions For Feathers' Controls
Step 1
Go to Window > Animation Editors > Expressions Editor command.


Step 2
In the Expression Editor window, turn on By Expression Name radio button as shown in the following image.


Step 3
Write FeatherSpread_Expression as the Expression Name and type // inside the Expression box. Click on Create.


Step 4
You can see the created expression in the Selection objects list.


Step 5
With the FeatherSpread_Expression selected, write //Feather Section A, //Feather Section B and //Feather Section C in the Expression text area. Click on Edit button.


Step 6
With the Grp_R_feather_Three_b01 group selected, copy and paste Grp_R_feather_Three_b01.rz = in the expression text area.


Step 7
With CC_FeatherMiddle_a01 curve selected, copy and paste CC_FeatherMiddle_a01.rz. Click on Edit button.


Step 8
Following the same way, create the following expression under //Feather Section A.Grp_R_feather_one_a01.rotateZ = CC_FeatherMiddle_a01.rotateZ; Grp_R_feather_one_b01.rotateZ = CC_FeatherMiddle_a01.rotateZ + 0.6; Grp_R_feather_one_c01.rotateZ = CC_FeatherMiddle_a01.rotateZ + 0.5; Grp_R_feather_one_d01.rotateZ = CC_FeatherMiddle_a01.rotateZ + 0.3;. Click on Edit button.


Step 9
Under Section //Feather Section B, write as Grp_R_feather_Two_a01.rotateZ = CC_FeatherMiddle_b01.rotateZ; Grp_R_feather_Two_b01.rotateZ = CC_FeatherMiddle_b01.rotateZ + 0.6; Grp_R_feather_Two_c01.rotateZ = CC_FeatherMiddle_b01.rotateZ + 0.5;. Click on Edit button.


Step 10
Under the last section //Feather Section C, write Grp_R_feather_Three_a01.rotateZ = CC_FeatherMiddle_C01.rotateZ; Grp_R_feather_Three_b01.rotateZ = CC_FeatherMiddle_C01.rotateZ + 0.6; Grp_R_feather_Three_c01.rotateZ = CC_FeatherMiddle_C01.rotateZ + 0.5;. Click on Edit button.


Conclusion
With every upcoming part of the tutorial, the rigging process is becoming more complex. The rigging of a bird is always a complex task for riggers. I will show each and every step of wings rigging process.
In the next part of the tutorial series, I'll start making the wings' fold controls.


