Many folks ask about the printing capabilities in Primavera P6 EPPM and in particular, the printing of the Gantt Chart. The good news is that Primavera P6 EPPM has some great features available that support the printing of the activity table and associated Gantt chart.
This article takes a look at how to utilize the print features in Primavera P6 EPPM to create a nice pdf file print out of the schedule, including a Gantt chart.
Usually, the first step in this process is deciding what columns to include in your activity table. You, most likely, will want to limit the number of columns you display so that you can fit your activity table and entire Gantt chart on one 11×17 sheet of paper. For our demonstration example we have limited the activity table to simply five columns as displayed in Figure 1.
 Figure 1
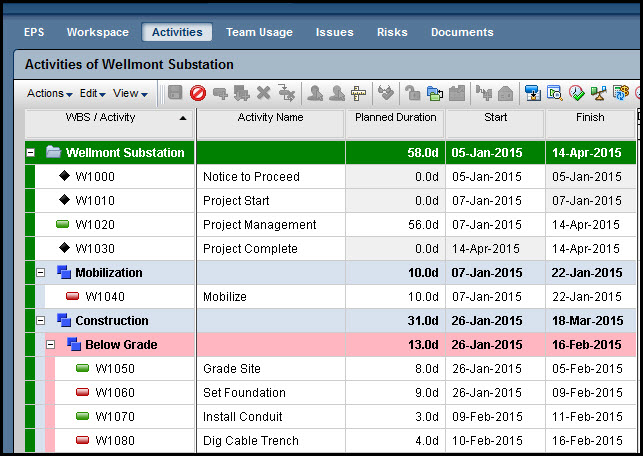
Ideally, you probably will want to include a sixth column displaying the activity percent complete.
Now that you have set the number of activity columns for your activity table you can focus in on the Gantt chart. Select a suitable timescale so that your entire Gantt chart is viewable on the screen. To do this, right click anywhere on your date or month headings as displayed in Figure 2.
Figure 2
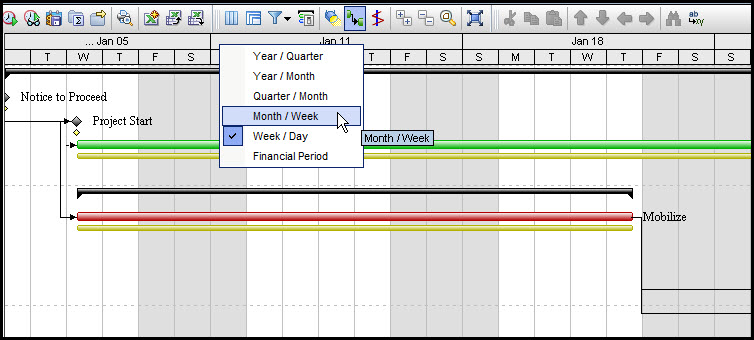
For our demonstration we select the Month/Week timescale that works well for our Gantt chart. Now your activities table and associated Gantt chart should be clearly viewable on the screen, similar to Figure 3.
Figure 3
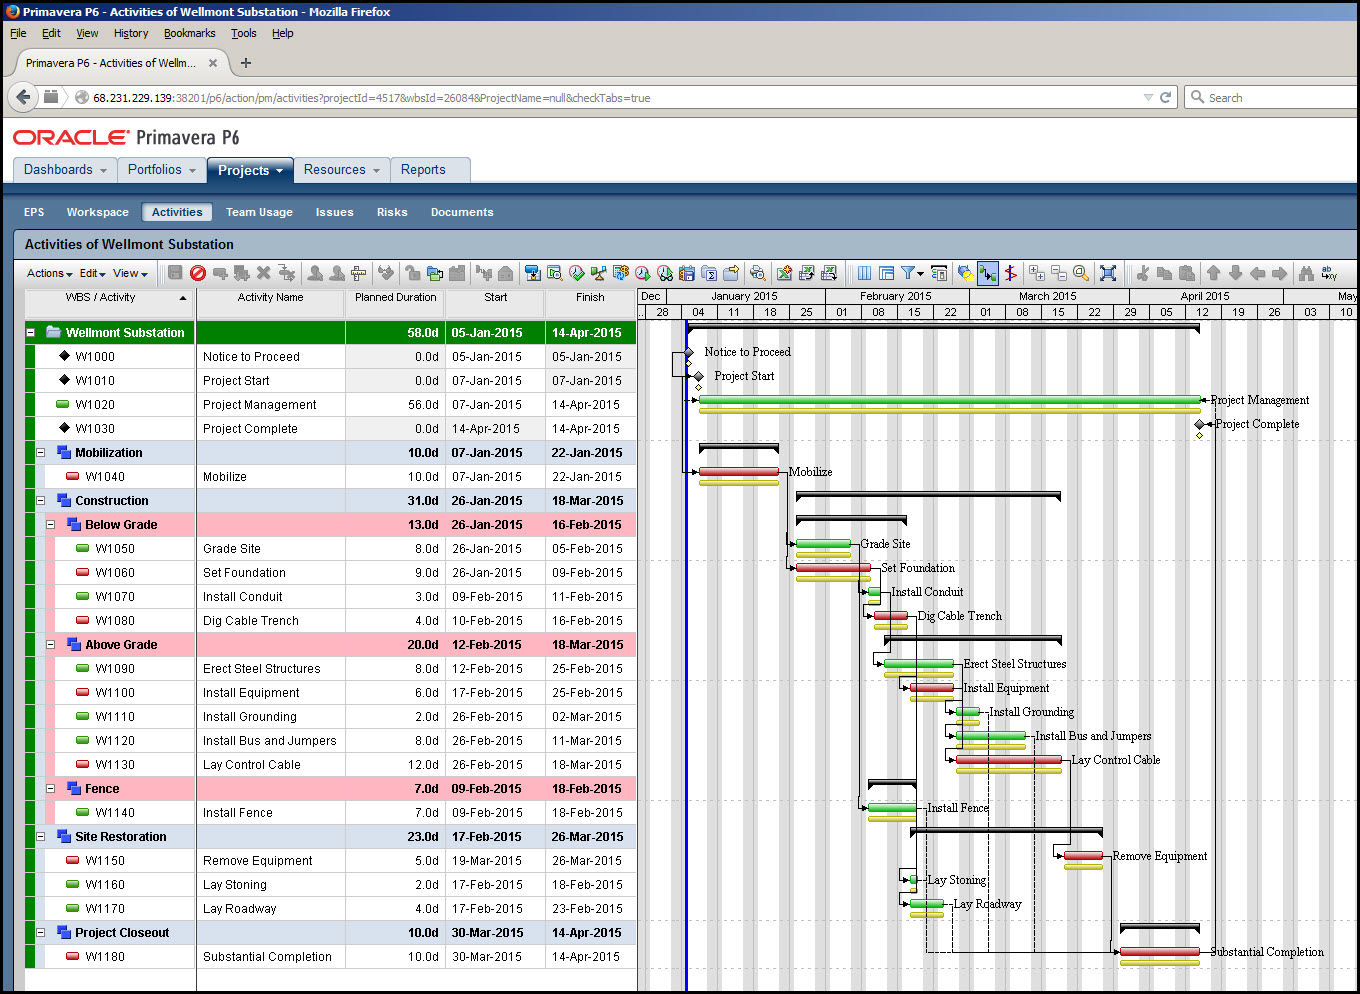
Once you have something equivalent to Figure 3, you are ready to focus in on the print option features.
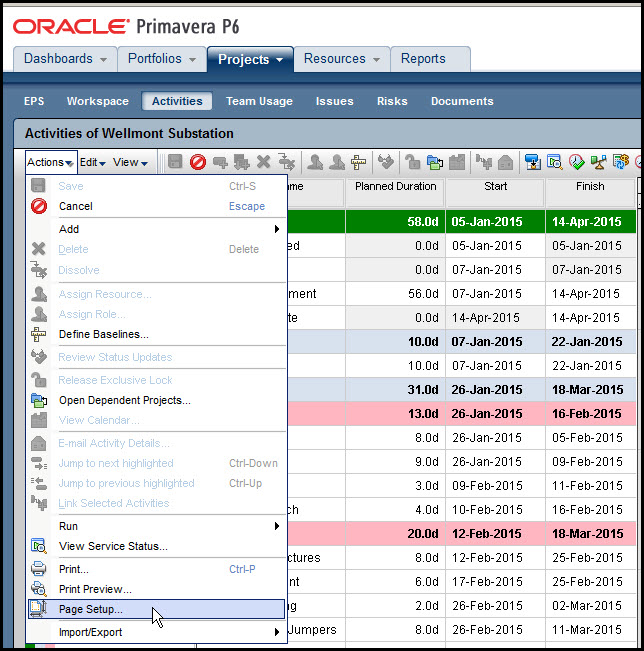
Select Actions and Page Setup as displayed in Figure 4.
Figure 4
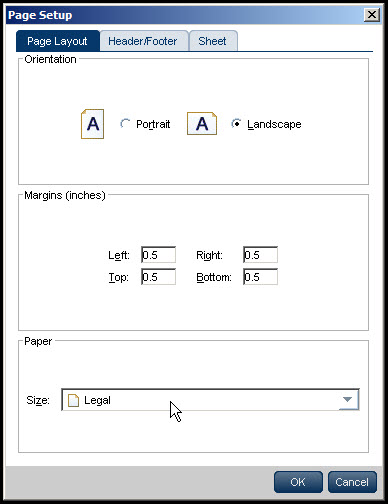
In the Page Layout tab, Figure 5, you set the orientation to landscape and the size to legal, which is 11×17.
Figure 5
Skip the Header/Footer for now and select the Sheet tab, Figure 6.
Figure 6
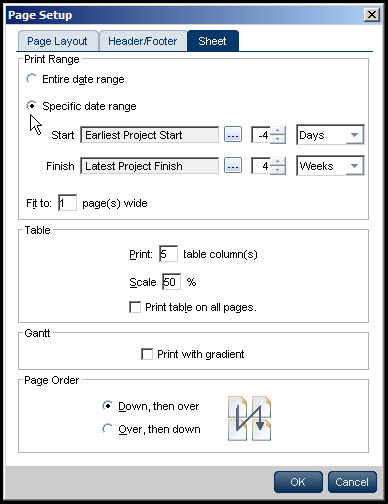
Here is where it gets interesting. Set the print range to ‘Specific Date Range’. The start option should be set to ‘Earliest Project Start’, ‘-4’, and ‘Days’. The minus 4 days is included to provide space for viewing activity relationships and such at the beginning of the schedule. Four days previous to the ‘Earliest Project Start’ should be sufficient. Next, set the finish option to ‘Latest Project Finish’, ‘4’, and ‘Weeks’. The additional four weeks is required to show the activity name of the last activity, which is printed to the right of the activity Gantt chart bar.
In the Table options, we set it to print 5 columns for our demonstration example. The scale is set to 50%. You may have to adjust the scale, accordingly, to fit your Gantt chart on one 11×17 sheet of paper. With these options in place go back to the Header/Footer tab. Select the ‘Custom Header’ feature. And for our demonstration we display the file name in the Left section and the Date and Time on the Right section, Figure 7.
Figure 7

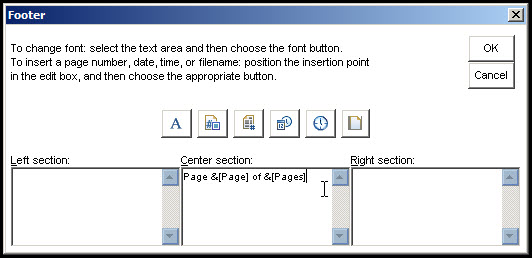
The last Header/Footer setting is to display the page number and total pages in the footer center section, Figure 8.
Figure 8
Obviously, you will want to experiment with the header/footer settings to provide the page titles preferred by your organization. Your print preview should look similar to Figure 9.
Figure 9
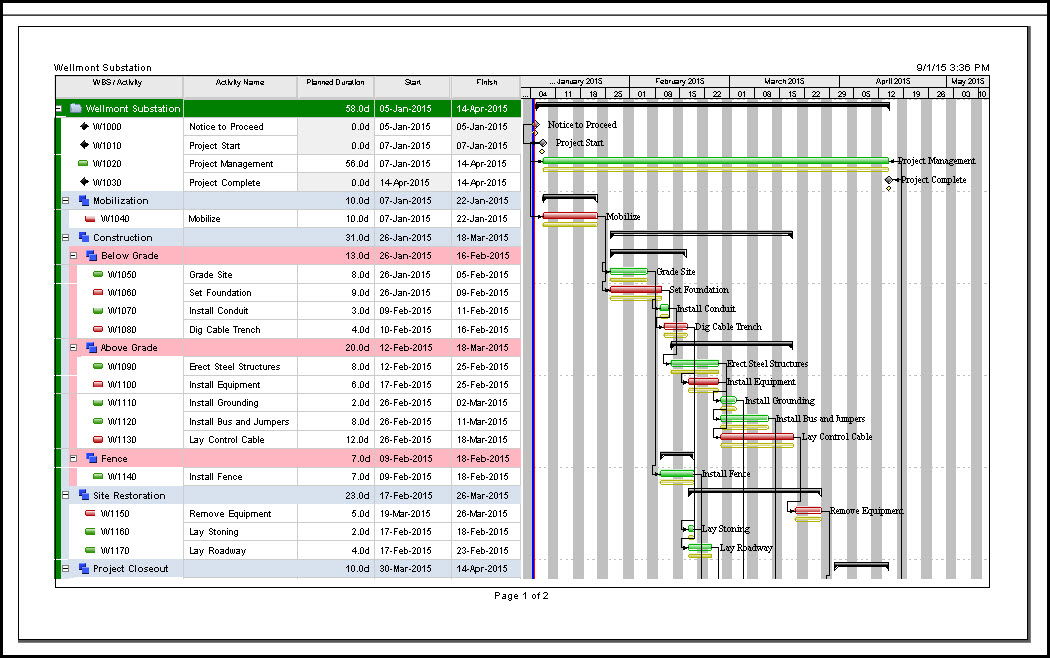
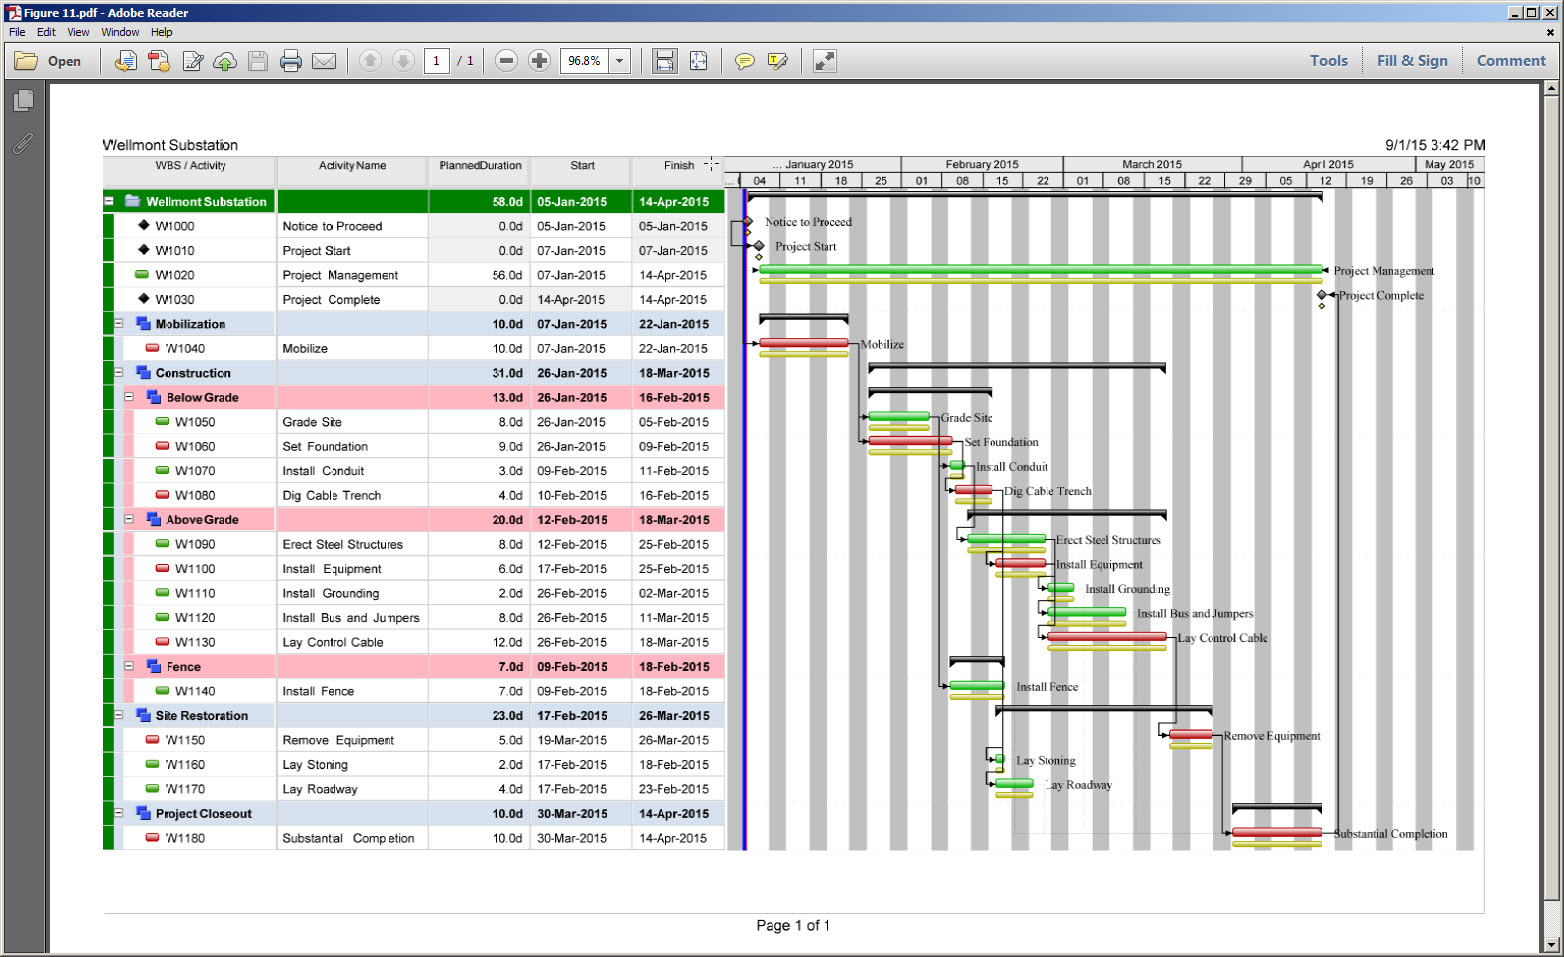
The last step is to create a pdf file of your schedule. We recommend you download a free copy of CutePDF at www.cutepdf.com. This will give you a boatload of paper sizes to choose from. Note to get the one page print out displayed in Figure 10, we had to adjust the scale to 45% of the original size.
Figure 10
Summary
Yes, like Primavera P6 Professional, Primavera P6 EPPM is able to print out an activities table in combination with the associated Gantt chart. Getting all the information to fit on one 11×17 sheet of paper is the challenge. This may require several adjustments.
First, limit the number of columns in the activity table. Second, adjust or pare down the Gantt chart timescale. Third, use the Earliest Project Start minus a few days and the Latest Project Finish plus a few weeks print features so that the Gantt chart, including labels, is clearly visible from start to finish.
Additionally, Primavera P6 EPPM has many of the same header/footer features found in most word processing software. Last, we recommend the use of tools like Adobe Acrobat or CutePDF so that you have plenty of paper sizes to choose from.