
Rich media is surplus and abundant on the internet. Tons of apps these days deal with rich media. Users spend more time uploading and viewing media content than any other thing.
Cloudinary’s PHP SDK, with which you can easily and speedily upload multiple images and videos in PHP files can help you ramp up quickly while dealing the mechanics of php file uploads and rich media during app development.
This article guides you through the process of uploading PHP files and rich media the easy way.
The Cloudinary Open-source PHP library utilizes the Cloudinary API which allows for the transmission of any kind of file for safe storage in the cloud. They contain easy-to-use helper methods for these image-related tasks:
- Uploads
- Administration and creation of sprites
- Embeddings
- Generation of URLs for transformations
Before diving into Cloudinary’s specific methods, it’s important to understand the foundational setup for PHP file uploads. This begins with configuring your PHP environment:
- Configure the “php.ini” File: Ensure that the “file_uploads” parameter is set to “On” in the “php.ini” file to enable file uploads.
- Create an HTML Form for Upload: In your “index.html” file, set the form method to POST and the enctype to multipart/form-data. This form should include a file type input, allowing users to browse and select files for upload.
Once the form is submitted, PHP processes the file upload using the $_FILES superglobal. The file is initially stored in a temporary directory, and you can use PHP’s** move_uploaded_file()** function to move it to a permanent location.
To get started, do the following:
Sign up for Cloudinary’s generous free-tier plan.
 Cloudinary Dashboard: Your cloud name, API key, and API secret are the key values for interacting with Cloudinary’s capabilities.
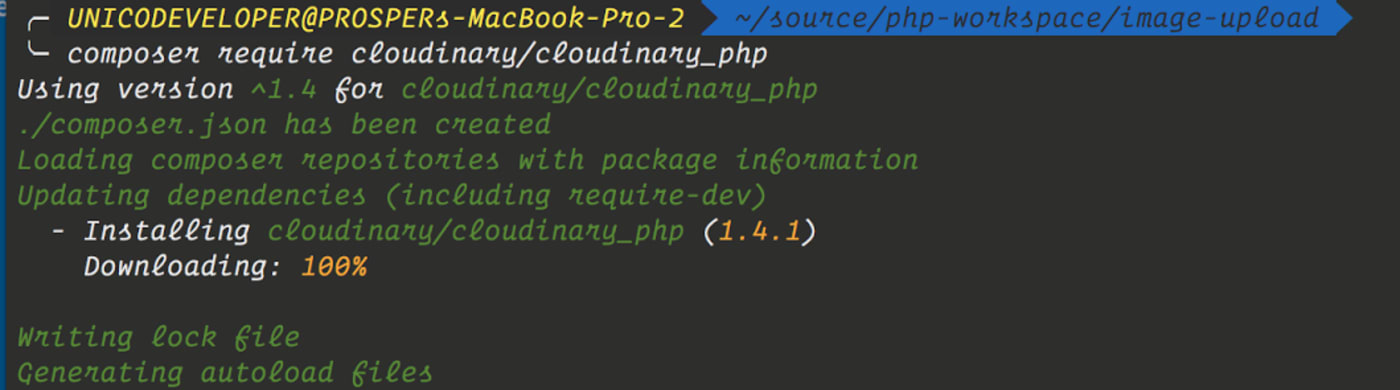
Fetch the library with Composer. Alternatively, go to Cloudinary’s PHP repository on GitHub, copy all the required files and paste them in your app. Afterwards, then reference them in the script with which to perform the upload, as follows:
/**
** UPLOADING PHP FILES
***
// importing the necessary Cloudinary files
require 'Cloudinary.php';
require 'Uploader.php';
require 'Helpers.php';
require 'Api.php';
.....
Code language: JSON / JSON with Comments (json)To manage your PHP library’s dependency with Composer, install Cloudinary’s PHP library directly from the Packagist repository and update your composer.json file, as follows:
{
  "require": {
    "cloudinary/cloudinary_php": "dev-master"
  }
}
Now install the dependencies, including Cloudinary’s PHP package:
php composer.phar install
For more details, see Cloudinary’s documentation on the PHP SDK.
You can upload images and other files to Cloudinary in PHP on a server that runs PHP 5.3 or later. Do the following:
First, set up the key values with the config method so that Cloudinary can verify that your account is valid:
\Cloudinary::config(array(
    "cloud_name" => "my_cloud_name",
    "api_key" => "my_api_key",
    "api_secret" => "my_api_secret"
));
Code language: PHP (php)For security, load those three values from an environment (.env) file. Alternatively, put them in a file called settings.php and include it in the script that performs the actual uploading.
Now upload your images and other files to Cloudinary’s cloud platform:
-
To upload a local file, e.g.,
my_image.jpg, type:\Cloudinary\Uploader::upload("/home/my_image.jpg")Code language: PHP (php)The upload method then returns an associative array whose content is similar to this snippet:
Array ( [public_id] => sample [version] => 1312461204 [width] => 864 [height] => 576 [format] => jpg [bytes] => 120253 [url] => https://res.cloudinary.com/demo/image/upload/v1371281596/sample.jpg [secure_url] => https://res.cloudinary.com/demo/image/upload/v1371281596/sample.jpg ) -
To upload a file from a remote HTTP or HTTPS URL, type:
\Cloudinary\Uploader::upload("https://www.example.com/image.jpg")Code language: PHP (php) -
To upload a file from an S3 bucket, type:
\Cloudinary\Uploader::upload('s3://my-bucket/my-path/my-file.jpg');Code language: PHP (php)Cloudinary assigns a public ID to each and every uploaded file for transformation and delivery later on.
Here’s the syntax for uploading files with PHP to Cloudinary:
public static function upload($file, $options = array())Code language: PHP (php)See these examples of what you can pass to the
$optionsargument: -
A custom public ID:
\Cloudinary\Uploader::upload('my_image.jpg', array("public_id" => "manutd_id"));Code language: PHP (php) -
The name of the uploaded file:
\Cloudinary\Uploader::upload('sample.jpg', array("use_filename" => TRUE));Code language: PHP (php) -
An image, a video, or a RAW file:
\Cloudinary\Uploader::upload("spreadsheet.xls", array("resource_type" => "auto"));Code language: PHP (php)
For details on all the upload options, see the related Cloudinary documentation.
Uploading PHP images files to Cloudinary] is hassle free. Once you’ve completed that task, you no longer need to store files on your host server. Do take advantage of dedicated cloud-storage services like Cloudinary, which also performs the invaluable task of serving files securely to web apps through content delivery networks (CDNs).
- Automating File Upload and Sharing
- Uploading PHP Files and Rich Media the Easy Way
- AJAX File Upload: Quick Tutorial & Time-Saving Tips
- Impressed by WhatsApp? Clone the WhatsApp Technology to Build a File-Upload App on Android
- Direct Image Uploads From the Browser to the Cloud With jQuery
- File Upload With Angular to Cloudinary
- Uploading Vue Files and Rich Media in Two Easy Steps
- Node.js File Upload to a Local Server Or to the Cloud
- Laravel File Upload to a Local Server Or to the Cloud
- JavaScript File Upload in Two Simple Steps


