As the trends in bathroom design headed towards minimalist, it was only natural that more techniques were developed in an attempt to cut as much excess out of the bathroom as possible. Large and impressive bath tubs were shrunk down to space-saving corner baths. Shower pipes were hidden away behind walls. Eventually baths were removed entirely in favour of shower enclosures, which were shrunk down themselves until they were nothing more than clear, glass panels separating the shower from the rest of the bathroom. Minimalism in shower and bathing design reached its furthest extent in the form of the wet room, where an entire room could be transformed to be shower-friendly, thus removing the need for many of the traditional separation techniques.
When building your wet room, it's natural to aim for this ultimate minimalist aesthetic, but it also naturally takes a lot of work. There are a lot of elements that need your careful attention which can mostly be grouped into two core elements: design and functionality. While the design of your bathroom - such as choosing the type of shower you want, how to heat your wet room and where to put your basin and toilet - is a commonly discussed topic, we thought that more could be written to help people make their wet room as functional as possible, without sacrificing these design elements.
How to Fit a Shower Tray & Waste
Fitting your shower tray and waste should be the first part of creating your wet room. The shower tray will end up underneath the waterproofing layer that you add later, which seals the gaps in between the tray and the floor as part of the waterproofing process.
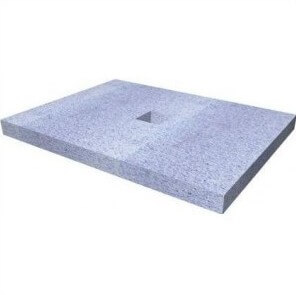
First select the waste you want to use (we have plenty of options if you want) and where it's going to go, then measure out the area on your floor that the tray will be installed in. Some people like to put their wet room floor at a slight angle with the shower tray at the bottom, but as long as it's not at the top of a slope this isn't a necessity.
Either trim the tray or create a larger space to fit it in, and then secure it safely. With this done, you can begin to add the waterproofing which will help seal the shower tray.
How to seal a shower tray after tiling: This is a question we're asked a lot, either due to unfortunate mistakes in the tiling, or due to needing to fix or replace certain aspects of the wet room. For underfloor trays, there's no easy way to do this that will work long term, so the best solution is to re-do the shower tray area from the bottom up to ensure the best long term protection. If you've opted for an above-floor shower tray, you can usually use silicone to protect the gaps between the tray and the tiles. In these cases, it is still a good idea to make sure that the tray is flush with the level of the floor.

Different Techniques for Different Materials
How to create a wet room on a wooden floor: For a wooden floor, you are likely to be installing the shower tray at floor level, as opposed to a concrete floor where the floor level is brought up to the height of the tray. Mark out the area that the shower tray is going to fill, remove the floor here and add in support for the tray underneath. Install the waste pipe and shower tray, then waterproof and tile as you would for any wet room.
How to create a wet room on a concrete floor: Creating a wet room on a concrete floor is a popular choice and isn't too difficult. The main element involved is that the installation of the waste and shower tray will involve digging a path in the floor for installation of the waste pipe, and the shower tray area is likely to be a frame that supports the waste and is otherwise filled with screed.
After fitting the waste pipe, the rest of the floor can be filled with screed to get the required height, and this is often your best opportunity to create a slight angle to ensure that water ends up in the drain. After the screed is applied to the floor, you can add waterproofing and tiling as normal.
Waterproofing & Protection for Wet Rooms
No matter what material your floor is made of, water will always find a way through the gaps, which is why it is so important to make sure that you have adequate waterproofing beneath the floor. There are plenty of waterproofing solutions for modern wet rooms, and as the demand has risen, so has the quality of product and ease of installation.
Using a waterproofing kit is usually easy enough. Most kits use a liquid primer that is applied across the entire floor, and waterproof membranes in the form of tape that cover the cracks in the underfloor. The membrane should also be applied to the areas where the floor meets the wall, we recommend a height of 75mm for this, as this will be another potential area for water to leak through. It's also a good idea to apply the waterproofing to your walls, especially around the shower area, for extra protection.
What is best to buy as protection for wet rooms: We recommend the Impey Waterproofing Tilesafe Kits, which come with everything you need to waterproof your wet room floor and great instructions on how to do so.
Fitting the Wet Room Floor
If you're choosing to use underfloor heating, make sure that your waterproofing will be compatible with it, either by checking the guide or asking the manufacturer directly. We can also help answer your questions on underfloor heating and waterproofing which we are providing. The underfloor heating is installed now, before the rest of the floor.
Add the tiling across the entire floor and the walls around the shower area, if not the entire room, depending on the look you're going for. With this, your wet room should be done.
If you have any questions about the best products to use, or need more information on how to make a wet room work for your home, please call us on 01524 841 087 and we'll be more than happy to help you out.
[related_products]