
There are a ton of accessories and modifications available out there for your self-defense handgun. Some are useful, but let’s be honest — there’s a lot of stuff you can do to your gun that’s not really going to make any measurable difference. But if you’re looking for an upgrade that will actually add some utility to your pistol, I can’t think of many investments better than a laser sight. This is a topic I’ve covered before here on the Lounge. I’m a big fan of laser sights, particularly for their capability in low light situations.

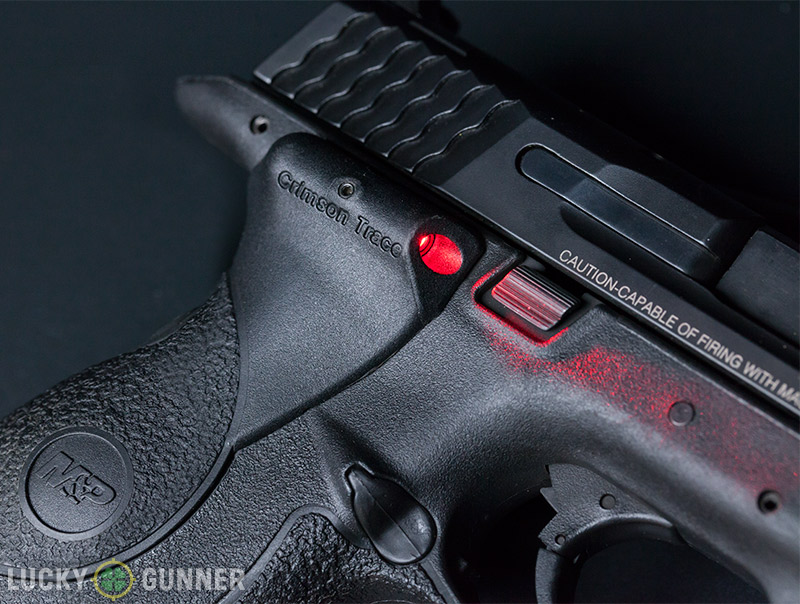
Of the handgun laser sights on the market right now, Crimson Trace is the clear leader, primarily due to their products that feature “instinctive activation”. Their laser grips and laser guards place the activation switch on the grip of the handgun, so as long as you’re holding the gun, the laser is on. No extra switches or buttons to reach for — just present the pistol like normal, and the laser is on the target.
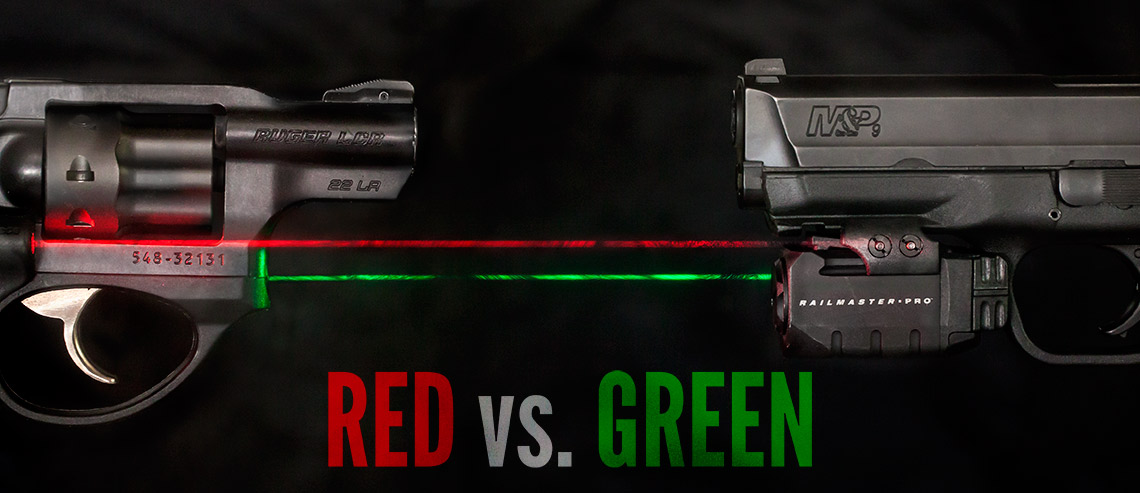
The downside is that these types of lasers only work with the guns they were designed for. Crimson Trace’s catalog covers a wide variety of handguns, including the many of the most popular models, but they don’t have a laser grip or laser guard for every gun out there. So as an alternative, Crimson Trace also offers an assortment of rail-mounted lasers and lights that will fit any handgun or rifle that has an accessory rail. They sent us a Railmaster Pro to review; a rail-mounted unit that includes a 100 lumen light and a green laser rather than the more typical red.
Looking at the new products coming from Crimson Trace and other laser sight manufacturers, it looks like green lasers are the future. They’re supposedly brighter and easier for the human eye to see compared to red lasers. The downside is the power requirement. Green lasers drain batteries quicker and at least for now, they’re also more expensive to manufacture.
So are they really worth the trade-off? I wanted to put the theory to the test. Just looking at the red and green lasers side by side on the wall in my house, the green laser did appear to be brighter. But would my eye actually pick up the green laser quicker on the target at the range?
Setting up the Test
Lighting conditions have a major effect on how visible a laser sight is. So I set up a short drill and ran it during three different times of day with iron sights, a red laser, and a green laser. The first run was in the middle of a cloudless day with bright direct sunlight on the targets. The second run was around dusk with only dim ambient sunlight. The last run was after dark, with no available light except the moon and the built-in flashlight on the Railmaster Pro.
The test gun was my full size Smith & Wesson M&P 9mm. Since I already have a set of red Crimson Trace laser grips for this gun, I was able to simply attach the Railmaster Pro to the accessory rail and easily switch between the red and green lasers. The iron sights are a set of “i-dot” style tritium night sights. The Railmaster Pro has four different modes; laser only, light only, laser and light, and laser with strobing light. So for the runs in the dark, I switched over to “light only” mode when shooting with the irons and the red laser.
Since acquiring a sight picture and sight tracking are both potential advantages of a laser sight, I wanted to make sure there were some target transitions involved in the test. I decided on a simple drill with a target setup very similar to the IDPA classifier. I set up three IDPA cardboard targets side by side at a distance of 10 yards from the shooting position with about 5 feet between each target. I varied the height of each target so that the top of the first target was at about six feet from the ground, the second was closer to four feet, and the third was a little over five feet.
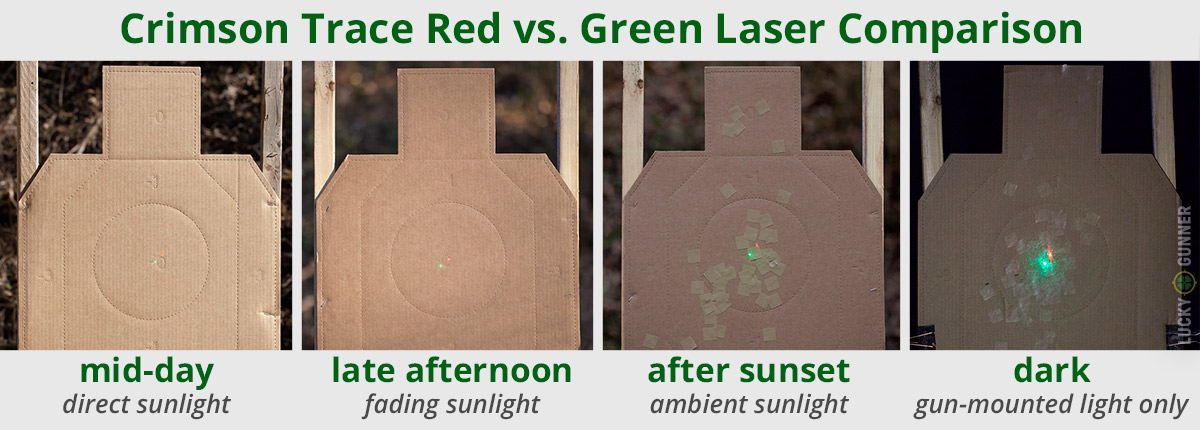
Looking at both lasers projected on a target side by side, you can clearly see how their visibility changes along with the sunlight. I grabbed a quick photo under each of the three lighting conditions that I shot the drill. I also took one in the late afternoon as the sun was starting to fade, but I didn’t shoot the drill in this lighting. The photos were taken with the lasers about 10 feet from the target. That’s closer than I shot the drills, but my camera can’t see the laser as well as a human so the lasers had to be moved in for the pictures. In the low light photo, you can see some “speckling” in the green dot, which occurs when the laser’s lens gets dirty.
The Results
Starting from a low ready position, at the buzzer I fired six shots: two rounds to the chest area of each target, from left to right. In each lighting condition, I ran the drill with iron sights, then the red laser, then the green laser, and repeated the cycle twice. That gave me a score for 9 runs at each light level for a total of 27 runs. Following IDPA’s scoring rules, I added a half second to my time for every shot that landed in the “-1” area outside of the eight inch circle in the center. Here are the average adjusted times of the three runs for each sight under each lighting condition (in seconds):
| Iron Sights | Red Laser | Green Laser | |
| Sunny | 4.81 | 5.16 | 4.47 |
| Dusk | 5.27 | 4.70 | 4.24 |
| Dark | 6.94 | 5.12 | 4.88 |

In all three lighting conditions, my average time was slightly quicker with the green laser than the red laser — by about two thirds of a second in the daylight, half a second at dusk, and a quarter second in the dark. Iron sights were actually faster for me than the red laser in direct sunlight, but slower at dusk, and significantly slower in the dark.
Observations
The numbers don’t lie, but they also don’t tell the whole story. In all three lighting conditions, the green laser was much more visible than the red — more so than the sub-one second time difference would suggest. Using the red laser in bright sunlight, I had to hesitate for a split second on each target to confirm that I could actually see the dot. Crimson Trace claims that the red laser will be visible at 15-25 feet in bright sunlight, so it’s no surprise that shooting from 30 feet, I found it easier to use the iron sights in this kind of light.

I didn’t struggle to see the green laser in daylight, but I have a bad habit of sometimes jerking the trigger the moment I see a good sight picture. So my confidence in being able to see the green dot actually led to a few more missed shots in the -1 zone. As the light faded, the green laser had less of an edge. I’m not a consistent enough shooter to declare that the .24 second difference in my average score with the red and green lasers at night time is a direct reflection of the lasers’ visibility. Both were very easy to see at night, and definitely beat the pants off using iron sights — even illuminated tritium night sights.
The Verdict
Regarding the brightness of red versus green lasers, the Crimson Trace website claims that “red lasers are most visible in low light conditions… The human eye naturally detects green with great ease, allowing it to appear brighter in conditions and environments with higher ambient or natural light.”
Overall, my experience validated these claims. Red is excellent in low light. Green is also highly visible in low light and pretty good in daylight, too. Based on this test, I plan to continue training primarily with my iron sights in daylight conditions and laser sights in low light conditions. I may begin to incorporate more laser sight training in daylight using one of the green lasers, but the priority will always be irons.
Despite the superior visibility of the green laser, if you’re practicing regularly with your handgun, a laser sight is less of an advantage during the day. They’re still great for firing from unconventional positions when you can’t properly align your sights, but in conditions where your iron sights are clearly visible, lasers aren’t quite the game changer they are in low light. That said, the added brightness of the green laser definitely expands its viability to a broader range of lighting conditions.
The Railmaster Pro
The Crimson Trace Railmaster Pro laser/light combo we used for the test is an interesting little unit. It’s smaller and more compact than most other comparable products, but that does come with some drawbacks. First, the light isn’t particularly bright by today’s standards. It was sufficient for getting accurate hits on the target at 10 yards and would probably get the job done for encounters inside a home. The brightness of the beam dropped off quickly at distances beyond 10 yards.

I would suggest supplementing any pistol mounted light with a handheld light anyway. Use the handheld light to ID the target (so you don’t end up pointing your gun at your dog or your family), and the pistol mounted light only for illuminating a known threat so you can fire with both hands on the gun.
I was also disappointed that the Railmaster Pro doesn’t have a momentary only activation switch. There are actually two activation switches, one on either side of the trigger guard, so it’s friendly for both right and left handed shooters. An inward press on either switch activates the unit. Press again to turn it off. I 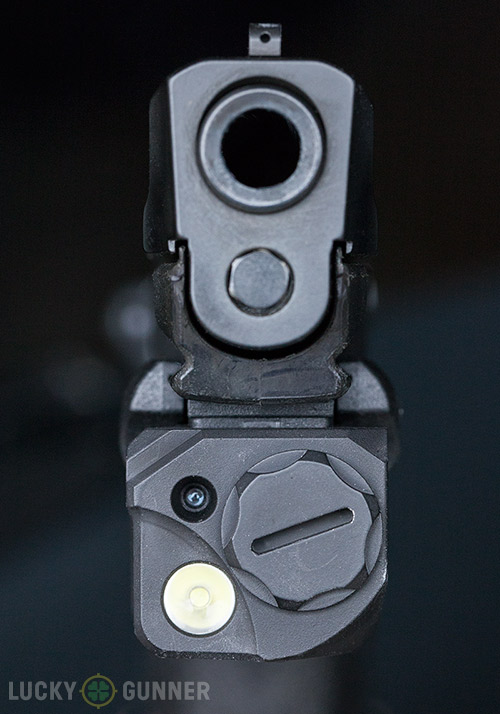 appreciate the simplicity, but I prefer the activation style of most other pistol mounted lights (and handheld lights) that I’ve used, which allow you to hold a switch to activate the light, and release to turn it off.
One advantage the Railmaster Pro does have over much of the competition is the proximity of the laser to the bore line. Some other units feature a light with a large reflector that takes up the entire width of the rail. These lights throw bright beams, but the laser has to be situated either above or below the light, and most are below. With the laser so far from the bore line, it’s tough to zero the laser so that there’s not a significant off-set between the point of aim and point of impact. The Railmaster Pro has its laser at the top of the unit, closer to the bore. The small LED light sits just below the laser, and both are situated beside the battery compartment. This makes for a very compact package, and also means its easier to get a zero that’s closer to the point of impact at varying distances.
The Railmaster Pro will fit just about any handgun that has an accessory rail, and also attaches to picatinny rifle rails. If there aren’t any CT laser grips or laser guards available for your pistol, or you want to have a laser you can move between multiple guns, the Railmaster Pro makes a great “go-to” unit. I’ve even mounted this one to my M&P 22 compact. A suppressed .22 LR with a laser sight is the absolute perfect handgun to get a first time shooter hooked.
The green laser version of the Railmaster Pro requires one CR2 battery, which lasts for one full hour of constant activation. The red laser version will go two hours on the same battery. MSRP is $379 for the green version, $279 for the red. If you want to save a few bucks, you can get the non-Pro version of the Railmaster which is a laser only with no light. MSRP for those is $229 for the green and $159 for the red.