
The cinemagraph is an art form divided: is it a photograph, or a video?
Above all, it's still an animated GIF, dressed in a completely new way. While animated clipart has almost vanished from pages on websites, the animated GIF is still going strong. It's just disguised
under a new look, that of a photograph.
In this tutorial, you'll learn how to make cinemagraphs of your own.
A Brief History of the Cinemagraph
The term "cinemagraph" was coined in 2011, when photographer Jamie Beck and digital artist Kevin Burg used the technique to animate some of their photography and wanted a name other than "animated photo." Photographers were already exploring that way of showing photos with animation, but it was their body of work that attracted attention and got people doing their own cinemagraphs. Suddenly it was trendy to have animated GIFs again, although those modern examples were not based on clipart from the early days of the Web, but really photographs with an area showing minor and repeated movement.
Animated
GIFs are produced by taking a series of photos that are placed together in a
sequence, very much like the frames in a traditional animation: the illusion motion is created
through the rapid display of static images (cinema is nothing more than a
sequence of static images, after all).
Although the use of photographs taken in sequence to create animated GIFS or cinemagraphs is a viable solution, photographers have discovered that video capture gives them more options and are using it to register sequences that can easily be transformed in a seamless loop of frames. Different software solutions make it easy for anyone to create cinemagraphs, although Photoshop is generally the best option.
How to Record for Cinemagraphs
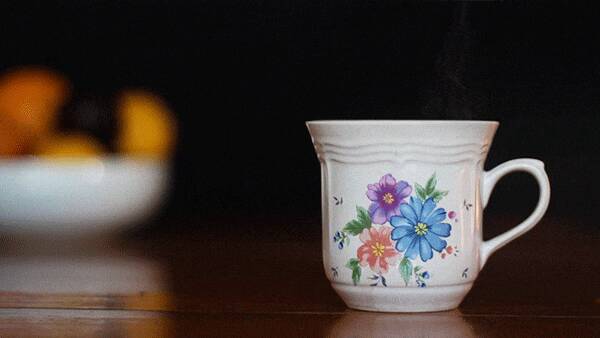
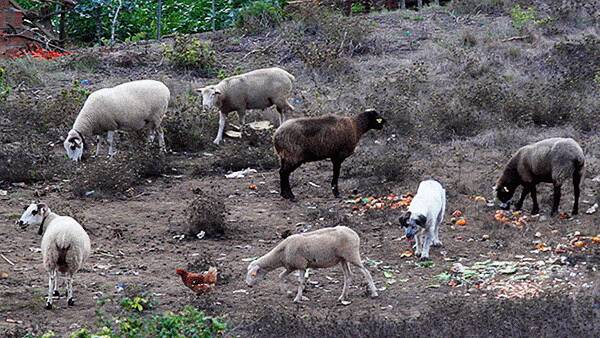
All kinds of subjects make interesting cinemagraphs. The key ingredient is a bit of motion. Repetitive movements work best: they create the illusion of perpetual motion. A static frame is also important for creating that feeling of continuity. Using a tripod is recommended. If you are capable of holding very still and have image-stabilization in your camera or lenses this can work, but it's tricky to do consistently.
Software Selection
If you want to create a cinemagraph using free software, the Cliplets software from Microsoft Research Labs, for PC, is a good option. Microsoft Research Cliplets is an interactive program that gives users the power to create "Cliplets", a type of imagery that sits between stills and video, including imagery such as video textures and cinemagraphs. The program provides a simple, yet expressive, way to mix static and dynamic elements from a video clip.
Record Video to Make Cinemagraphs
Still, the best way to control the whole process is to use a software like Adobe Photoshop. Although it is possible to shoot a sequence of photos to use, video is a better way to go. Shooting video means you have more frames to choose from, as video can be shot at different frame rates, from 24 fps upwards. A segment of some ten seconds of video will provide you with more than enough material to create your first cinemagraphs. Go for simple animations first, to explore the tools and potential of the technique, and with time you'll be able to create more sophisticated cinemagraphs.
How to Make Cinemagraphs
There are multiple ways to create cinemagraphs, but the easiest of them is to choose a segment of video, select a static image from it to use as the base image, and then select the sequence of frames for the animation. Follow along in the example shown in the text and images below.


Step 1: Open Your Video in Photoshop and Create a Static Frame
Start by selecting and opening your video in Photoshop.
The first thing to do is to select one frame that you want to use as the base for your static image. Play through your clip. Once you’ve identified the frame, select the image by clicking the video and Select All (Control-A) and Copy Merged (Shift-Control-C), then and Paste (Shift-Control-V) it on the base image.


Step 2: Move Static Image to Separate Track
Pasting the copied image on the
video Timeline creates a static image after the video clip on the same track. In on the Layers panel, on the right, it appears as a separate layer. Now we want to move the image to its own track in the video time line, so grab the layer on
the right panel and move it above the Video Group. You'll see a new track created in the timeline.
You’ll find that you now have
on the Timeline a Video Group 1 and a Layer 2. You could rename them, for
easier identification, if you were working with more items. As we’re only
using two layers to create our Cinemagraph it is not needed.


Step 3: Align the Clips
The next step is to align the Layer 2 (your photograph from one frame in the video) with the video itself, so they run for the same time. With very short video clips you may need to Zoom in the Timeline using the slider at the bottom (with the mountains) so that you can see everything properly.


Step 4: Reduce Image Size
This is a good moment to reduce the
dimensions of your video. Cinemagraphs are usually relatively small files. Cutting down the data you have to work with at this stage generally makes processing easier. I reduce my image to a longer side of 800 pixels, which
gives me a good compromise of quality and file size for the final cinemagraph.
Select Image > Image Size (Alt-Control-I) and define the new horizontal dimension as 800 pixels. A diaglogue box with open asking you to transform your video into a Smart Layer. Say “Yes”.


Step 5: Cut the Clip
The next step is to choose the part of the video that you want to use in the animation. It has to be a small portion, or the animation will be too heavy. To do this, uncheck the visibility of the Layer 2 on the Layers panel, and select the video. View the video—use the arrows to move between frames—and decide which segment you want to use. Once you’re satisfied, select Video Group 1 and use the scissors tool to cut a beginning and end to the segment. Delete the remaining footage.


Step 6: Trim the Image Clip
Now it is time to readjust the static image to the remaining video segment. Be careful and try to not change the dimensions (and time) of the video clip segment. Zoom in the Timeline so you’ve a good grip on it and move it to the start of the line. Then adjust the duration of the image by clicking and dragging the end of the clip .
Step 7: Mask and Reveal
Now we'll make the magic happen: a layer mask on the photo layer will create the illusion of movement within a static image.
First, select the static image, Layer 1. Then add a layer mask by clicking the Layer Mask icon (a circle inside a rectangle) on the Layers panel bar. Select the mask and paint with a black brush (B) to reveal the layer below.
This sometimes is a time consuming
operation. Use black to reveal and white to hide until your mask produces a result you’re happy with.
Step 8: Final Touches and Export
You can adjust colour and tone. But remember
the final image is going to be a 256 colour GIF, so the colours will be heavily compressed.
Saving the image is the next step. You can always save it at a higher resolution (800 pixels in this case) and then change its dimensions to create a smaller file. The File > Save for Web option will take you to a menu where you can choose the best options, and view results. Remember to keep file sizes small and to set the animated GIF to loop forever!
If you need to optimize your GIF, the easiest way to do it is through a website like EZGif is your best option.
Conclusion
That's it for the technical aspects! There is, still, an interesting note about this process that, again, relates to cinema and deserves to be mentioned. When you create a static image in front of an animated one you're in fact using a technique similar to the matte painting technique pioneered by the visual effects inventor Norman Dawn in the early days of movie making.
The matte process is based on a large plate of glass positioned in front of the motion camera. That glass has the intended scenery painted, with one area left clear, so the actors are filmed through it. That "double layer" created in a single capture allowed to reduce production time, as multiple sceneries, indoor and outdoor, could be done in studio. The introduction of computers in film production changed this, but the way cinemagraphs are created is in fact very similar to the old technique of matte painting.
Recap
- Open your video in photoshop and create a static image
- Move the static image to a separate track
- Align the clips
- Reduce image size
- Cut the clip
- Trim the image clip
- Mask the static and to reveal the moving image below
- Final touches
Happy cinemagraph-making! Share your results in the comments below.


