Open
the file in Maya which was saved in the last part of the tutorial.
Open the file
Step 2
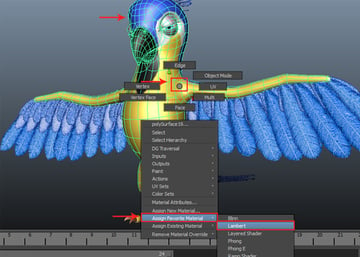
With the
parrot's body selected, secondary-click on the mesh and go to Assign Favorite Material > Lambert.
Assign material
Step 3
With the
body mesh selected, go to Show >Isolate Select and check on View Selected option to isolate the selected
mesh.
Isolate Select
Step 4
Change the Maya mode into rendering mode. Click on the mode arrow
button and select Rendering option
in the drop down list.
Rendering mode
Step 5
With
the parrot mesh selected, go to Texturing
> 3D Paint Tool and click on the option
box.
3D Paint Tool
Step 6
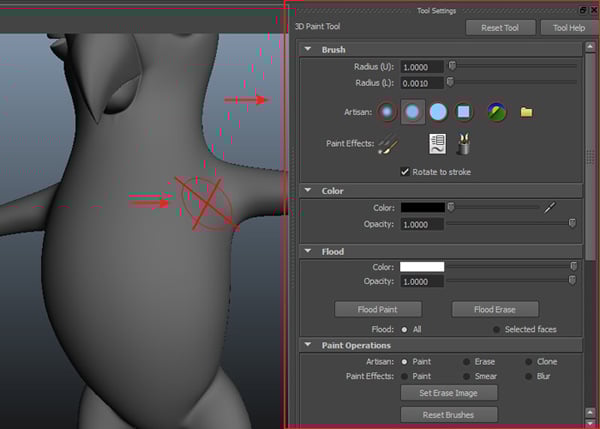
You can see
the 3D Paint Tool settings attributes at the right side of the screen. You will observe the paint brush stroke in
cross mark. Now, you have to assign the texture map node for enabling 3D paint
brush on the selected parrot mesh.
Paint brush stroke
Step 7
Go down in
the attributes panel and choose Attributes
to paint as Incandescence. Click
on Assign/Edit Texture button to
assign the incandescence map.
Incandescence map
Step 8
It opens the
Assign/Edit File Texture window. Keep
Size X and Size Y values as 2048
and then click on Assign/Edit Texture
button.
Assign/Edit File Texture
Step 9
In the 3D Paint Tool settings panel, click on Flood Paint button inside the Flood panel.
3D Paint Tool
Step 10
You can see the
white color has been applied on the selected parrot body mesh.
Parrot body mesh
Step 11
To paint the black color on the parrot body mesh, select Artisan brush profile. Turn on Reflection and ReflectionAxis X options
inside the Stroke panel.
Stroke panel
Step 12
Paint those
areas with black color where you don't want the fur; like beak and eyes.
Beak and eyes
Step 13
You should
paint the beak and eyes parts like this.
Beak and eyes
Step 14
After
painting, save it as a map by clicking on Save
Texture button inside the File
Textures panel.
Save Texture
Step 15
Whenever you
save a texture map, you can see the default path of saving location at the
lower screen of Maya. Select this location path and press Ctrl-C to copy. Open Photoshop and press Ctrl-V button to paste address path in the open document’s
address bar.
Ctrl + C and Ctrl + V
Step 16
This opens
the saved texture map in Photoshop.
Photoshop
Step 17
Save the
texture map file as Bald Map.jpg.
Bald Map.jpg
2. Applying Material
Step 1
With the
parrot body mesh selected, do right click and go to Assign Favorite Material >Lambert
in the fly out menu.
Assign Favorite Material
Step 2
Select Rendering mode to apply the fur on the
parrot body mesh.
Rendering mode
Step 3
Even after
changing the application in rendering mode, you might not see the fur menu on the
main menu bar. In such case, you need to load the fur plug-in.
Fur plug-in
3. Enabling Fur Plug-in
Step 1
Go to Window > Settings/Preferences >Plug-in
Manager to open the plug-in manager.
Plug-in Manager
Step 2
In the
plug-in manager window, turn on Loaded
and Auto Load check boxes of Fur.mll. Click on Close button to close the window.
Fur.mll
4. Applying Fur
Step 1
With the
parrot body mesh selected, go to Fur
> Attach Fur Description >New.
Attach Fur Description
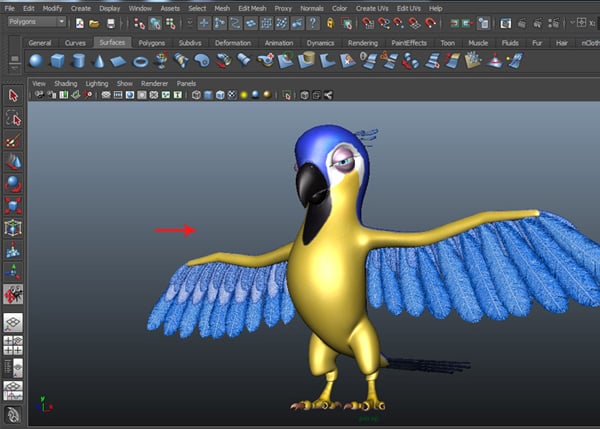
Step 2
After
applying fur, you can see the result in the viewport.
Result
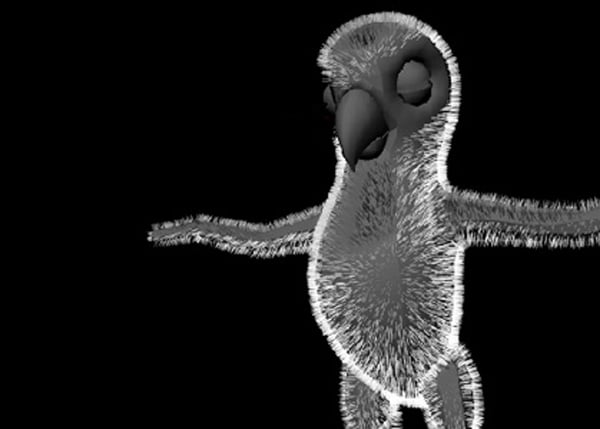
Step 3
Render a
test frame. There are a lot of settings yet to tweak before you could see the
fur properly.
Render a test frame
5. Setting up Fur Attributes
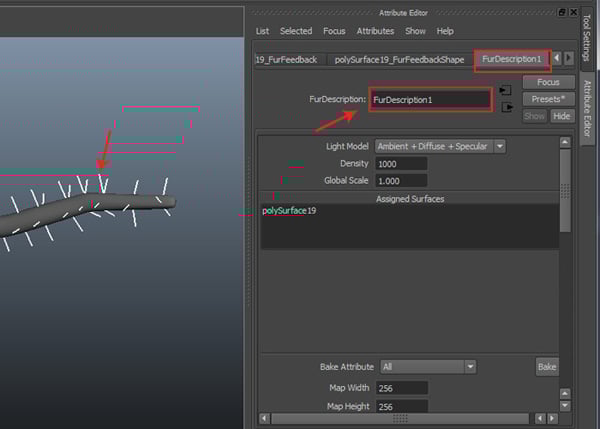
Step 1
With any of the fur strands selected in the viewport, press Ctrl-A button to open the fur
attributes panel. Select FurDescription1
tab.
FurDescription1
Step 2
Scroll down the
slider and find Density and Global Scale. Keep their values as 20000 and 0.500 respectively.
Density and Global Scale
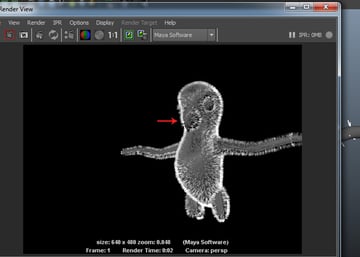
Step 3
Render a
test frame. This time you will find the fur with better density. But the beak
and eyes parts are also covered with fur, which you should take care of.
Render a test frame
6. Applying Bald Map
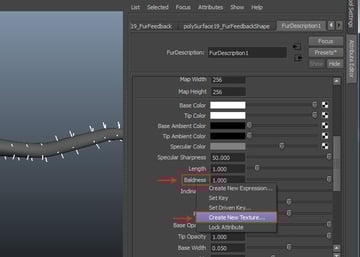
Step 1
In the FurDescription1 attributes, secondary-click
on Baldness property and select Create New Texture option in the fly
out menu.
Create New Texture
Step 2
It opens the
Create Render Node window. Click on File node.
Create Render Node
Step 3
In the File attributes, click on Image Name folder icon.
File attributes
Step 4
Select the Bald Map.jpg file and click on Open button.
Bald Map.jpg
Step 5
After
applying the bald map, click on Bake
button to bake the texture.
Bake the texture
Step 6
After baking
the bald map, you can see the fur distribution on the parrot mesh. This time eyes
and beak areas are unaffected.
Fur
Conclusion
In this part of the tutorial, I showed you how to do 3D painting and create Bald map for applying fur on the distinguished parts of the parrot body mesh. In the next part of the tutorial, I will show you how to create Color maps for the fur and then apply it to the entire parrot body mesh.
Subscribe below and we’ll send you a weekly email summary of all new Design & Illustration tutorials. Never miss out on learning about the next big thing.