

How to Make Lumberjack Plaid

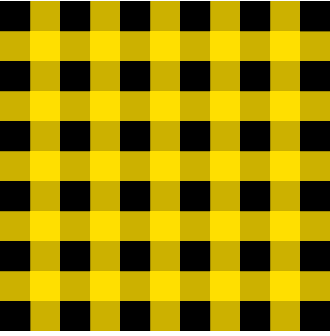
Lumberjack Plaid
How do you think this plaid was created? Squares: stepped and repeated? Or perhaps using a plugin? Or maybe a table? If you guessed table, you are correct! How many rows and columns do you think compose this plaid? 11 rows and columns? Nope. Try 5. This article will teach you how to create lumberjack plaid by applying a custom dashed stroke style to a table. First, let’s start by making a 5×5 table with the rows and columns exactly 60 points wide by 60 points high. Make the text frame larger than the table, because the table will need a little room to grow once the strokes are applied.

Table with cells 60 pt x 60 pt
Next, fill the table cells with yellow. The yellow in traditional Lumberjack plaid is a bit warmed up from InDesign’s default yellow.
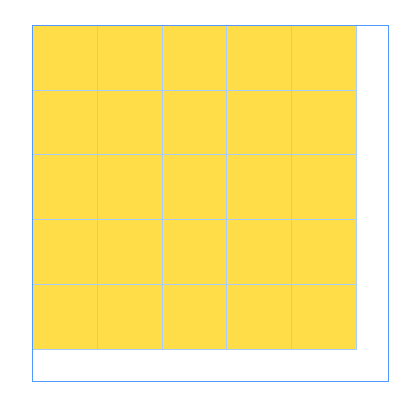
Fill the cells with Yellow
Next, go to the Stroke Panel flyout menu > Stroke Styles.

How to Access the Stroke Styles Dialog Box
Next, make a new dashed stroke style with the settings below. The Length and Pattern Length don’t matter too much for our purposes here. Pattern Length does need to be over 15 points, but anything greater than that will work just as well. The one thing you’ll need to set correctly is Corners. Choose “Adjust Dashes.”
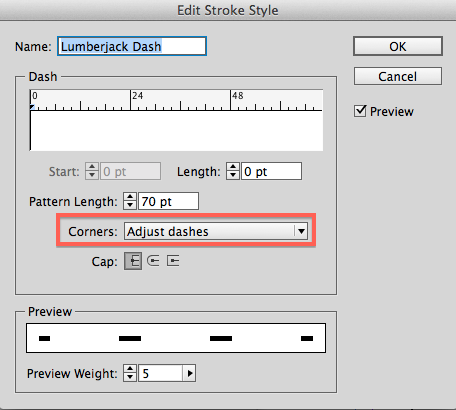
Create the Lumberjack Dash Stroke Style
Now, go back to your table and select the entire thing: all the rows and columns. The easiest way to do this is to click inside one of the table cells. Then press Alt/Cmd + /. That will select the single cell. Then press Alt/Cmd + A to select the entire table.
Next, in the Stroke panel, select all the row and column separators. This can be a little tricky, as those little blue lines are so darn small. The easiest way to select all the lines is to right click anywhere in the table section of the Stroke panel (which is visible whenever you have cell/s in a table selected), then choose Select All.

Select all the Row and Column Separators
Then apply your newly-minted Lumberjack Dash stroke style at 30 pts. (30 points is important because this is exactly half the width and height of the 60 pt cells.)
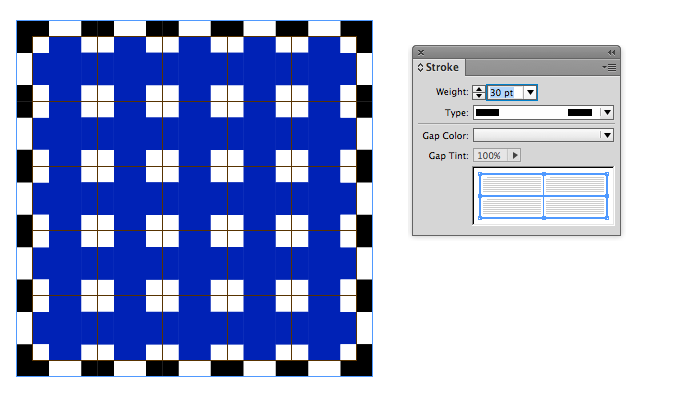
Apply the Lumberjack Dash Stroke Style
Here is the table at this point, completely deselected, so you can see the progress.

Not quite Lumberjack plaid. Almost there!
So how do we get that plaid look? The plaid pattern comes from weaving, at the intersecting of two different colors of yarn: one going vertical (warp) and one going horizontal (weft). Where the two bands of color intersect, it ends up looking like a third color. Because we are creating our plaid in InDesign (as opposed to on a weaving loom), we need to create that third color manually. To get the appropriate darker yellow, copy the warm yellow swatch and add 24% black to it for a CMYK value of 0, 9, 100, 24.
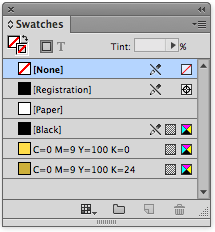
Create your Yellow Swatches
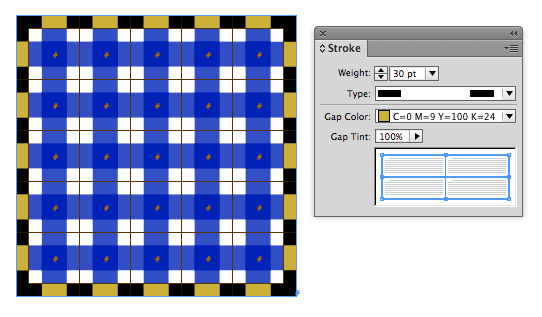
Apply the Gap Color
Completed Lumberjack Plaid
So how is this possible, you ask? This technique takes advantage of the Corners setting in the custom stroke style dialog box. Depending on which corner option you choose, InDesign will adjust the dashes and gaps as necessary, to maintain beautiful corners. But if you choose “None,” InDesign will disregard any concern for beautiful corners, and it will rely strictly on your mathematical input for calculating the corners and dashes. The result, though precise, is often ugly.  But by editing other settings here in the Stroke Styles dialog box, you can achieve some interesting effects.


 But going back to the original design: if you want to enlarge your Lumberjack Plaid design, just Option+ drag on the lower right corner of the table. Because the pattern was created using a table, the pattern will enlarge magically as you drag.

It’s easy to enlarge Lumberjack Plaid! Just Opt+Drag on the lower right corner.
If you decide to change the colors of your plaid, it is very easy. Just edit the colors of your swatches. 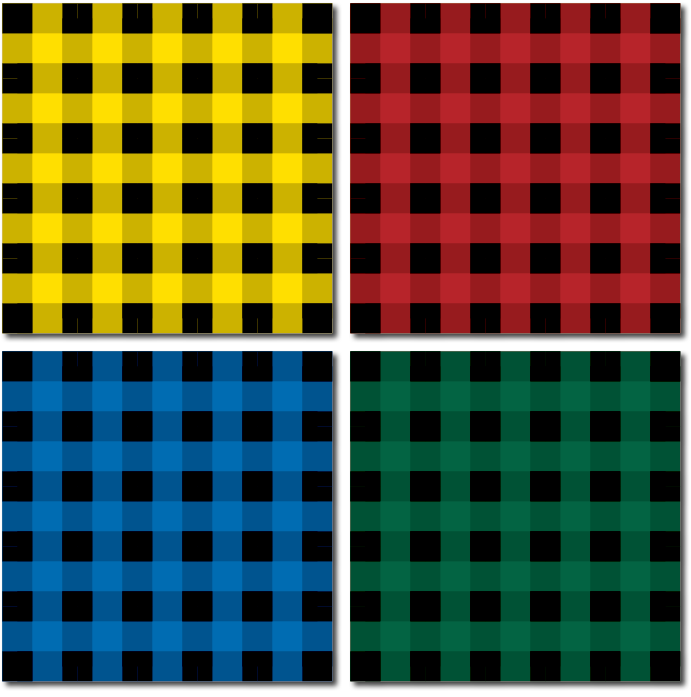
This is fantastic, Kelly! You always have such amazing treats to share!
Awesome, embedding the finished product into the background of an object works really well with pasting it into a background frame. Thanks so much!
Excellent tip! Thank you.
Reminds me of a song …
I’m a lumberjack and I’m ok
I GREP all night and I work all day