Primavera P6 has some great options for viewing and printing Gantt charts that can give you the flexibility you need to meet the reporting demands of peers, senior management and stakeholders. One useful option in Primavera P6 is the ability to open and print a Gantt chart that can be viewed as a Microsoft xps file or a pdf file.
This article discusses how to set up your printer options in Primavera P6 to create an xps or pdf file of the activities view and the corresponding Gantt chart.
Print Setup
The first step is selecting a print to file option in the Print Setup dialog accessed by selecting File | Print Setup from the top drop down menu. From the list of available printers select Microsoft XPS Document Writer or Adobe PDF. You will need an 11×17 paper size to reasonably display both the activities view and Gantt chart. The 11×17 paper size is available for both the Microsoft XPS Document Writer and Adobe PDF file printers. In order to fit both the activities view and Gantt chart on one 11×17 sheet of paper you will need to set the Orientation to Landscape.
Page Setup
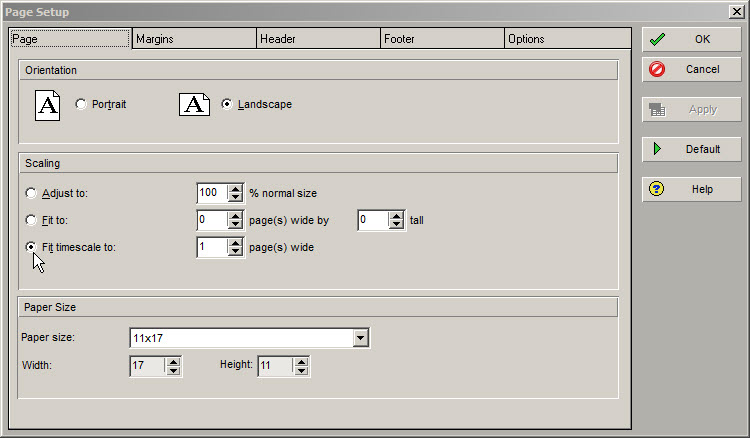
The next step is to set the page setup options. Go to File | Page Setup in the main drop down menu. You will now see your Page orientation and Paper size that we have already set to Landscape and 11×17, respectively. Make certain to select the Fit timescale to toggle and check to see that it is set to 1 page(s) wide, Figure 1.

Figure 1
The margins in the Margins tab may be adjusted to your desired settings, but for our example leave those all set to 0.5. You may also change the headers in the Page Setup Header tab, but for our example leave them at their default settings. Note that if you cannot see the header at the top of the print out adjust the header height using the Height setting option in the top right hand side of the Header tab, Figure 2.
Figure 2

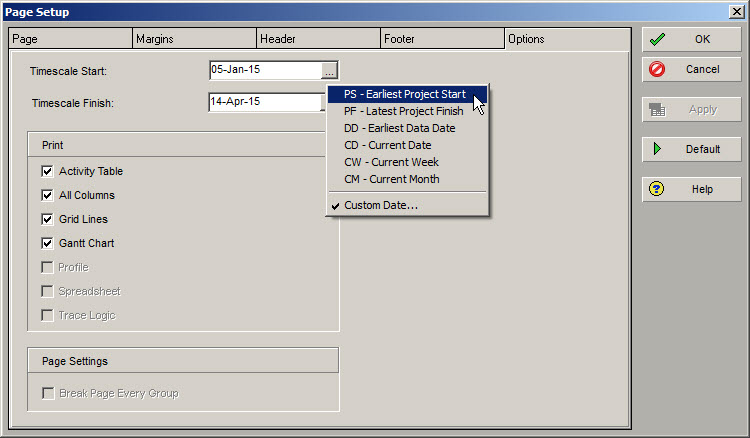
The Option tab has an important set of options for printing out the Gantt chart. In the Timescale Start setting, instead of going with the default start date of the project, select PS – Earliest Project Start from the drop down menu selection, Figure 3.
Figure 3
Now in order to provide a little space (3 days) to the left of the Gantt chart, type in -3D after the PS. Your Timescale Start should now read “PS-3D”, Figure 4.
Figure 4

For your Timescale Finish select PF – Latest Project Finish and type in +5D to provide some (5 days) space to the right of the Gantt chart. Your Timescale Finish should read “PS+5D”, Figure 5.
Figure 5
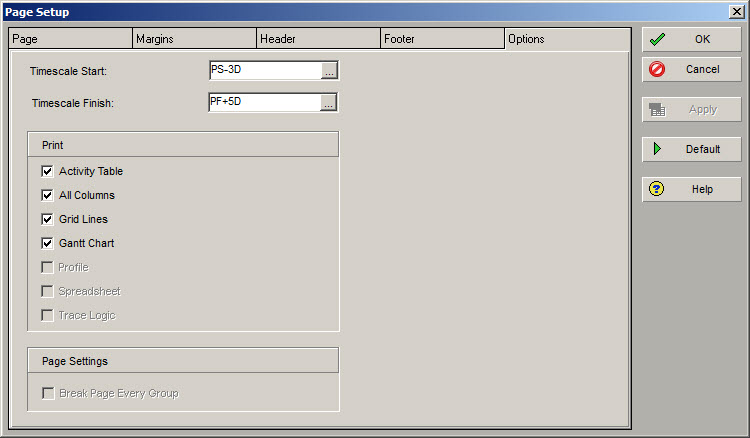
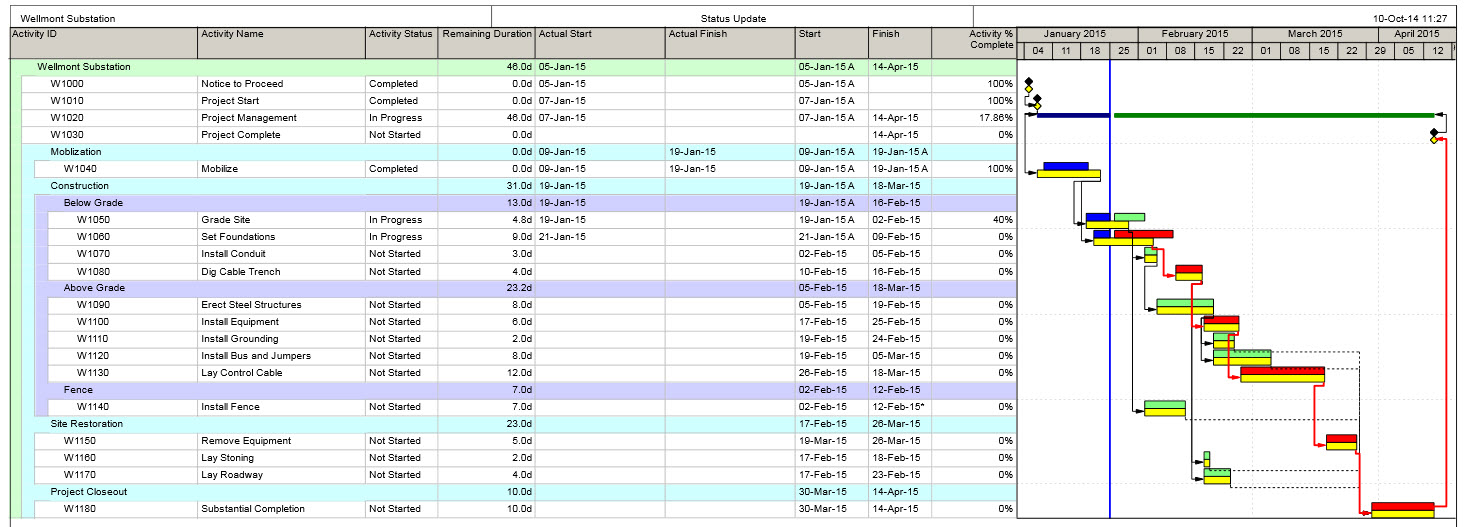
Make certain that Activity Table, All Columns, Grid Lines, and Gantt Chart are all selected. Your Print Options should all be set as displayed again in Figure 5. Now you are ready to print to a file. Select File | Print and select OK to print the activities view and Gantt chart to either an xps file or a pdf file. For our example the print out is displayed in Figure 6.
Figure 6
Summary
Primavera P6 is able to print out the Gantt chart and activities view side by side. The two keys to having the Gant chart fit on the 11×17 landscape paper are:
- Make certain the Page Fit timescale to toggle is selected and set to 1 page wide
- Use the Earliest Project Start minus 3 days and the Latest Project Finish plus 5 days
After you have your Gantt chart clearly displayed in the Adobe or Microsoft XPS Document Writer file printout, you may explore the various options for labeling the Gantt chart bars using the Bars tool in the layout tool group.