

Taking care of an RV is part of being an owner, and there’s no shortage of products available on the market to do all those jobs. But in some instances, the are alternatives that are kinder to the environment and chemical free. Let’s take a look at some ways to keep your RV clean and tidy.
1. A CLEAN EXTERIOR
One of the best things we’ve used for cleaning our RV is a simple soft broom and a bucket. With just some warm water, a mild detergent and a bit of elbow grease, this combination is a gentle way for cleaning the RV’s exterior. We’ve also used a pressure washer on some occasions, but only on the lowest setting and being very careful where the jets are aimed.
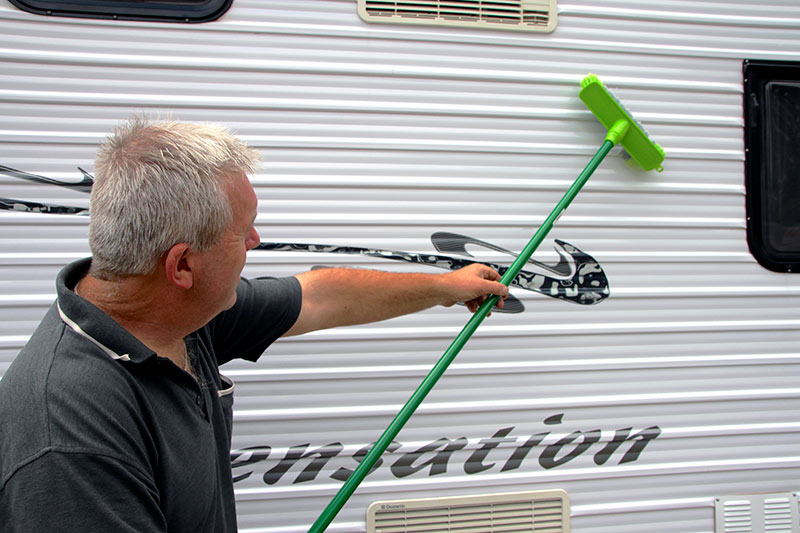 For stubborn marks, like roadwork tar, a citrus-based product that has been allowed to soak in for a few minutes before being washed off can work well.
It’s also a good idea to avoid washing an RV on a hot day; otherwise it may end up with water streaks.
2. CHECKERPLATE
Checkerplate is one of those items that looks fantastic when it’s shiny and clean. There’s a range of products available on the market to help even the dullest of checkerplate, but you need to take care. You could find that some products scratch the metal and make it susceptible to corrosion.
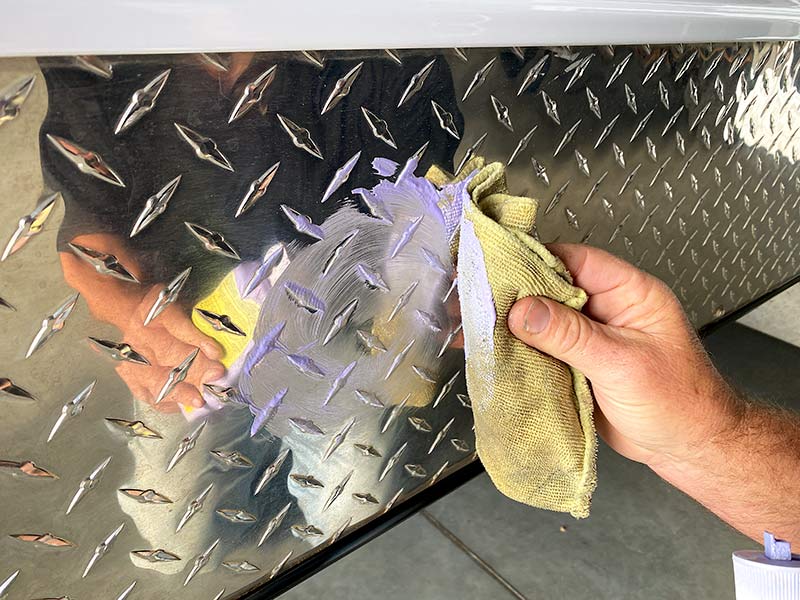 We generally use something like a truck wash or a dedicated aluminium cleaner, as they both work well.
3. WHEELS AND TYRES
Road grime mixed with brake dust will never be easily removed with a simple squirt from a hose. It’s here where a good quality wheel-cleaning brush mixed with a bucket of hot, soapy water and elbow grease will have them looking like new.
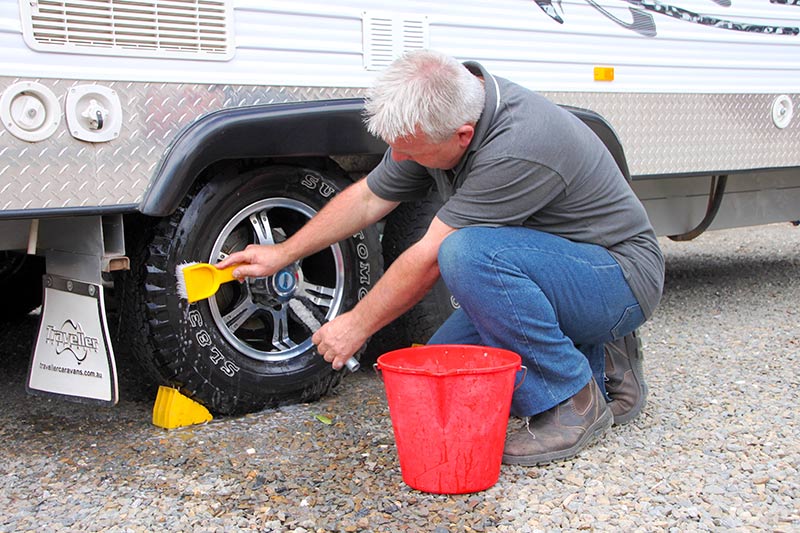 Finish the job by wiping the wheels with a polish wax that’s suitable for your type of wheels, as it will make cleaning them much easier next time.
Tyre walls should also receive a good scrub with a detergent/water mix and finished off with one of the many protective products on the market. Our preference is a simple water-based product that can be applied with a paint brush. It dries without any sticky residue and leaves a protective coating that helps to minimise UV damage.
4. A-FRAME
Give the A-frame a once-over by starting with a light pressure spray. Follow this up with some detergent or truck wash, and soap everything up with a brush or a large sponge. Be sure to include the gas cylinders and regulator.
 The A-frame collects road grime and any paintwork will take a bashing from stones, roadworks and bugs. So use some bug and tar remover where needed. Touch up paint on any areas where there are paint chips to prevent corrosion.
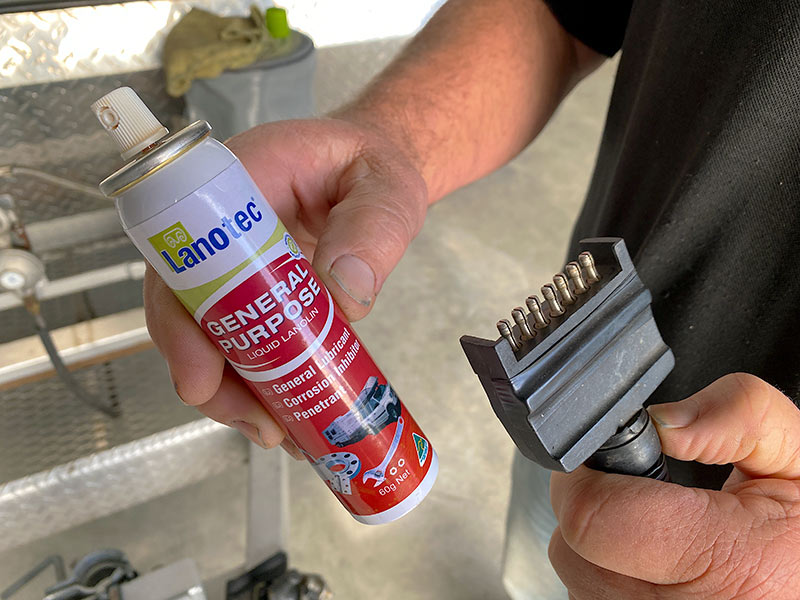
Finish off using a non-solvent-based protector, like Lanotec. Spray it on and wipe over all the surfaces with a soft rag. It will bring dull paint and plastics back to life and leave an all-weather protective coating to surfaces at the same time.
Get into the habit of doing this type of wash and clean periodically to keep your A-frame looking like it just came out of the factory showroom.
5. WINDOWS
An RV’s windows can scratch easily, so use something soft, such as a large sponge and a small amount of mild detergent in some water to do the job. Do not use any harsh cleaners.
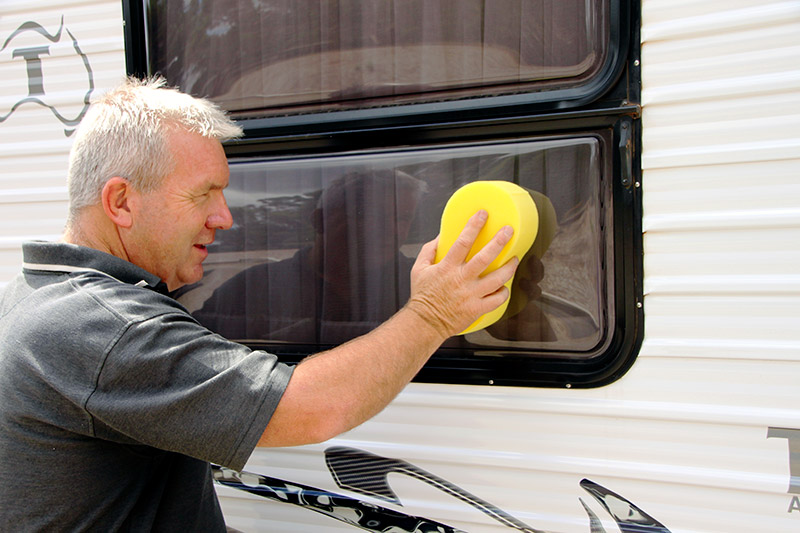 Windows streak when washed in the heat, so run some cold water over them before drying with a chamois or a microfibre cloth.
6. MESH SCREENS
The mesh on an RV’s windows is soft and needs to be treated gently to avoid damage. A simple mix of 20:80 vinegar and water works well.
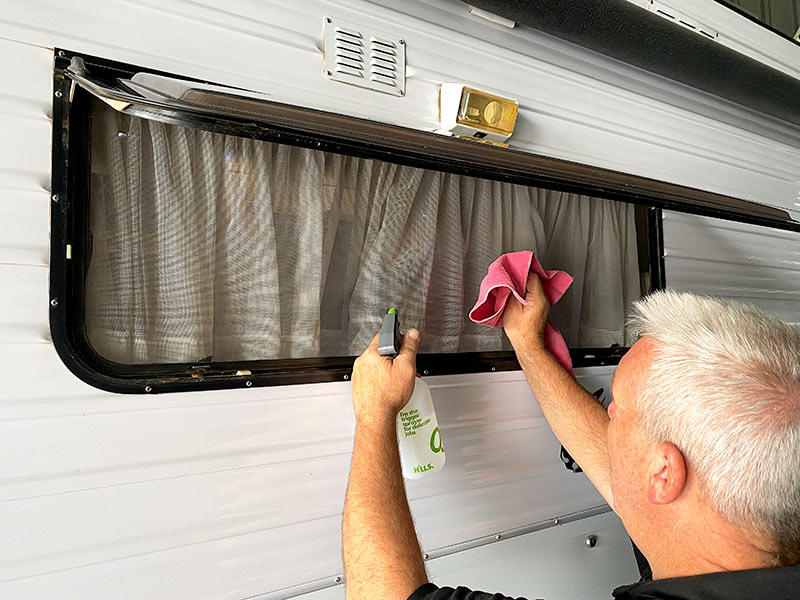 Giving them a good wipe over will have them clean in no time.
7. MOULD AND MILDEW
While there are many commercial products, such as bleach, and other specific products to eliminate mould and mildew, these can damage protective coatings on an RV. We’ve tried all sorts of products in the past, but we now stick to something simple, such as oil of cloves.
It’s environmentally friendly, and only requires a teaspoon in a bucket of warm water to remove these culprits. It also helps prevent the spores from regrowing.
8. SHOWER CUBICLE
An RV’s shower cubicle can soon develop a build-up of soap. There are a couple of different methods for keeping it clean. One way to minimise the build-up is to use shower gel as an alternative to a bar of soap.
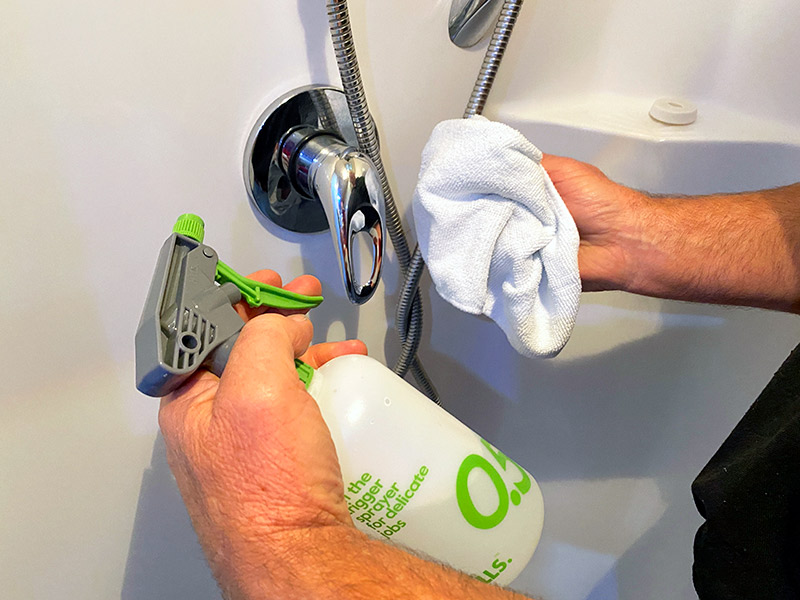 Simply wiping over the cubicle with a microfibre cloth after showering will also do the trick.
9. TOILET
We like to give the toilet cassette a really good clean at the end of each trip. A natural product, like citric acid, is added to the cassette along with some warm water.
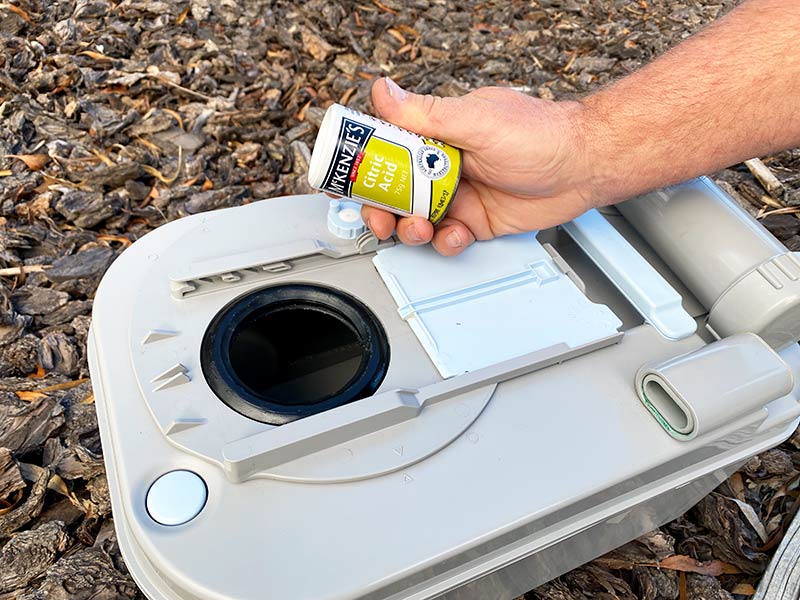 Sloshed around and left to sit for a few hours, the cassette is then emptied. It’s a simple process, yet the cassette is left clean and smelling fresh in readiness for the next trip.
10. OTHER INTERNAL AREAS
Cooking inside can sometimes leave a mess on the cooktop, especially when there’s oil or other fats involved. Simply sprinkle any grease with some bicarb soda or a citrus-based cleaner, then spray on some undiluted vinegar. Leave it for a few minutes before wiping it all off.
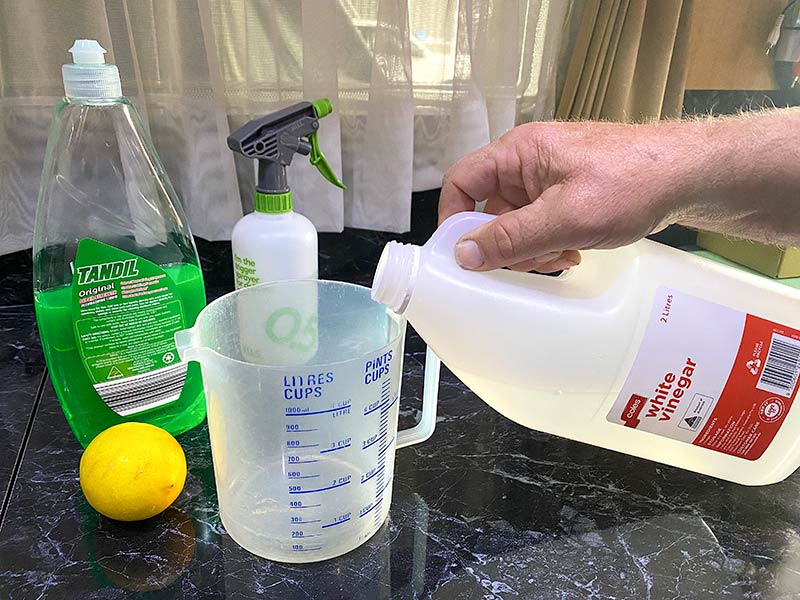 But for an all-round cleaner to use inside an RV, we can’t go past our homemade mix. While there are commercial cleaning products available, using a mix of 20:80 vinegar and water, plus a dash of dishwashing liquid and some lemon juice, works very well.
The mix is kept in a spray bottle and can be used to wipe over most surfaces. We use it for basins and the toilet, as well as for cleaning the shower, vinyl floors, internal walls and benchtops.
Another item we always keep on hand is a packet of microfibre cloths. They have many uses inside and outside the RV, and they are easy to wash, dry and store. This makes them a good all-round touring accessory.
SUMMING UP
While we’d all like a quick fix when it comes to cleaning, the bottom line is you can’t avoid having to use a bit of elbow grease at some stage. But by regularly keeping on top of the cleaning jobs, it will leave your RV in tip-top condition and ready for that next trip.


