


While some people think cheesemaking is complicated, and requires loads of specialized equipment, those of us already making cheese know it takes little more than good milk and a large pot. Unlike commercial mechanized processes, home cheesemaking can happen with just a few repurposed household objects and a basic understanding of biology. The tricks below will be especially useful if you’ve already dabbled in simpler cheese styles such as ricotta or yogurt and are ready to move on to more complex, aged ones.
Adding Cultures
Cheese cultures come in two basic categories. Primary cultures are bacteria that digest the lactose in milk, lowering the pH and helping to turn the milk into curds and whey. Store-bought cultured buttermilk is teeming with a mix of primary cultures.
Secondary cultures are the microorganisms such as bacteria, yeasts, and molds which do the “second leg” of a cheese’s journey, taking it from being a simple, fresh food to something complex, aged, and specific. Often they play an important role in forming the rind (which, in my opinion, is the best part).
A common way to incorporate secondary cultures is to add freeze-dried cultures to the milk early in the process. But this entails buying a pricey packet of cultures. Luckily, there are alternatives for sending your rind in a tasty direction:
From a Friend
Select a vibrant, fresh-looking, robustly rinded cheese from your favorite store. This trick works particularly well for red-rinded cheeses (think Morbier). Be sure that the cheese you buy is high quality to avoid dealing with radiated cheese cultures, various unwanted preservatives, or expired microbes. Bring it home and inoculate a recently made wheel of cheese by rubbing the rind of the store-bought cheese against the surface of the homemade cheese. Rub thoroughly and evenly to ensure a successful cultural transfer.
Beer Wash

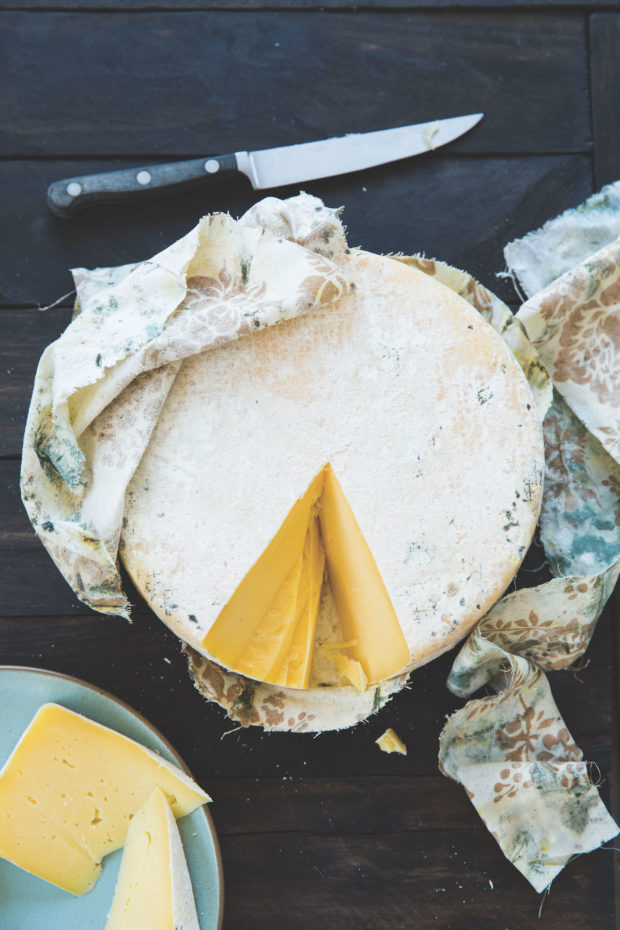
Beer and cheese are good old friends, so it shouldn’t be a surprise that you can create an exquisite cheese rind simply by washing it with beer. Here’s how to do it: At the end of a long day, open a bottle of beer. Pour a bit onto an unopened wheel of recently made homemade cheese (Figure ). Rub the beer into the rind using a scrap of cheese cloth or a dedicated toothbrush. Then enjoy the rest of the bottle yourself.
Growing Mold Spores
Unlike the previous trick, which transfers store-bought secondary cultures onto homemade cheese by rubbing the two together, blue cheese cultures (which are secondary cultures) must be added to the milk earlier in the process. You can grow a batch of blue cheese mold spores quite easily on sterilized bread, and yield enough for a year’s worth of Stiltons. Here’s how:

1. Purchase some fresh, domestic blue cheese. Using a clean knife, cut the cheese in half to expose a fresh surface (you don’t want to take mold spores from the rind or a previously exposed surface). Carefully dig out a penny-sized glob of blue mold (aiming for the blue mold and not the cheese). Set the glob on a clean piece of plastic wrap, then cover and set aside.
2. Take 2 slices of whole wheat bread (it can be stale) and break it up into small, walnut-sized chunks, excluding the crust, and place in a jar. Sprinkle 4 tablespoons of just-boiled water over the bread chunks. Form a lid from a double layer of aluminum foil and press it tightly around the rim, but not airtight. The goal is to let air in while keeping the microbes from getting in and out.
3. Stand the bread-filled, covered jar in a larger pot. Place a weight (a heavy ceramic plate works) on the top of the jar. Add water to the pot, taking care to keep the jar upright and the foil lid from getting wet, then cover it.
4. Bring to a boil and boil for 15 minutes to sterilize the bread and prevent unwanted microbes from growing on it. Turn off heat, carefully remove jar from water, and set on a clean towel. Let it cool for 1 hour.
5. Very carefully, transfer the glob of blue mold spores onto the bread, then quickly close the foil lid. Keep at room temperature in a bright room for 4–6 days by which point the contents of the jar should be completely blue.

6. If using the spores in a batch of cheese right away, take ½ cup of the blued bread out of the jar and place in another clean jar along with ½ cup of the milk you will be using to make cheese. Shake the jar to release the spores from the bread, then strain the spore-rich milk through a clean piece of tightly woven cloth and into your milk vat.
7. The leftover blued bread can be saved in the incubation jar with a secure lid in the fridge for up to 2 months. Remember to use a clean instrument when removing bread pieces from the jar and to resecure the lid promptly to limit air exposure.
How to Age Homemade Cheese (If You Don’t Have a Cave)
Few home cheesemakers have a “cave” (or dedicated refrigeration space) to age cheeses in. Instead, most do the trick of creating “Mini Cheese Caves” by placing shallow plastic bins in the refrigerator. For these bins to work properly, follow these tricks:
1. Place your finished wheel of cheese on top of a sushi mat (or other mesh matting) to allow oxygen to pass on the underside of the cheese wheel. If you place the cheese directly on the bottom of the bin, the base of the wheel will rot.
2. Place the cheese (which rests on the mat) inside a short plastic bin with a lid. The container does not have to be airtight. More important is that the size of the container is relative to the size of the cheese. You want to have the cheese take up approximately 40-60% of the airspace of the container. This container will stay in your fridge.
3. Once the cheese is in its bin, flip it regularly to ensure it gets air on all sides. Air will allow the right molds and bacteria to grow. Lack of air will cause the cheese to rot or develop off-flavors.
4. Remove accumulated moisture from the aging bin with a clean rag or paper towel.
5. Set the lid of the aging bin on lightly, not snapping it on. This allows for moderate airflow. Your cheese will neither suffocate nor dry out if you do this.
6. If you have multiple cheeses in one bin, make sure that they do not touch one another. This is most important when you are making cheeses with white mold rinds (Brie).
7. Keep your hands clean while flipping your aging cheeses. Think about which surfaces you might touch between the hand washing sink and the cheese itself.
How to Make a Cheese Wheel (Without a Proper Cheese Form)
You can easily shape a wheel of ageable cheese using nothing more than cheesecloth—you don’t need to buy a cheese form. Here’s how:
1. Clean a 24 x 24 inch/61 x 61cm square of fine weave cheese cloth (#60 or #90). You may need a larger square depending on the size of your recipe.
2. Place cloth into a colander then place colander in the sink.

3. At the point in the recipe when you are transferring curds into a cheese form, transfer curds into the colander.
4. Allow curds to drain for one minute in the colander then gather the four corners of the cloth and start to twist in order to wring out moisture from the cheese.

5. Keep twisting until the cheese is captured in a tight ball then quickly loop the twist into a knot. Your cheese will be a slightly asymmetrical circle with a knot in the center.

6. Set the cheese pouch back in the colander. Set a large plate on top. Add weights to the plate so that it presses into the cheese. Make sure that whey is draining freely.
How to Press Cheese Without A Cheese Press
Pressing cheese correctly is an art in of itself. Through some trial and error, I have figured out several methods of pressing my homemade cheeses without using an official cheese press. Here are my favorite ‘non-traditional’ options:
Car-Jack Press
In order for this system to work, there needs to be a low ‘ceiling’ for the jack to work against. This might be the bottom side of some cabinets or the underside of a very heavy table. Also, take care to either have a car jack reserved strictly for cheese pressing or to properly cover and isolate the jack. No one wants car grease in his or her Gouda. Proceed by placing the car jack over the freshly made wheel of cheese (in a form, with a lid or follower) and proceeding until proper pressure.
Heavy Object Press
I often use barbell weights to press my cheeses. Barbell weights work well because you know the exact weight you are using. They are easy to come by and easy to adjust. What they do need, though, is some sort of support so that as the cheese compresses, the weights don’t topple over.
Double Bucket Press
Gather two five-gallon food grade buckets (or a nearly equivalent size). Clean and dry both of them, especially the outside and bottom side of the one that will be nesting inside the other.
At the bottom of the first bucket, set several layers of circular cheese mat. Alternatively, look for something that is sturdy, of even height and that can fit symmetrically inside the bucket. I’ve seen people use grated trivets or even the iron cover to a stovetop burner.
Set cheese form (with cheese and follower) on top of the mat or trivet. Then place the second bucket on top so as to sandwich the cheese form. Finally, fill the second bucket with water until it is nearly full. This will be close to 30 lb/13.6 kg worth of weight, a perfect amount for heavy pressing a cheese.
Set the nested buckets somewhere where the contraption can be blocked. An example of a good spot might be the corner of your porch, again the house. Wedge the bucket stack so that the house, the railing, and then two deck chairs on the remaining sides support it. Visit the cheese every 30 minutes for the first two hours to remove built up whey. Afterwards, depending on the height of your propping mat, you may not have to worry about the cheese sitting in whey.
ADVERTISEMENT
Join Make: Community Today


