- Scalability and availability for Azure Web Apps - Wed, Jun 28 2017
- Managing Azure Virtual Machine scale sets - Wed, May 31 2017
- Azure virtual machine scale sets - Mon, May 8 2017
As mentioned briefly in the previous article, cookbooks are the fundamental units that store the required configuration for your environment. We must store recipes in a cookbook and use it to define resources, attributes, and actions for target nodes.
Generate cookbook
You can use the chef generate cookbook command to create a cookbook. You can simply provide a name for your cookbook, or you may want to use additional parameters such as version, license, or email.
But before running the command, you should also do your initial git configuration using the commands below:
git config --global user.email "[email protected]"
git config --global user.name "Your Name"
These two commands set your user name and email address, which each git commit will use. Global parameters also make these settings permanent, so you don't need to run the commands every time.
Now we are ready to create our first cookbook:
chef generate cookbook azurecb01

Creating the first Chef cookbook
The command will create a top-level directory called azurecb01 and bunch of subdirectories and files.
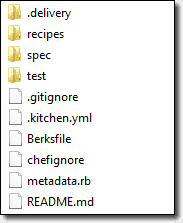
Cookbook directory structure
By the way, it's also possible to download some useful cookbooks from the Chef Supermarket. There are plenty of good resources there, especially when it comes to Windows Server management. For instance, the Windows cookbook is pretty popular and provides lots of Windows specific resources that you can play with.
Here is an easy way to install this cookbook using the knife command:
knife cookbook site install windows
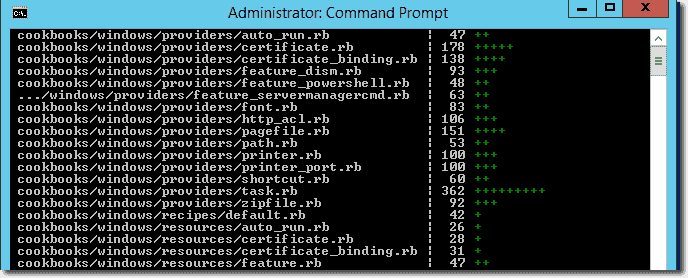
Installing a Windows cookbook from the Chef Supermarket
The best thing about this cookbook is that it includes all libraries and attributes for you to use. You can start writing your recipes simply and easily.
Creating a cookbook and recipe from scratch
In our case, I would like to show you how to create a cookbook and recipe from scratch. To this end, we will start with an empty default.rb file, which is the default recipe for our new cookbook, azurecb01. In this file, we can define a set of commands as per our requirements. For the sake of this blog, I would like to create a custom directory, install an IIS Server role by adding required Windows features, start some Windows services, add couple of registry keys, and create a template file for IIS.
Luckily, Chef maintains six Microsoft Windows dedicated resources: batch, dsc_script, env, powershell_script, registry_key, and windows_package. Recipe files can use these by default.
Here is the recipe file I developed to achieve my goal.
#
# Cookbook:: azurecb01
# Recipe:: default
#
# Copyright:: 2017, The Authors, All Rights Reserved.

directory 'C:\CustomDirectory' do
  action :create
  recursive true
  rights :read, "Everyone"
end

powershell_script 'Install IIS' do
                action :run
                code 'add-windowsfeature Web-Server'
end

template 'c:\inetpub\wwwroot\index.htm' do
                source 'index.htm.erb'
                rights :read, 'Everyone'
end

registry_key 'HKEY_LOCAL_MACHINE\SOFTWARE\Microsoft\Windows\CurrentVersion' do
                values [{
                                :name => "NewRegistryKeyValue",
                                :type => :multi_string,
                                :data => ['foo\0bar\0\0']
                }]
                action :create
end

service "w3svc" do
  action [ :enable, :start ]
end
Let me go through each section quickly:
- The first resource is directory, and I'm using a create action to create a directory. The rights property for this resource configures permissions for users and groups.
- Next is my favorite resource: powershell_script. This is pretty useful on Windows systems, as you can execute PS scripts on target nodes easily. You can use the run action to execute a script. The code property is the exact code you want to execute on remote nodes. In our case, we are adding the IIS Windows feature using the well-known add-windowsfeature
- Another resource is template that we can use to declare a location in which to create a file. We can use this to generate static text files dynamically. I want to create one .htm file for our newly installed IIS so that I can simply browse and access my custom page. To use template, we'll also need to add the required ERB (embedded Ruby) files (defined in the source action) to the cookbook later.
- Next is the registry_key resource, which creates a new registry key for this demo.
- The last section is for the service For the IIS service (w3svc), I'm using the enable and start actions.
Before uploading our cookbook to the Chef server, we need to create an index.htm.erb template file.
chef generate template cookbooks\azurecb01 index.htm.erb
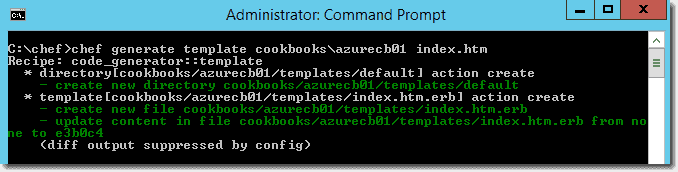
Creating a cookbook template
Then we can simply add some HTML code to this index.htm file to show up on the IIS start page.
We are ready to upload our cookbook to the Chef server from the workstation machine. The knife cookbook subcommand allows you to interact with cookbooks. It is also an argument to upload your cookbooks from a local repository to the Chef server.
We can use knife cookbook upload azurecb01 to upload our new cookbook. You can also use the -a option to upload all local cookbooks to the Chef server at once.

Uploading cookbooks to the Chef server
On the Chef administration webpage, you can see your new cookbook under the Policy section. You can also browse the contents of cookbooks.

Verifying cookbooks on the Chef server
Up to this point, we configured a workstation and installed ChefDK, which includes all tools needed to develop recipes and cookbooks. We created our first cookbook, installed the knife azure plugin, developed our first recipe, and uploaded it to the Chef server.
Creating an Azure VM with Chef
The next step is creating some Azure VMs, applying our cookbook, and then checking whether we've applied all the settings from the recipe file or not.
The knife-azure plugin supports creating Azure virtual machines along with cookbooks. To create a new VM, you'll need an existing Windows Server image. You can list all available Azure stock images with the knife azure image list command.
Use the following command to create your first Azure VM combined with a cookbook. I also strongly suggest using the -VV parameter for a verbose VM-creation process and the –tcp-endpoints parameter to allow access via ports 80 and 3389.
knife azure server create --azure-dns-name 'chefaniltest01' --azure-vm-size Small -I a699494373c04fc0bc8f2bb1389d6106__Windows-Server-2012-R2-20160617-en.us-127GB.vhd --azure-service-location 'West US' --winrm-user chefuser --winrm-password 'P@ssw0rd123*' --r 'recipe[azurecb01]' --tcp-endpoints 80,3389 -VV
After the provisioning, Chef will download a bunch of packages from chef.io and then run them one by one to configure your server accordingly.
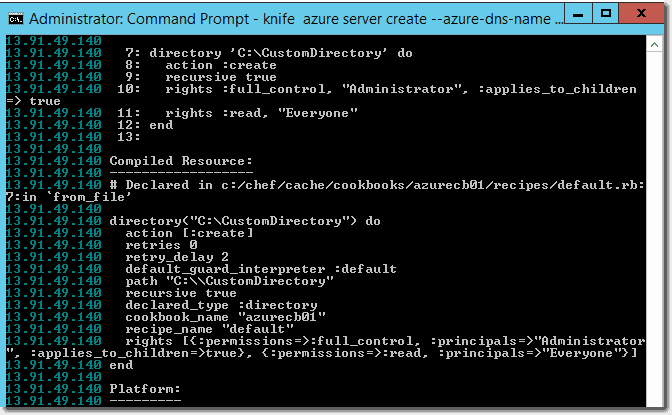
Creating an Azure VM with knife
I'll download my cookbook and recipe to the C:\chef\cache\cookbooks directory on the Azure VM. I'm also expecting to see that all the recipe configurations I defined should be applied on this particular server.
After the script completes all the tasks, we can check whether the configuration is applied on the target VM.

A custom directory created

A registry key created

An index template file copied over to the wwwroot folder

Reaching the IIS index page externally
Thus far, we discussed how to manage and automate Azure virtual machine deployments with Chef. We created a cookbook and recipe to define our configurations. After that, we deployed a new VM using the knife tool and applied our cookbook.
Subscribe to 4sysops newsletter!
In the upcoming blogs, we are going to discuss how to use Chef for Azure Resource Manager deployments and how to integrate Chef with Desired State Configuration.
IT Administration News
- IBM to Acquire HashiCorp, Inc. Creating a Comprehensive End-to-End Hybrid Cloud Platform
- Nation-state hackers exploit Cisco firewall 0-days to backdoor government networks | Ars Technica
- Microsofts Configuration Manager Update 2403 Brings Diagnostic Dashboard, Other New Features
- GitHub Touts 2FA Adoption Success, Looks Ahead to Further Adoption – Thurrott.com
- OpenAI: Introducing more enterprise-grade features for API customers
Join our IT community and read articles without ads!
Do you want to write for 4sysops? We are looking for new authors.