Use this comprehensive guide to complete the 'Love and War' Easter Egg in the Gorod Krovi Zombies map for Call of Duty: Black Ops 3's new Descent expansion.
The recently released Descent expansion for Call of Duty: Black Ops III adds a slew of fresh content to the popular FPS. This new content includes four multiplayer maps, dragons, and of course, yet another Zombies map. Called Gorod Krovi, the new Zombies map has its own extravagant Easter Egg for players to complete, as is tradition for Zombies maps in Call of Duty games.
We recommend Call of Duty: Black Ops III players familiarize themselves with the different areas in Gorod Krovi before attempting its complicated "Love and War" Easter Egg. Also, it's easier if players complete this Easter Egg with friends, though it's possible to conquer it solo.
For those that would prefer to use a video guide, we recommend the one from MrDalekJD below:
[HTML1]
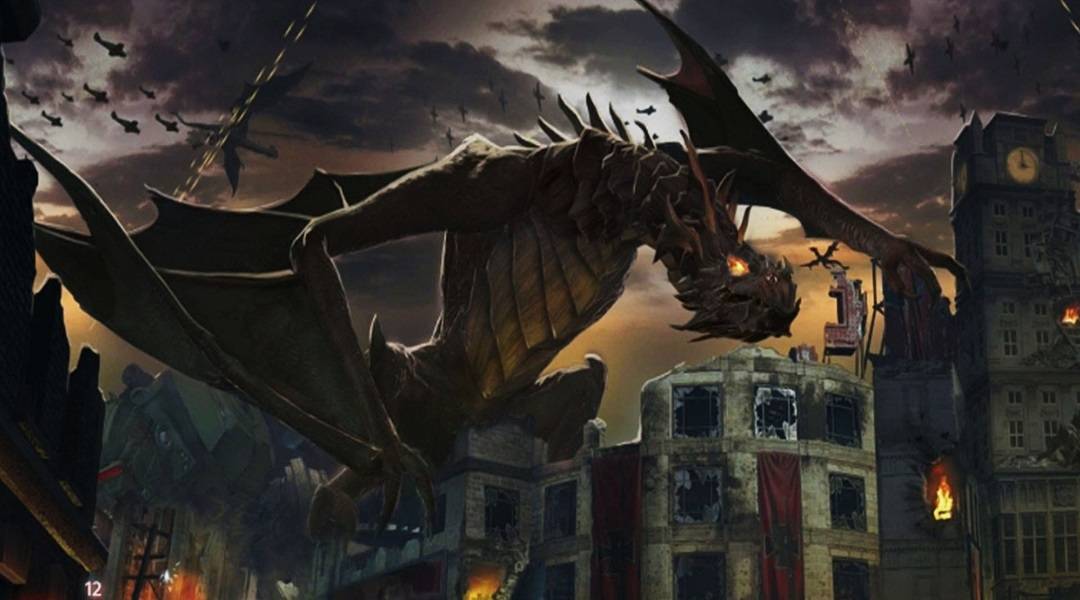
1. Riding the Dragon
In Gorod Krovi, players are actually able to ride a dragon, and summoning the dragon is the first major step to completing the Easter Egg. However, some groundwork needs to be done before players can hope to take to the skies. Namely, players should visit the Dragon Command room to switch on the power.
With the power on, players can focus on collecting the three code cylinders. Zombies killed in Dragon Command, Supply Depot, and Tank Factory will drop these at random, and players will need to collect one from each area. These three areas all have a special terminal where the code cylinders can be deposited, so deliver them to the terminals when possible.
Once a code cylinder has been placed in a terminal, a pod will shoot into the air, and then fall back down to the map. The pods seem to land in different places every time, so players will need to look to the sky for beacons to help them locate the pods. Upon finding a pod, it will be attacked by zombies and other enemies, so sit tight and blast away at anything going after it. When this wave of enemies has been defeated, the code cylinder inside the pod will be upgraded. Retrieve it, take it back to the terminal it came from, and then repeat the process for the two remaining areas.
With all three powered-up code cylinders in place, return to Dragon Command and interact with the large terminal located there to summon the dragon. When the dragon arrives, ride on its back to the Pack-A-Punch building. Expect to visit this place many times throughout the Easter Egg. For now, locate the blue crystal machine in the house, and fight off another wave of enemies. Doing this successfully will grant players access to a devastating weapon called the Dragon Strike Controller, which makes the ray gun look weak by comparison.
(Continued on Next Page)
2. Dragon Egg
Since we will be spending a lot of time there, it's a good idea to take the time to explore the Pack-A-Punch building thoroughly. Definitely be sure to check out the basement, where a sewer grate can be found. To destroy the sewer grate, let a drone fly near it, shoot it, and the resulting explosion should clear a path. With the grate gone, players can use the chute to quickly return to the main portion of the map.
Players will want to grab the dragon egg before they leave, however. The dragon egg rests on wooden boards hanging just above the basement. Shoot at the egg with explosive weapons to make it fall to the ground, and then collect it. Leave the area with the egg in tow, and deliver it to the nest near the Dragon Command signposts. Use the Dragon Strike Controller on the egg to heat it with dragon fire, but know that it will take a few rounds to cool off. We don't need the egg again just yet, so let's move on to building the Guard of Fafnir while it cools down.
3. Guard of Fafnir and Gauntlet of Siegfried
To build the Guard of Fafnir, players will need to acquire three parts that spawn randomly in three distinct locations. One part will spawn in the Armory, one will spawn in the Infirmary, and the third will spawn in the Operations Bunker. Upon acquiring the parts, deliver them all to the workbench in the Operations Bunker to build the Guard of Fafnir.
At this point, there is a possibility that the dragon egg has cooled down. If it hasn't, advance a couple more rounds. When the egg has finally cooled, retrieve it and then go to the challenge board located near the map's spawn point. An "Incubate an Egg" challenge should be listed on the board, though what it will ask of the player is random. Complete three of the random challenges, and then return to the Pack-A-Punch building.
Completing the three Incubate an Egg challenges will allow players to place the egg in an incubator located near Pack-A-Punch. Place the egg inside one of the incubators, and be ready to fight off another wave of enemies. At this point, players should be equipped with powerful weapons (like one of the ray guns) and also have helpful perks like Juggernog if they want to stand a chance at surviving against the more intense waves.
Anyway, staying close to the egg and going through two waves of enemies will cause it to finish the incubation process. Pick the egg back up, and then use the sewer chute to return to the challenge board. Approach the challenge board to complete the Incubate an Egg challenge and be rewarded with the Gauntlet of Siegfried for the trouble.
(Continued on Next Page)
4. Valve Chambers
[HTML2]
This may be the most complex step in a Zombies map to date, and so we highly recommend watching the above video for help. The gist of it is players need to destroy a drone near the generator in the Pack-A-Punch building, and then complete a randomized valve puzzle where the point is to reroute air currents. The randomness of this step is what makes it so frustrating, but after getting past this, players should be well on their way to earning one of the most difficult of all of Black Ops III's trophies. Furthermore, this step also gifts players with the very important master cylinder item.
5. S.O.P.H.I.A.
The orb-shaped computer terminal pictured above is named S.O.P.H.I.A., and it is integral to completing the Easter Egg. The first thing players will want to do with S.O.P.H.I.A. is collect the six trophies scattered throughout the map. This step can be a bit tedious, especially on the higher rounds, but at least the trophies aren't in random locations every time.
The trophies can be found in the following areas:
- Dragon Command - Shoot the left hand of the soldier statue to make the trophy appear.
- Operations Bunker - Use the Gauntlet of Siegfried on the safe near the workbench.
- Pack-A-Punch Building - Shoot the glowing red pipe in the sewer chute and then check the broken toilet.
- Supply Depot (1) - Activate the laser beam trap in the Supply Depot, and then check the wall where the laser hit.
- Supply Depot (2) - Shoot the green puddle in the streets with the Dragon Strike Controller.
- Tank Factory - Shoot the open pipe with the Guard of Fafnir shield.
With all six trophies collected, it's time to take them and the master cylinder to S.O.P.H.I.A to start the trials. Interact with S.O.P.H.I.A. and input the password "KRONOS" into the terminal to begin the trials. There are five trials in total, with the first two simple escort missions. The third trial asks players to locate a pod just outside of the map, kill zombies near it, and then use the Gauntlet of Siegfried to collect its contents.
Take the contents of the pod to the teleporter pad that the escort trials led to, and then begin the fourth trial. The fourth trial consists o a yellow orb that flies around the map that speaks when it is shot. Make it speak three times, and then move on to the fifth, final, and most difficult trial.
The fifth trial requires players to defuse bombs that spawn randomly on the map, and do so in a specific order. The map terminal located near S.O.P.H.I.A. indicates where the bombs are located in a general sense, and what order players need to defuse them in. This trial is made especially difficult by the fact that, like the valve puzzle, it is random, and players are asked to do it within two minutes.
With a little luck and patience, all five trials will be completed. At that point, a red keycard can be retrieved from the map terminal near S.O.P.H.I.A. that needs to be taken to the Pack-A-Punch building. Insert the keycard into the computer there, and fight off the extra wave of enemies that spawns. Once that's over, grab the keycard and head back to S.O.P.H.I.A. Use the keycard on it, take the power core that it dispenses, and then leave the area.
(Continued on Next Page)
6. Nikolai
Players should now notice classic Zombies character Nikolai roaming just outside the map in a mech suit. Get as close as possible to Nikolai and his mech, and then fire the Gauntlet of Siegfried at him. The Gauntlet of Siegfried should deliver S.O.P.H.I.A.'s power core to Nikolai. Upon returning to S.O.P.H.I.A., it should leave, revealing a secret exit in the process.
Use this exit to initiate a battle with the dragon. Simply shoot the glowing weak points on the dragon created by Nikolai until it is dead. Afterwards, players will have to engage Nikolai himself in battle, but again, it's not too difficult. Just shoot his clearly designated, glowing weak spots until he is defeated, and enjoy the ending cinematic.
And with that, players will have completed the latest Easter Egg for Call of Duty: Black Ops III, introduced in the Descent expansion. However, with Black Ops III's season pass promising at least one more expansion, there should be another Zombies Easter egg to conquer in the near future.
More Zombies Easter Egg Guides for Black Ops III:
Call of Duty: Black Ops III is available now for PC, PS3, PS4, Xbox 360, and Xbox One.
Source: Gameranx, jedixking98, MrDalekJD