During that same time, I've taken to using Oracle Enterprise Linux for all my software installs, from the database (11gR1 > 11gR2), OBIEE (10.1.3.4 > 11.1.1.5), Informatica components, so on and so forth. I can say with all honesty now, that I would prefer a nix install over a Windows 2008 Server install (security being the biggest issue I have, not that it's bad, I have no idea...let's just say I find it annoying that if I can install the software, I should have access to the directories...which apparently I don't).
All of my testing is done with VirtualBox. For my XP virtual machines, I've gotten to the point where I simply clone an existing "base" VDI and use that (for clients mostly, and some OBIEE software).
Often times I'll allocate n GBs of space. Occasionally, like with my first few attempts with OBIEE, I don't allocate enough space. For me, that means recreating the entire VM with n + x number of GBs. Silly, I know.
I don't have to do that any longer, I finally learned how to add space without starting from scratch. Yay for me.
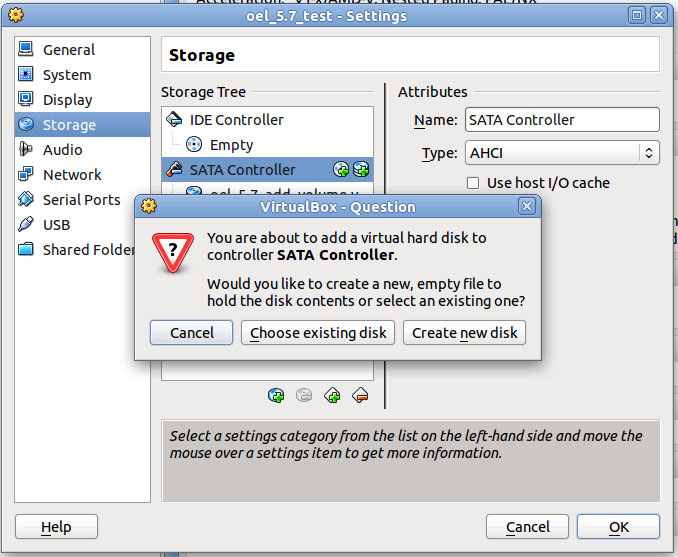
First up, I go into the settings of the VM (while stopped, of course) and add a new SATA controller. I select Create new disk.
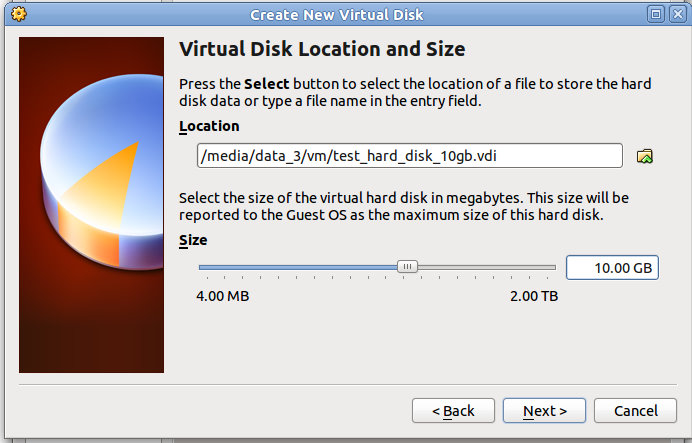
Please ignore the "10" GBs part, I had taken those screenshots last week. I'm actually adding 100 GBs for the remainder of this exercise. I choose a location, name it and give it a size in GBs.
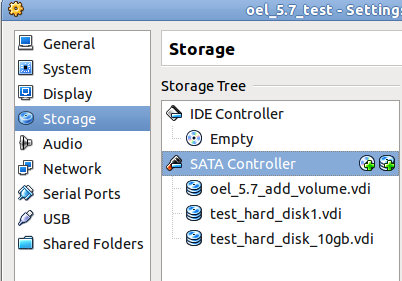
Now you can see (forget the 10, it's 100) it listed in the Storage section of the VM Settings
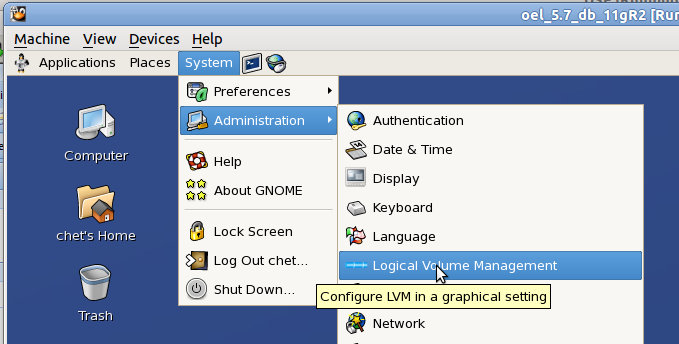
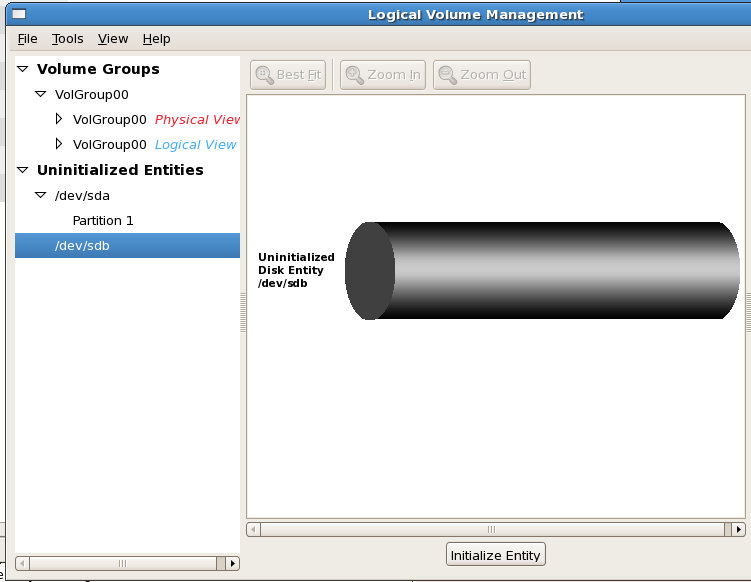
So now I fire up my VM (OEL 5.7), go to System > Administration > Logical Volume Managment. You'll be prompted for the root password.
Under the Uninitialized Entities, you should see the disk you just added. Select Initialize Entry.
 3
3
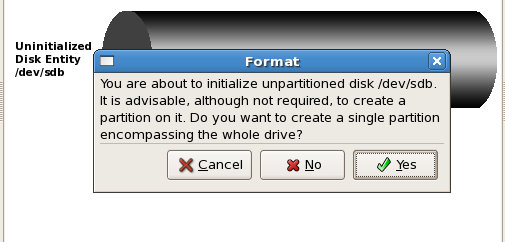
Blah blah blah. Yes.
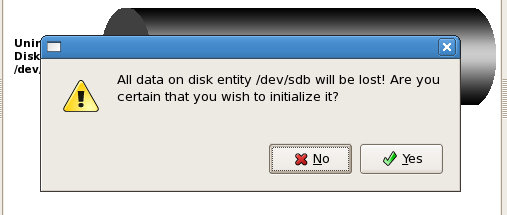
Blah blah blah. Yes.
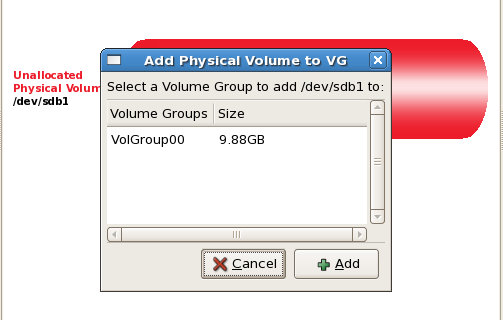
Now it's migraterd up to your Unallocated Volumes section. Add to existing Volume Group.
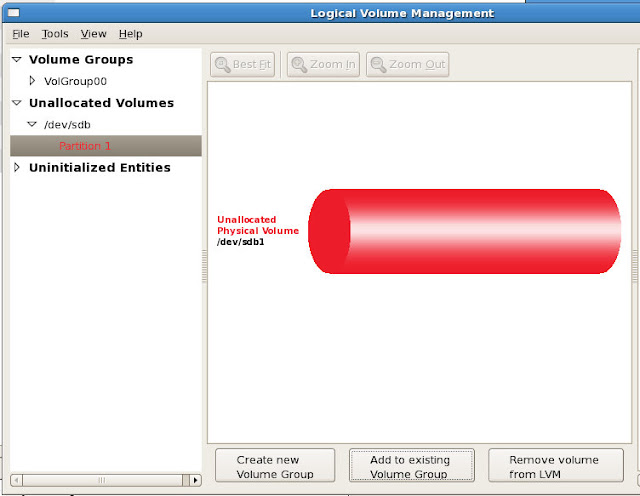
You should be prompted with your currently existing Volume Group, in my case, VolGroup00. Select it and then click Add.
Here's a picture of what I have allocated so far, 4.8 GiB (the rest is swap space)
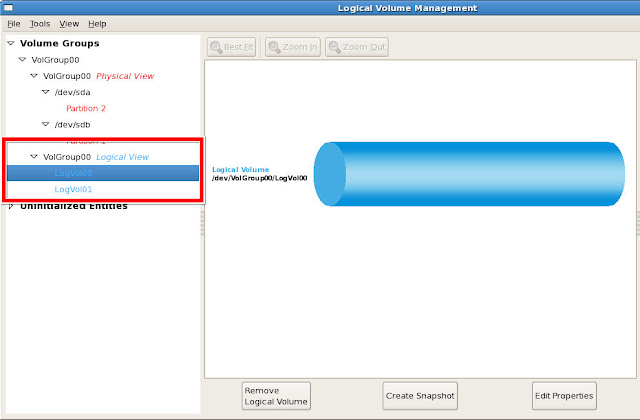
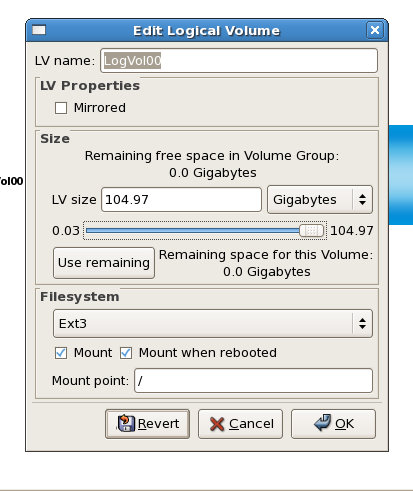
Now, under VolGroup00 (Logical View), select Edit Properties
You'll be prompted with the Edit Logical Volume dialog. On the slider, you can see that it goes up to 104.97 and just below that a, "Use remaining space for this volume: 99.97 Gigabytes"
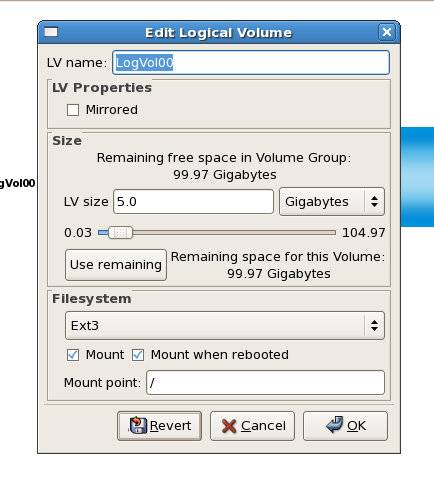
You can choose either one.
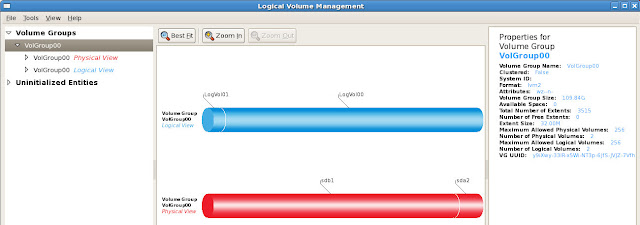
Now you can usee that VolGroup00 has 2 physical volumes which comprise it, sda2 and sdb1, sdb1 is the one I've just added. To the right, you can see the Volume Group Size is now 109.84.
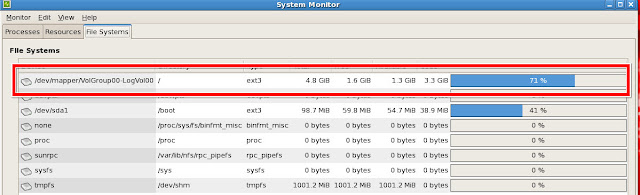
And finally, System Monitor shows that I now have a total of 101.7 GiBs associated with VolGroup00-LogVol00
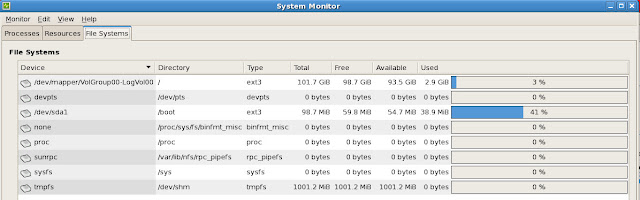
It's as simple as that.
Someday I'll figure out how to add different disks (well, technically they are different disks, just logically only 1) so that I can layout my tablespaces a bit better. For now though, no more recreating virtual machines just because I didn't plan well enough.
No comments:
Post a Comment