Running Spring Boot Java application as a Microservice in Service Fabric - Part 3
Let'd do a quick summary of previous 2 posts.
Part 1: Covered creating Spring Boot application using Eclipse
Part 2: Covered deploying this application to service fabric on a local cluster.
In this post, we'll take a look at how we can use Visual Studio Team Services (VSTS) for implementing CI/CD pipeline to deploy to Azure. Project which I was working on has been pushed to GitHub and I'll use it as a source control repository to start CI/CD process.
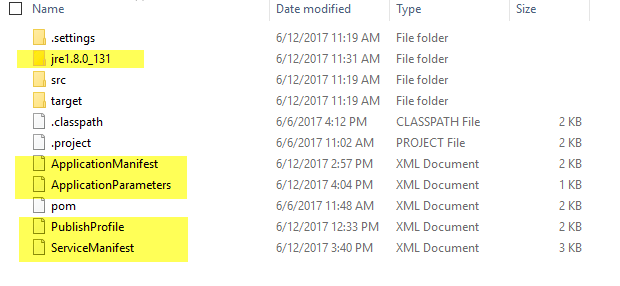
Ensure that you copy JRE folder and following Service Fabric specific files to Sprint Boot application and keep them at same location as pom.xml.
- JRE: Folder that we earlier copied inside Code folder in Service Fabric solution.
- ApplicationManifest.xml
- ApplicationParameters.xml
- PublishProfile.xml
- ServiceManifest.xml
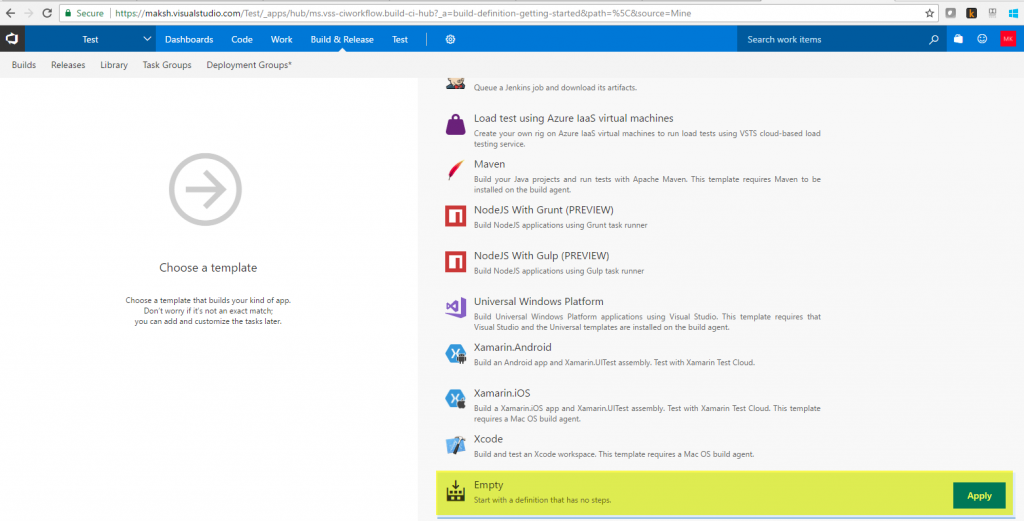
Lets start with building CI/CD pipeline. Navigate to "Build" menu in VSTS home page and click "New" button.

Select "Empty" as a template.
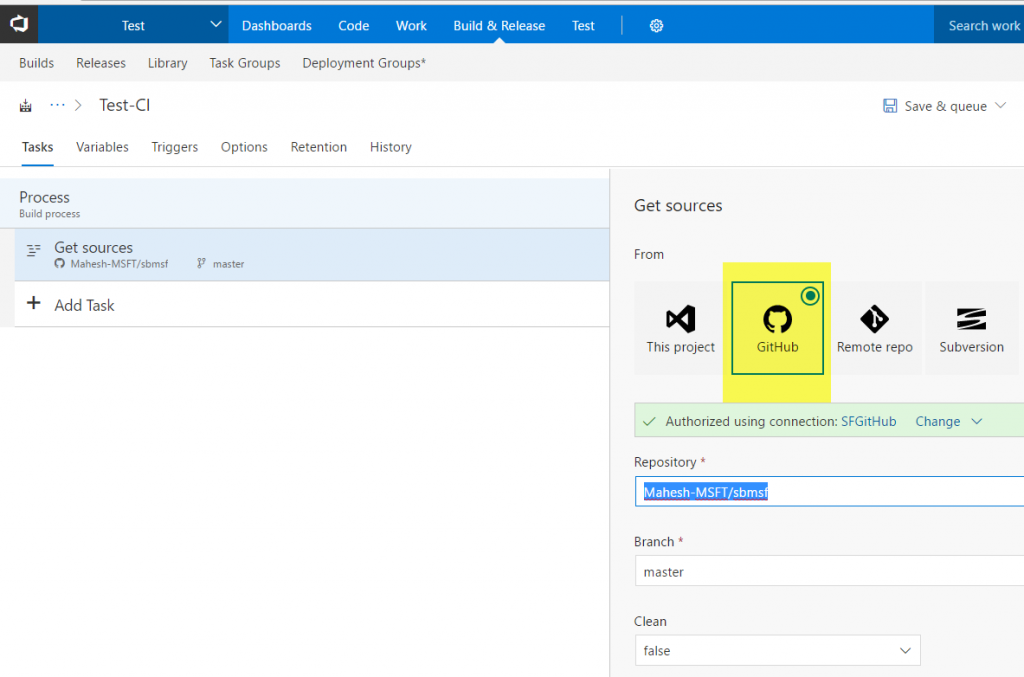
Select the "Github" as source control repository. You can also choose from other options shown. Select repository and branch name.
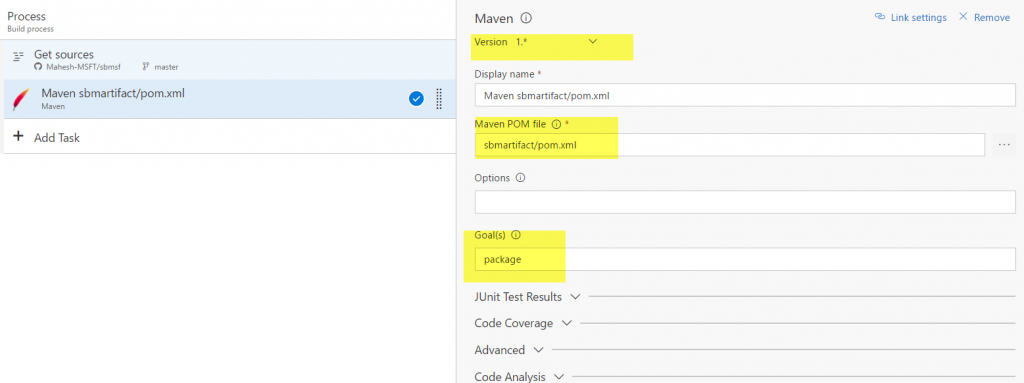
Next add a Maven Build as a task.
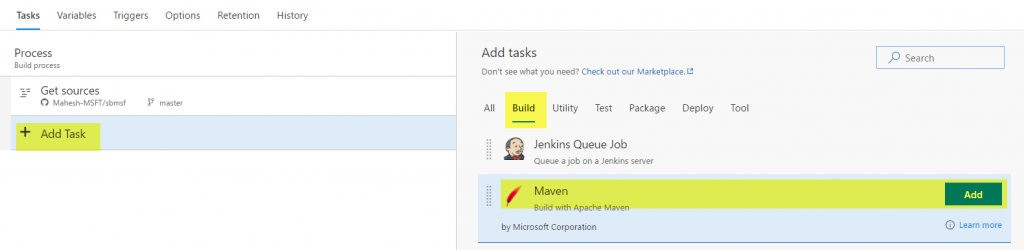
Select the Maven version, path to pom.xml file and goal(package).
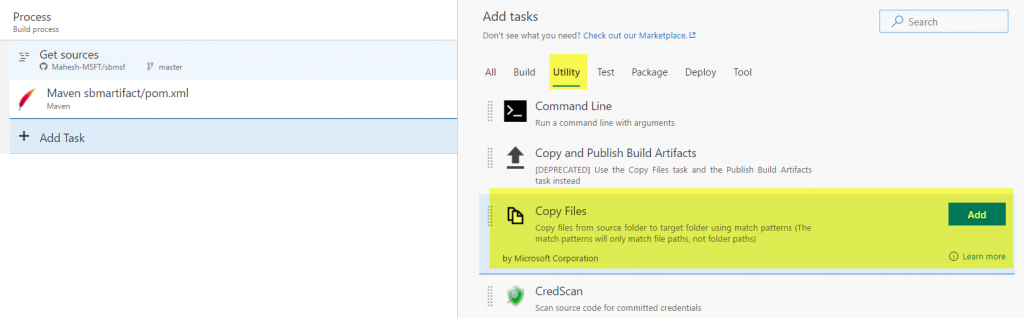
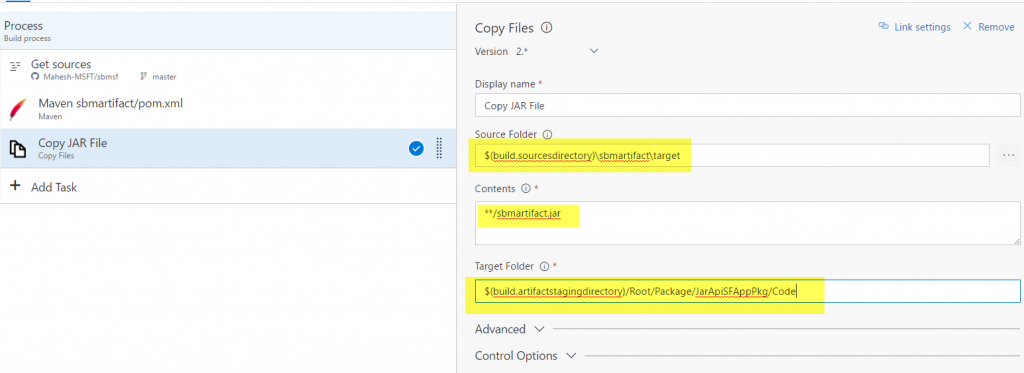
Next add a "Copy Files" task to copy JAR file generated by previous Maven build step and configure as shown below. We will create a service fabric VS solution structure using CI/CD pipeline.
Note target folder is in source location denoted by variable $(build.sourcesdirectory). Maven build step generates JAR file in this source directory location. Specify **/sbmartifact.jar in "Contents" box, which is JAR file name as mentioned in pom.xml file. Finally copy this jar file to a staging directory denoted by build variable $(build.artifactstagingdirectory). This is where we start to construct service fabric VS solution structure. Folder stucture specified here is Root/Package/JarApiSFAppPkg/Code.
Next add task to copy JRE folder

Add Copy ApplicationManifest.xml file task. Note target folder location. It's at root of the Package. 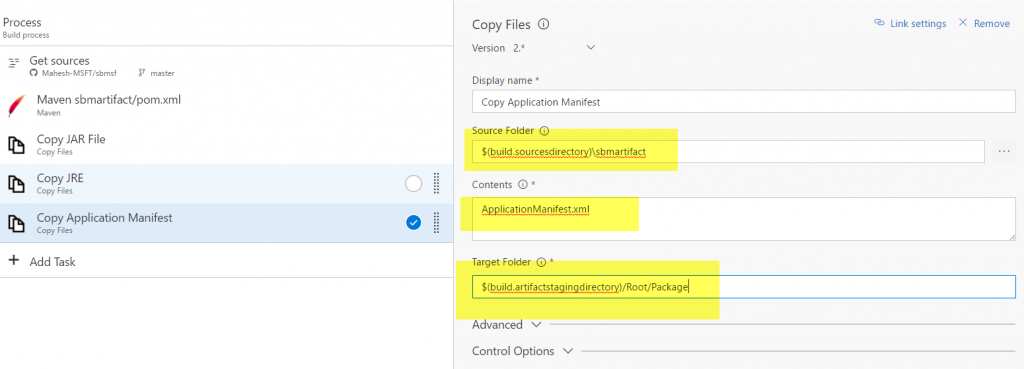
Add Copy ServiceManifest.xml file task. Note target folder location. It's 1 level below root Package . 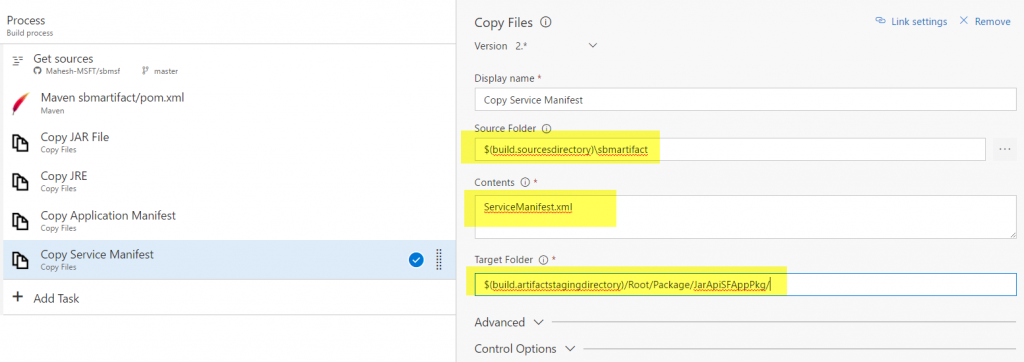
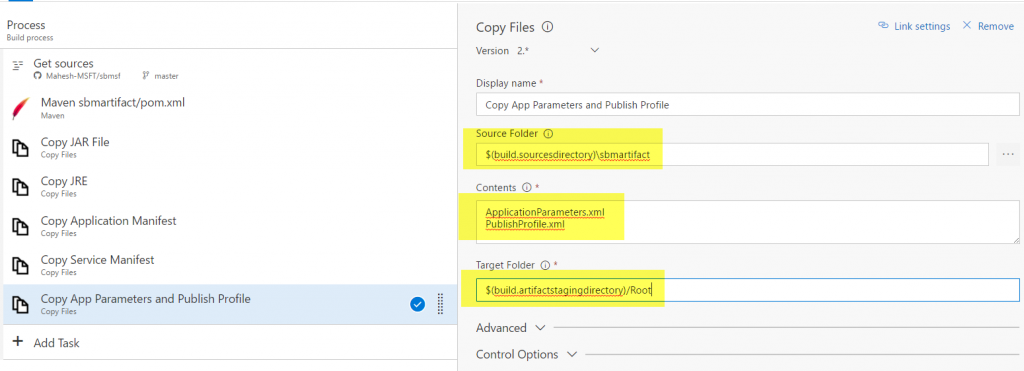
Now copy ApplicationParameters.xml and PublishProfile.xml files.
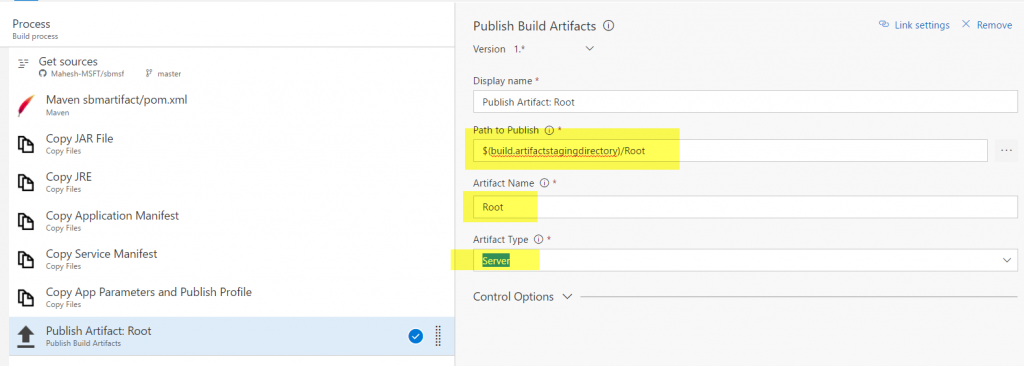
Finally, add a "Publish Build Artifact" task. Publish Root folder that was constructed by earlier tasks.
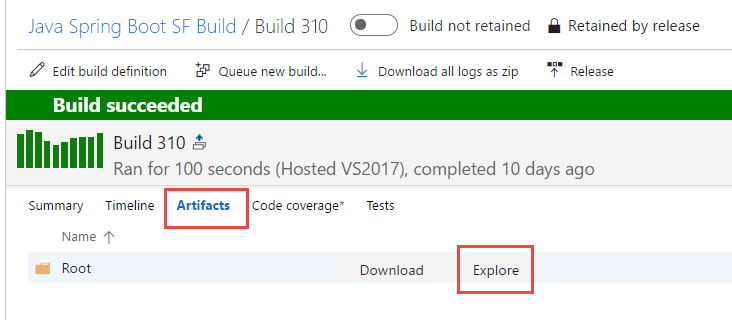
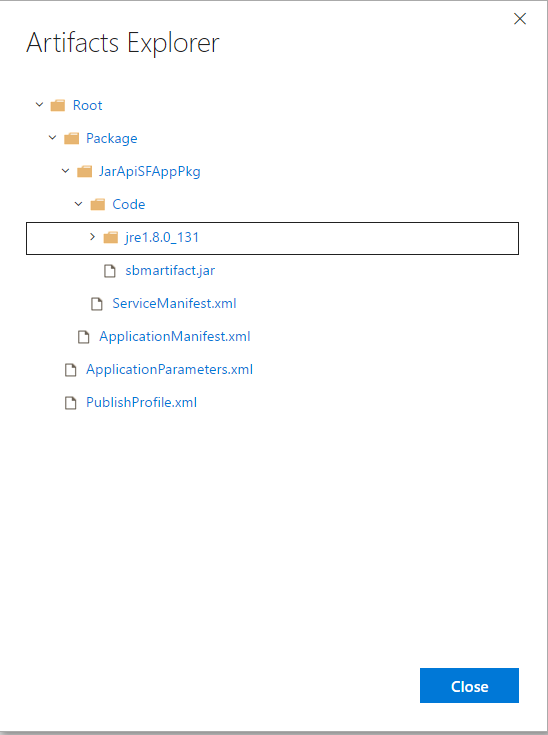
After this build finishes its run, take a look at "Artifact Explorer". It should have all files and directories arranged as shown below.
We now have got all the build artifacts ready for deployment to Azure. Let's see how we can deploy this application to Azure. There are 2 pre-requisites before we can get started with deployment.
- A Service Fabric cluster already deployed in Azure. See these instructions for setting this up.
- Azure Service Fabric Endpoint in VSTS. See these instructions for setting this up.
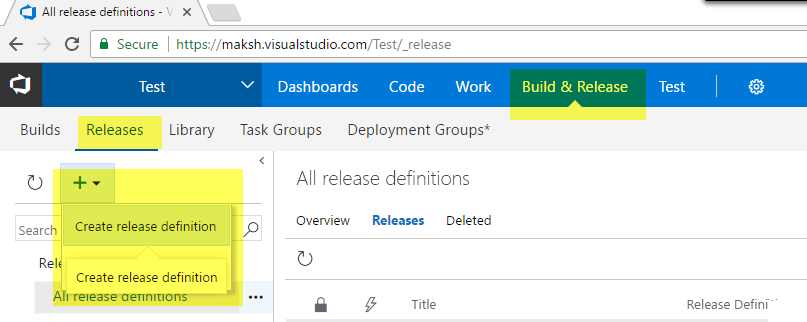
One above pre-requisites are fulfilled, lets go back to our build definition. Click Build & Release --> Releases--> +create release definition.
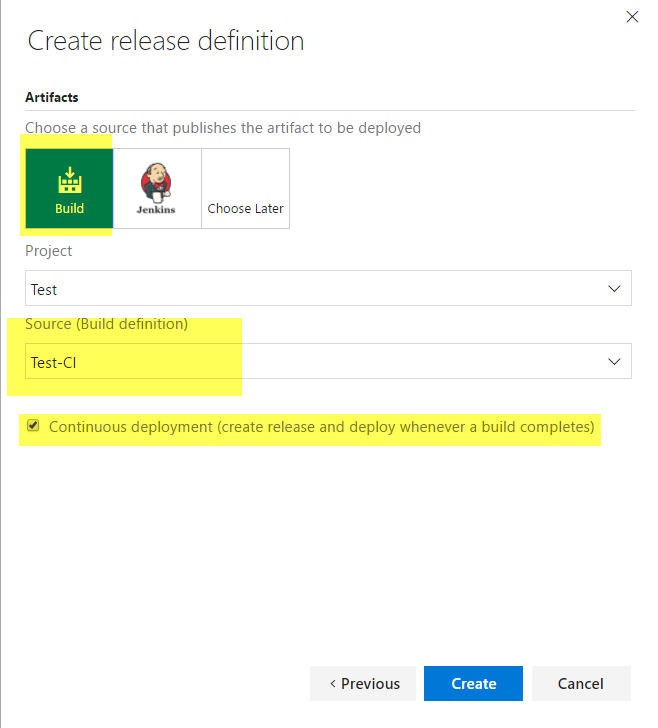
Select "Azure Service Fabric Deployment" as a template.

Select the "Source (Build Definition)" we just created from the drop-down. Ensure "Continuous deployment" checkbox is ticked.
Click "Create" button and a screen as shown below should be presented.
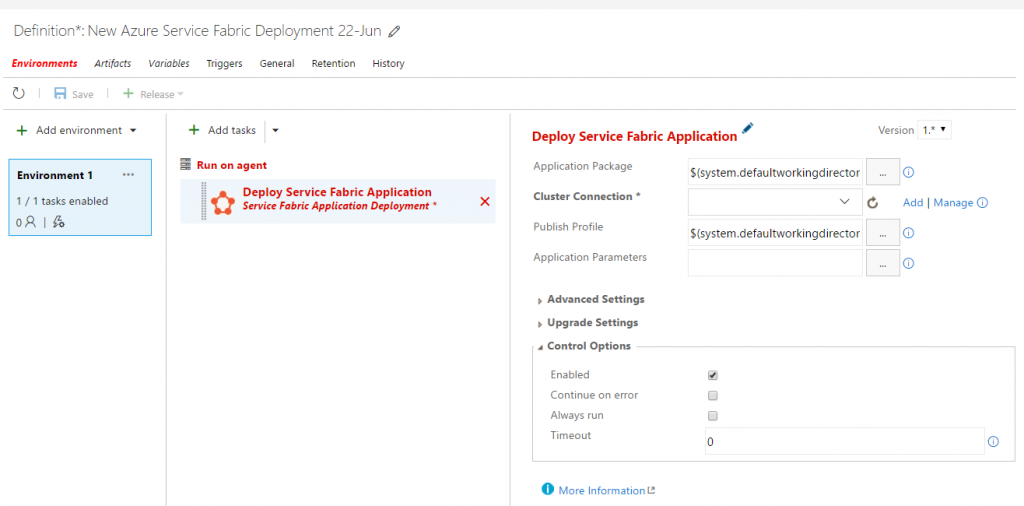
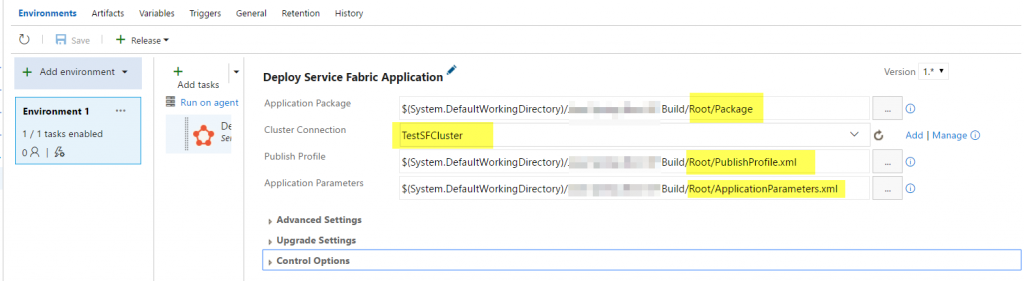
Populate values as shown below.
- Application Package: This value should be Root/Package folder.
- Cluster Connection: This value should be selected from drop-down. It is populated by azure service fabric endpoint set as pre-requisite.
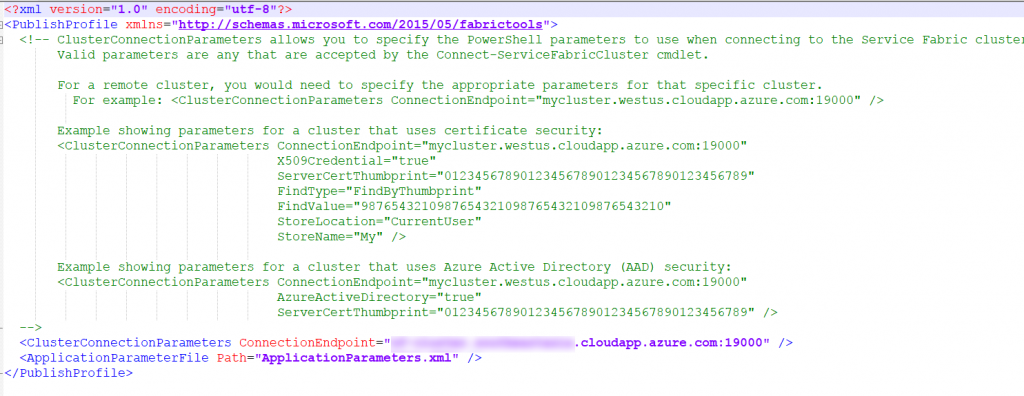
- Publish Profile: Should be used to connect with Azure based SF cluster. An example is shown below.
- Applicaiton Parameters: It is referred from Publish Profile. Typically contains instance_count setting for service.
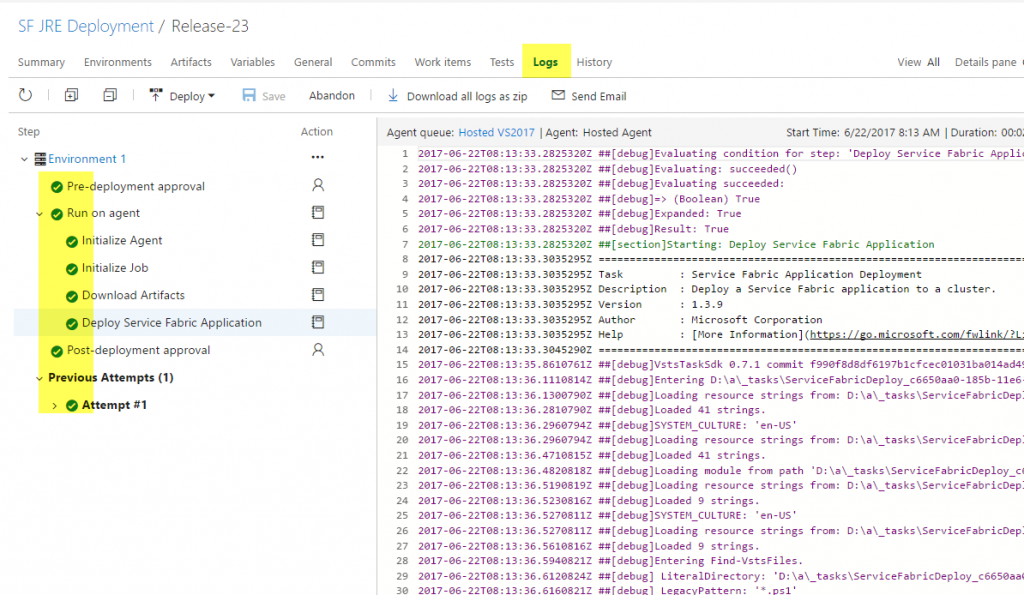
Now, deploy this release and verify all deploy steps are completed successfully.
Navigate to Azure Service Fabric Explorer and verify application has got deployed successfully and cluster is healthy.

Given that this application runs on port 8080, a load-balancing rule needs to be added to Sevice Fabric cluster in Azure as shown below.
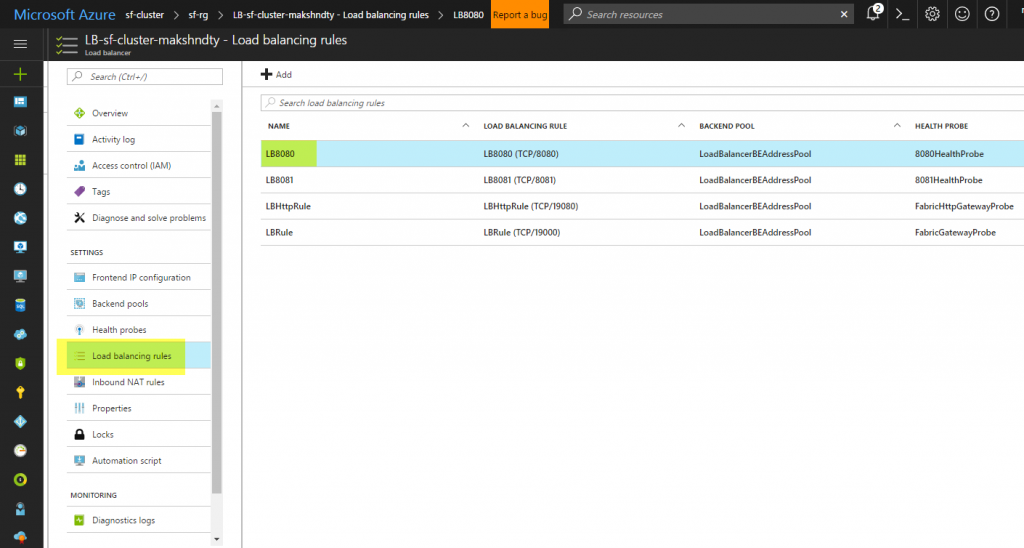
Once the load-balancing rule is added, verify that application is working as expected navigating to service fabric URL.
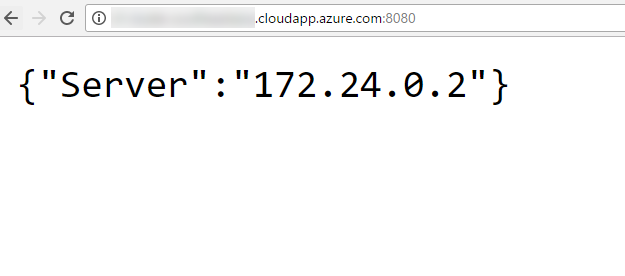
There it is - a Spring Boot Fat Jar application running as a microservice in Service Fabric in Azure using CI/CD pipeline in VSTS.
But there's more! in next part, I'll show how to containerize this application and run it in Service Fabric as a container.