Heading out the door? Read this article on the new Outside+ app available now on iOS devices for members! Download the app.
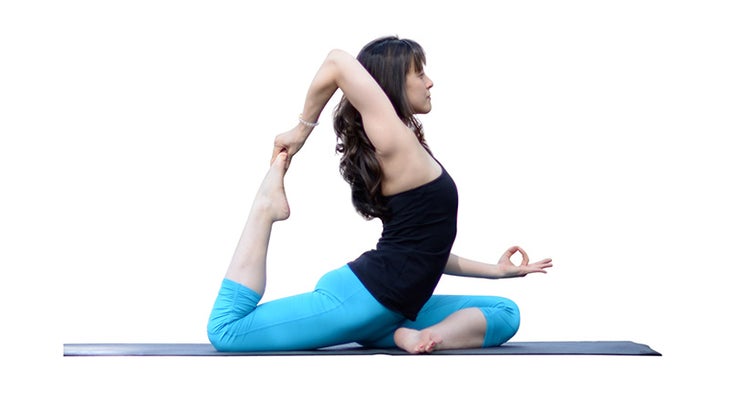
Two Fit Moms‘ Masumi Goldman reveals the surprising secret to this tricky hand position in Dancer Pose and One-Legged King Pigeon.
It’s no secret that flexibility across the chest and shoulders is a requirement if you want to master the overhand grip that you see in the full expression of Lord of the Dance Pose or One-Legged King Pigeon Pose. Heart and shoulder openers crack the door to the possibility of overhand-grip poses and we at Two Fit Moms highly encourage you to incorporate these amazing stretches into your daily practice. But what you might not realize is that the chest and shoulders are not the only body parts that need love and attention in order to progress and eventually grab your foot with an overhand grip.
I practiced chest and shoulder openers for quite a while without any noticeable change in my quest for the overhand grip. My foot felt miles away, and I couldn’t imagine how I would ever be able to reach it. It wasn’t until I saw a photo of myself in Pigeon Pose a couple of years ago that it all clicked. My shoulder/chest flexibility was just fine — I had been practicing heart openers diligently for months. That wasn’t the problem at all. It was my tight psoas muscles (the hip flexors connecting the torso and the leg) that were preventing me from grabbing my foot. Once I had a reasonable amount of chest and shoulder flexibility, the secret to being able to grab my foot with an overhand grip was all in the psoas muscles. Learn more below.
Also see Kathryn Budig’s Challenge Pose: Flip the Grip
How To Master the Overhand Grip
How to assess your psoas flexibility
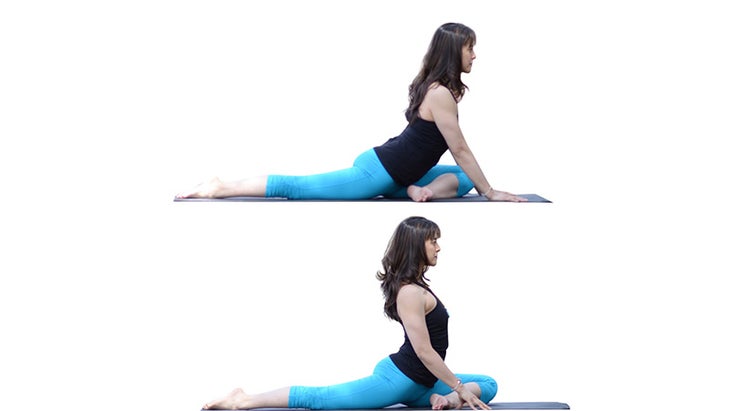
The top photo represents what my form looked like a couple of years ago in Pigeon Pose. You’ll notice that my torso is angled forward, even though this was my best attempt at sitting upright. The bottom photo represents my form in Pigeon Pose today. Can you see the difference? In the bottom photo, my torso is nearly perpendicular to the mat. I was unable to sit with my torso upright like this a couple of years ago because my psoas muscles were so tight.
Also see Hip Flexor Anatomy 101: Counterposes for Sit-Asana
Start stretching your hip flexors daily
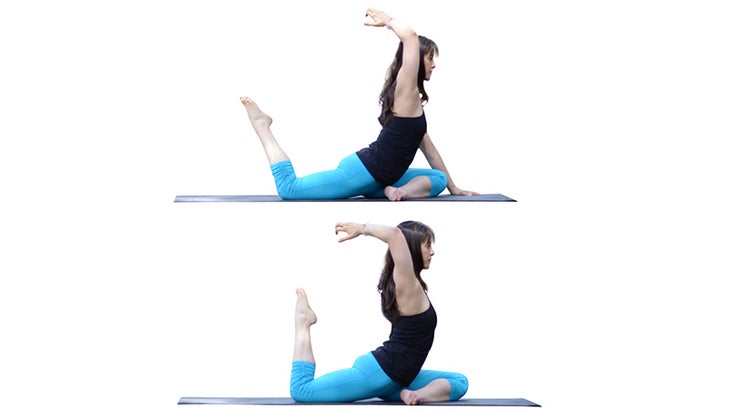
Just by stretching my psoas muscles each day, my hand inched closer and closer to my foot over time. In the top photo, I am illustrating a Pigeon Pose variation with tight psoas muscles. I am reaching back with an overhand grip, but my foot is quite a distance away because I am angled forward. In the bottom photo, my torso is upright because my psoas muscles are nice and loose. Not only am I sitting upright, but I am able to draw my foot in toward my body so that my shin is perpendicular to the mat. This was not possible when my hip flexors were very tight. Use the following four poses daily to open your psoas muscles.
Also see Learn How to Release Your Psoas
1. Low Lunge
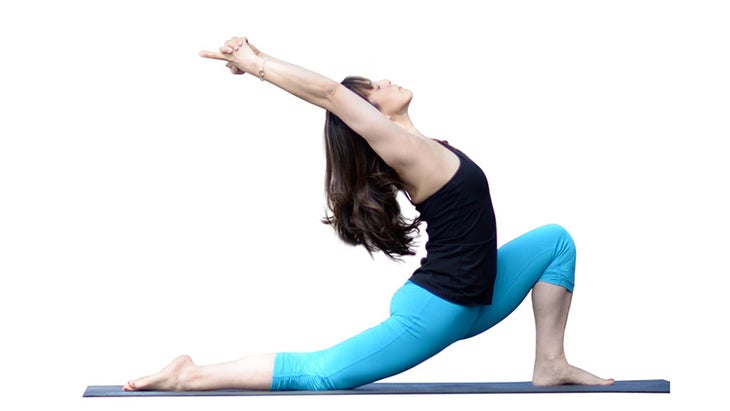
Anjaneyasana
From Downward-Facing Dog, step your right foot between your hands. Lower your back knee to the ground and untuck your toes. Place both hands on top of your front thigh and begin to lean forward, sinking your hips toward the ground. Keep your torso upright for a deep stretch of the left psoas muscle. If you would like to stretch the entire front body (as shown in the photo), sweep your arms over your head, interlace all 10 fingers, and then release the index fingers. Keep your biceps alongside your ears and slowly lift your chest as you bend backward. Take 5 deep breaths, and repeat with the left leg forward.
Also see Kathryn Budig’s Favorite Hip and Psoas Stretch
2. Low Lunge Variation
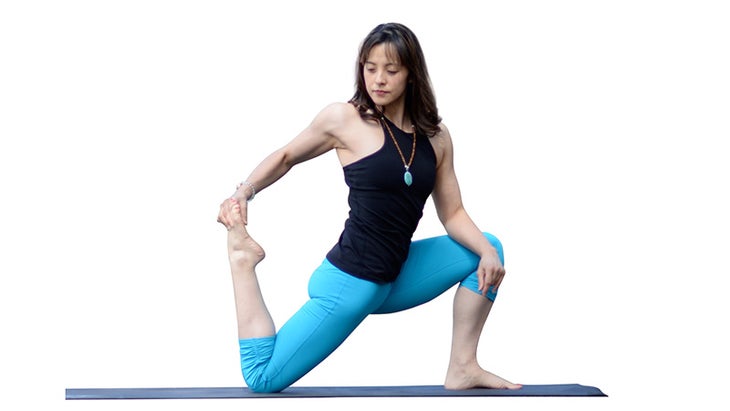
Eka Pada Rajakapotasana II Prep Pose
After stretching the front body with Low Lunge, try this variation, which focuses on stretching the quadriceps, as well as the psoas muscles. From Low Lunge (with your right foot forward), place your right forearm on your right thigh for support. Lift your left foot from the mat so that the toes point up toward the sky. Sweep your left arm back and grasp the inner edge of the left foot. Begin to draw the left foot in toward your torso, and do not force your heel toward your bottom. Keep your torso upright, and avoid the urge to lean forward. Take 5 breaths in this pose and remember to practice on both sides of your body.
Also see To Tone Your Tummy, Release Your Psoas
3. Camel Pose
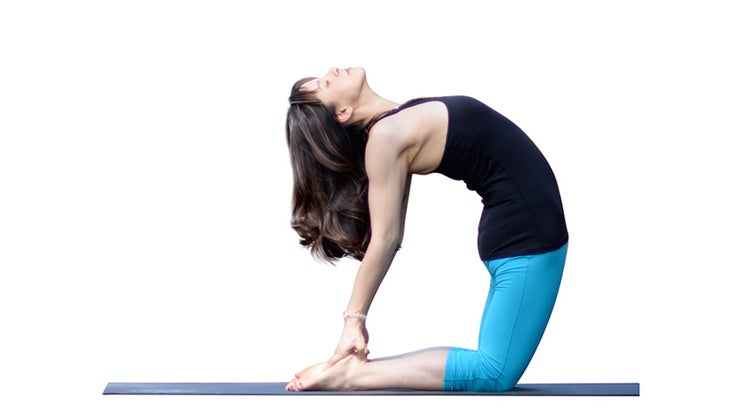
Ustrasana
Open your chest toward the sky as you lengthen your psoas muscles in this full-body stretch. Focus on keeping your thighs perpendicular to the floor, and press your hips forward for the deepest stretch. This pose can be modified for all levels of flexibility (see how here). Tuck your toes to relieve the intensity or feel free to keep your hands on your lower back for support.
Also see 7 Steps to Master Ustrasana (Camel Pose)
4. High Lunge, Crescent Variation
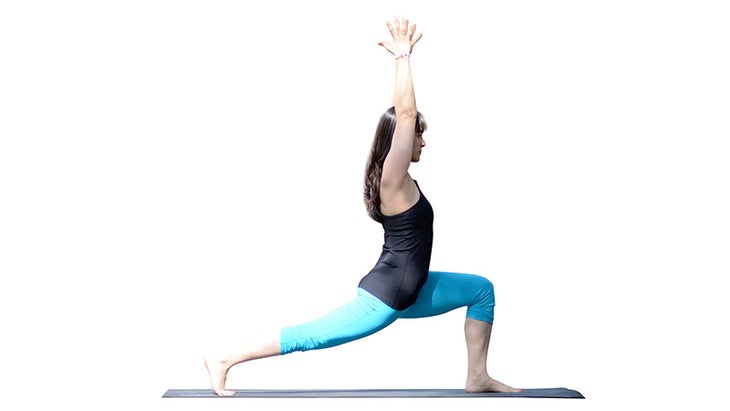
From Downward-Facing Dog, step your right foot forward between your hands. Lift the torso to vertical, and sweep the arms up toward the sky. Sink into the hips and keep the torso upright to experience the most effective psoas stretch. Take 5 deep breaths and practice this pose on the opposite side of your body.