How to Create a Dolly Zoom With Just a Prime Lens
The Dolly Zoom is one of cinematography’s most striking shots. Here’s how you can recreate it in post.
The dolly zoom. it’s an iconic technique that has been used in countless films from the late 50s until the very present. First employed by Irmin Roberts in Alfred Hitchcock’s Vertigo, the technique has become a staple shot of Hollywood classics. I will always remember the moment, at sixteen-years-old, when I first understood how the technique was deployed. I spent the entire day rushing toward things while zooming out on my DV camcorder. But this article is not about the history of the dolly zoom, nor the technique. PremiumBeat already has an extensive article about that here.
To employ the dolly zoom technique, you, of course, need a dolly and a zoom lens. This video below (via Jan Stripek) very quickly shows what happens when you track backward and zoom in.
What if you don’t have a zoom lens? What if you have a tracking shot and think that a dolly zoom would work a lot better, but unfortunately, the shot has already been captured? Well, thanks to 4K resolution, you won’t need to reshoot. Now you can employ this technique in post-production.
Of course, this isn’t going to have the same intrinsic elements that the shot would have if it were captured organically with an actual zoom lens. Replicating something in post-production is just never as good as the real thing. But sometimes, it’s all you have.
Note: There are a few constraints to the post-production method. You need to have footage which is at least 3k or above, and your timeline sequence needs to be at 1080p. The entire post-production process is built on scaling your footage; this is why the resolution matters. The following video tutorial will cover everything you need to know to pull the technique off. After the video, we’ll break it down step by step.
How to Create a Dolly Zoom With Just a Prime Lens: A Step-by-Step Guide
If you check the visual examples in the video above, you’ll notice that 90% of the shots had their subjects stand in the dead center of the frame. While this isn’t crucial, it does make the effect more predominant. Therefore, this will work best with a video clip that is tracking forward toward a subject that is the center of the composition.
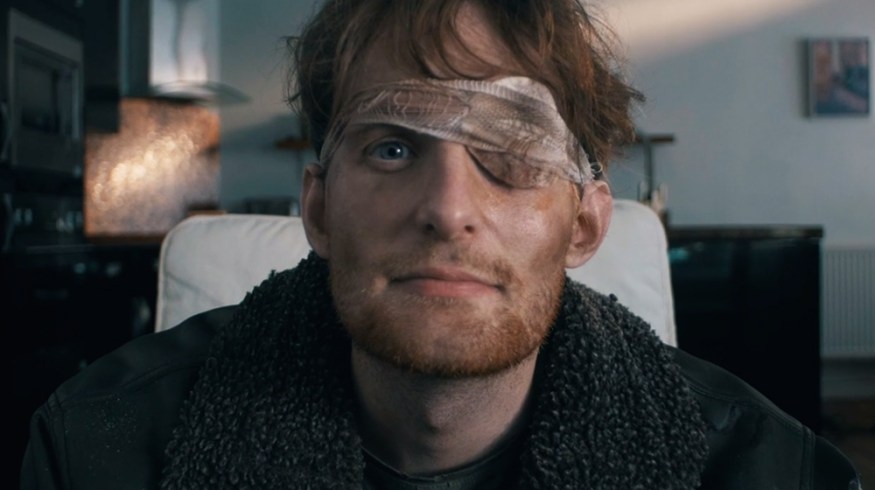
This is our before clip:
It’s 3840×2160, the perfect size to decrease and increase the scale in a 1080p timeline. Let’s make this into a dolly zoom.
Step 1: Bring the Clip Into Your Software
This can be any NLE or compositor that allows you to scale clips and implement key frames. I’m working in Adobe After Effects. The composition has to be set at 1080p.
Step 2: Add a 4k to a 1080p Timeline
Bring the 4k clip into the timeline. It will initially be too large for the composition. That’s fine — keep it as it is.
Step 3: Create a Work Area
Find the start point and end point of when the dolly movement starts and stops and create a work area between these two points. This is important.
Step 4: Add a Grid
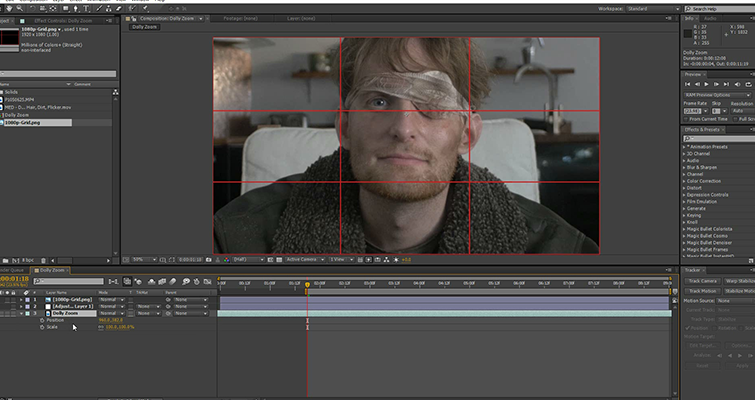
Next, insert a thirds grid alignment into the composition. Remember, in a majority of dolly zooms, the subjects stay dead center. If this shot were being captured by a camera operator with a zoom lens, that operator would be able to keep the subject within a particular space of the framing. As this is in post-production, as we start to decrease the scale, the subject will fall away from the center of the screen. This is why we insert a grid.
With a guide, we will be able to correlate the primary position of the subject to the position at the end. Most software will have the option of creating a grid which you can fine-tune. For an easier option, you can download a pre-made thirds grid here. Let’s continue.
Step 5: Set Keyframes for Scale and Position
Set the playhead at the start of the work area, and open the Scale effect (S on the keyboard for Adobe After Effects.) Do the same for the Position (P on the keyboard.) You can open Scale and Position at the same time by holding shift when hitting S and P. Click the Stopwatch icon to set a keyframe for both properties.
Step 6: Decrease Scale
Move to the end of your sequence and decrease the Scale to 50%.
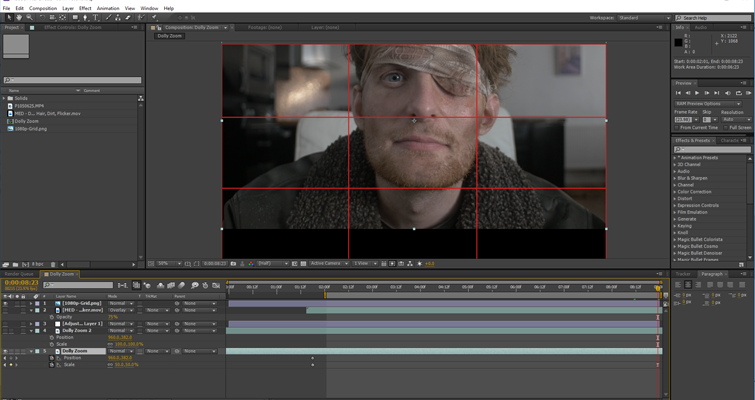
As previously mentioned, unlike a camera operator, we’re not going to be able to keep the subject dead center of the frame. As you can see in the image above, as we’ve decreased the scale, the subject has now moved away from his original position. Therefore you also need to reposition the clip in alignment to its start point.
It’s pivotal that you keep the subject as close to the starting position as possible. If it sways just slightly, the effect will be ruined. If your dolly shot gradually stops, change the end Scale keyframe to an easy-ease keyframe by selecting it and hitting F9.
Here’s the result.
It looks great. As I stated at the start, there are going to be some lens properties which do not translate over into the post-production method of this shot, and of course, we lose a lot of our initial compositional width and height.
However, if you have a 4k piece of footage that tracks toward or away from an actor and you want to incorporate a dolly shot, you now know how. If your shot is moving backward, just reverse the tips stated in this article.
Ever tried this technique for creating a dolly zoom in post? Share your footage in the comments below!


