

Learn to create a nice 3D cubic text effect in Illustrator. This tutorial will teach you how to use 3D tools to create 3D cubes from squares. You will also learn other blending techniques to create the see through cubes! So start learning today.
3D Cubic Text Effect
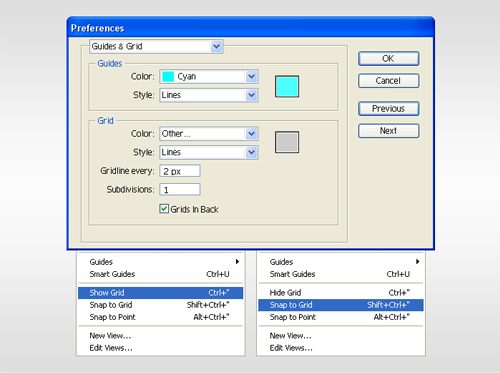
1. Create a 700 by 300px document. First, turn on the Grid (View > Grid) and the Snap to Grid (View > Snap to Grid). Next, you’ll need a grid every 2px. Go to Edit > Preferences > Guides & Grid, enter “2” in the “Gridline every” box and “1” in the “Subdivisions” box. You can also open the Info panel (Window > Info) for a live preview with the size and position of your shapes. Do not forget to replace the unit of measurement to pixels from Edit > Preferences > Unit > General. Al these options will significantly increase your work speed.
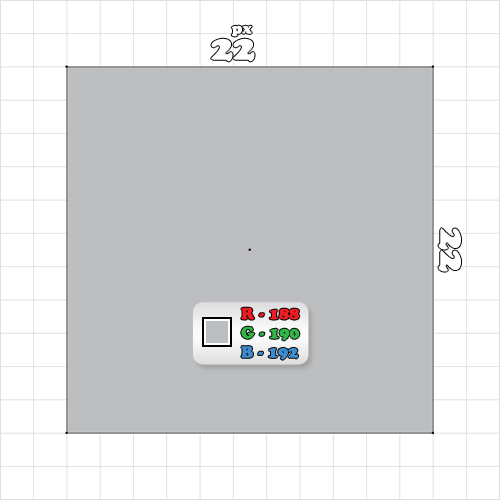
2. Start with the Rectangle Tool(M). Create a 22 by 22px square and fill it with R=188 G=190 B=192.
3. Pick the Selection Tool(V), select the square, hold Alt then click on this shape and drag. You should get a copy of the square. Repeat this technique to create several copies. Use these new shape to create your letters. Leave 2px between each copy. The snap to grid will ease your work.
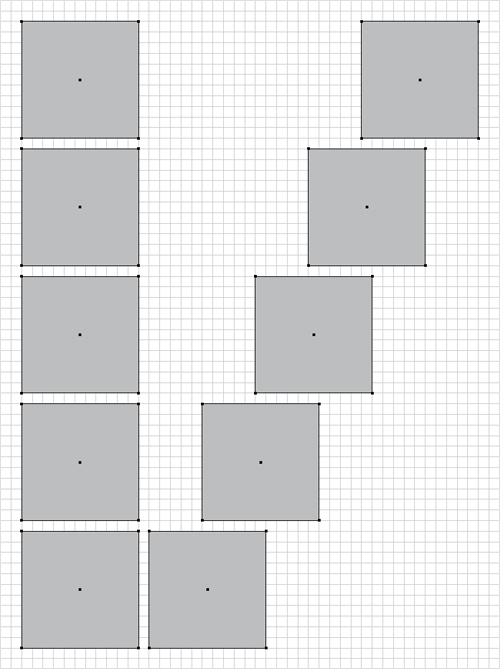

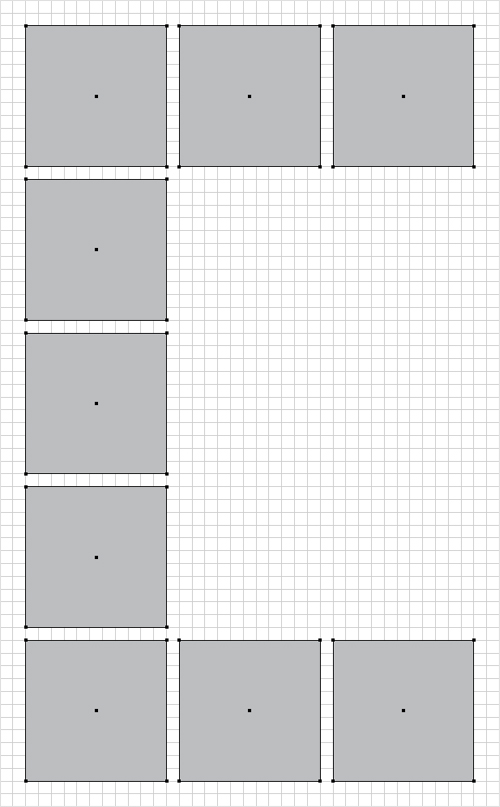
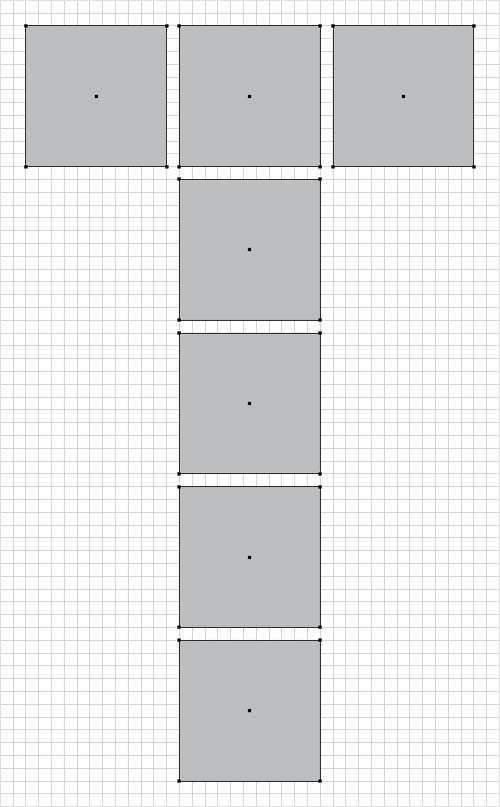
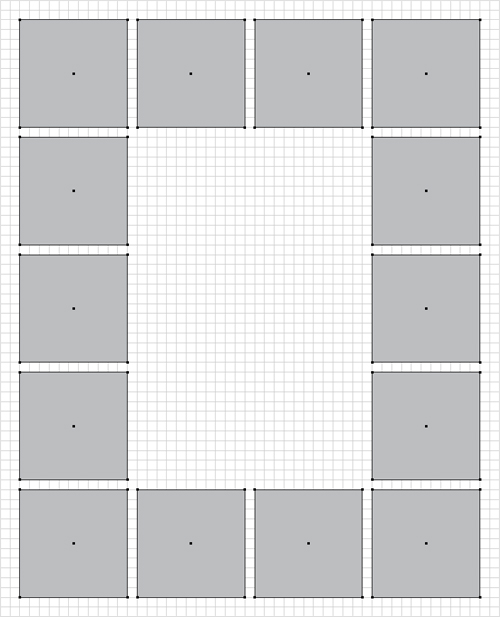

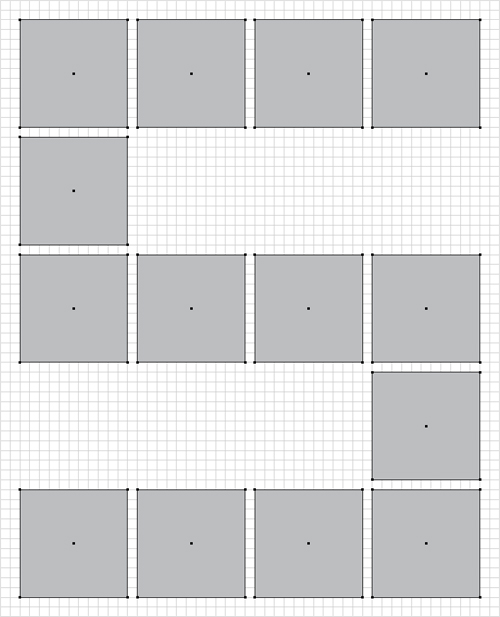
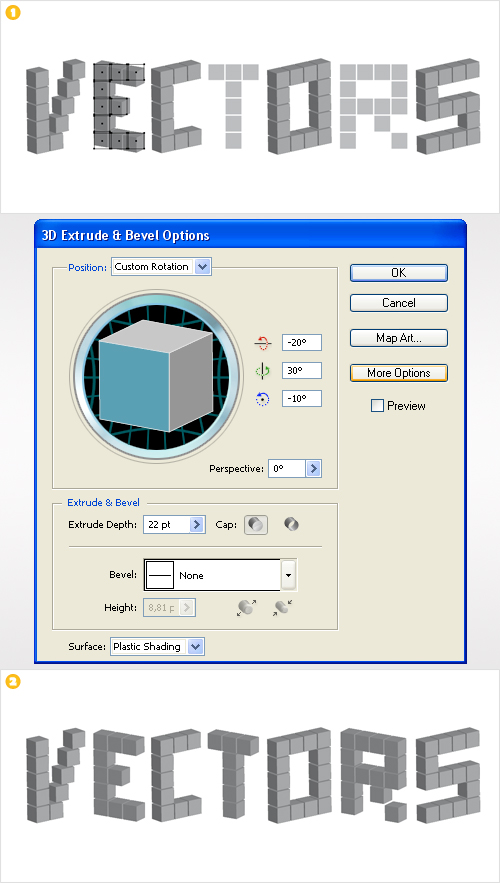
4. This is how your work should look like so far. Select the squares that make up the first letter and group them (Ctrl + G). Reteat the same technique for the rest of the letters.

5. Select the first letter group and go to Effect > 3D > Extrude & Bevel. Enter the data shown below then click OK. Select every two group and add the same 3D effect.
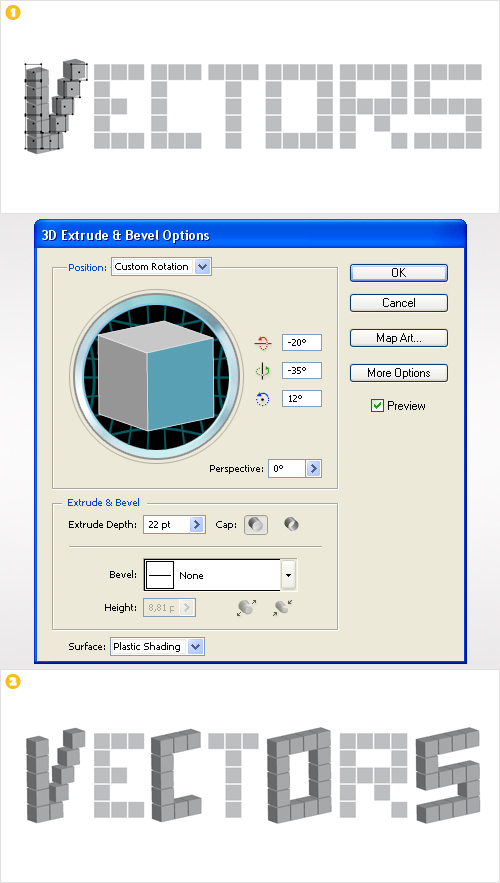
6. Select the rest of the groups and go again to Effect > 3D > Extrude & Bevel. Enter the data shown below then click OK.
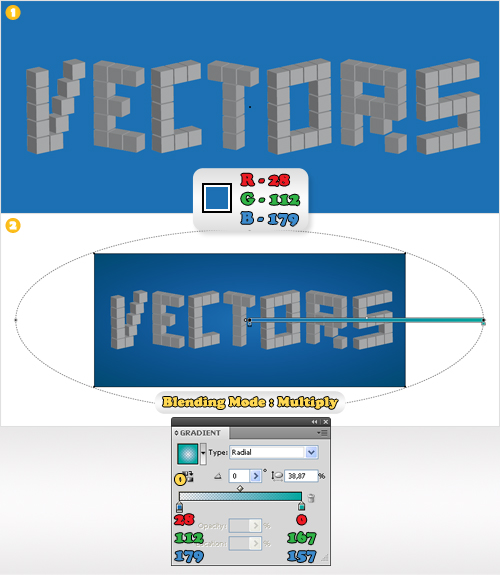
7. Now, let’s add the background. Pick the Rectangle Tool (M) and create a 700 by 300px shape. Fill it with R=28 G=112 B=179 then hit Shift + Ctrl + [ to move it in the bottom of the Layers panel, behind the rest of the shapes. Reselect this rectangle, open the fly-out menu of the Appearance panel and click on Add New Fill. This should add a second fill for your shape. Select it and use the radial gradient shown in the second image. Take a closer look at the gradient image. You’ll notice a yellow zero above the left gradient slider. It means that you need to select that slider and lower its opacity to 0%. Reselect this second fill and change its blending mode to Multiply. Finally, lock this rectangle. That way you won’t select or move it accidentaly.
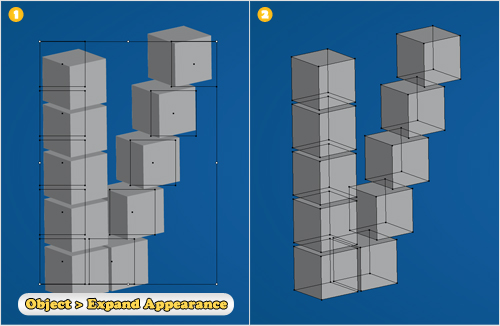
8. Let’s focus on the first group. Select it and go to Object > Expand Appearance. Select the resulting group, hit Shift + Ctrl + G three times then hit Ctrl + G once. Thus you get rid of all the groups and subgroups and you keep only one.
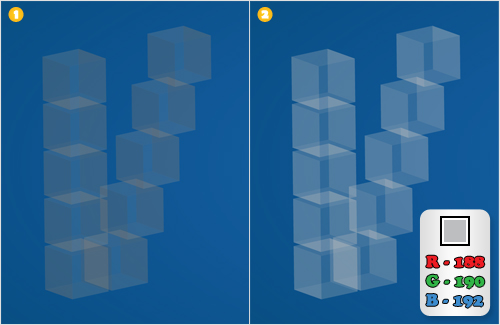
9. Next, you will need to organize the shapes made in the previous step. Pick the Selection Tool (V) and select the front shapes. Lower their opacity to 10% then group them (Ctrl + G). Make this group invisible (for the moment). Continue with the Selection Tool (V). This time select the back shapes, lower their opacity to 10% and group them (Ctrl + G). Make it invisible too.

10. Select the top and bottom shapes. Lower their opacity to 20% and group them (Ctrl + G). Select the left and right shapes. Lower their opacity to 30% then group them (Ctrl + G).
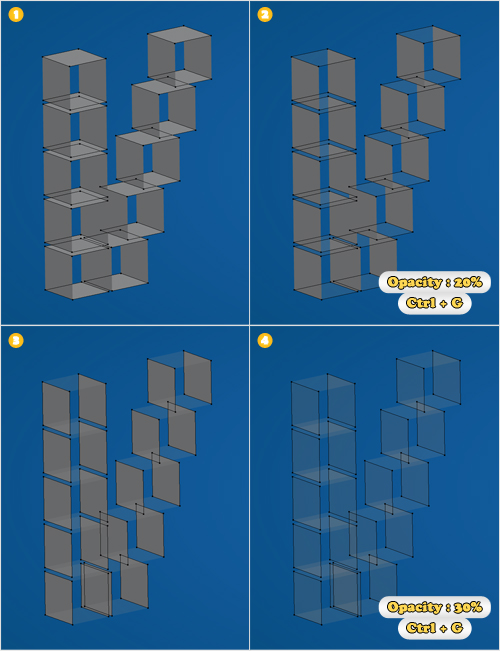
11. Turn the groups made in step 9 back to visible. Now you letter should look like in the first image. Select all the components and fill them with R=188 G=190 B=192.
12. Repeat the same techniques for the rest of your letters. This might take you some time but it’s a good practice, especially when you’re a beginner.

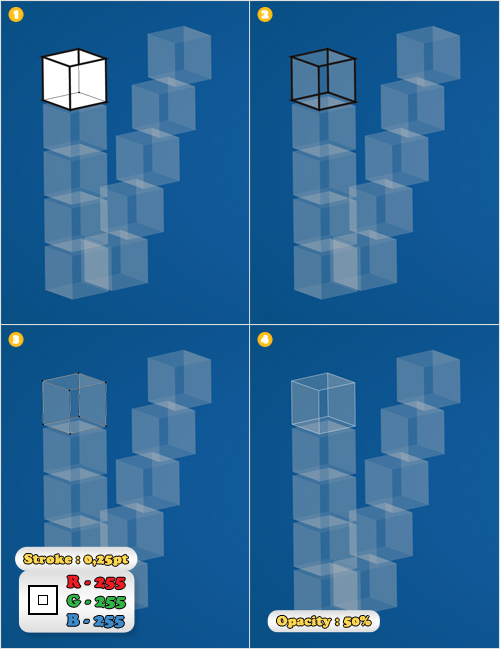
13. Now that you finished editing all the letters let’s focus again on the first group. You need to ungroup and reorganize your shapes. This being said, select the groups and hit Shift + Ctrl + G. Now, you need to create a group for each cube. Start with the top one. Select all six shapes and hit Ctrl + G. Continue with the rest of the cubes.

14. Next, you need to add a discrete stroke for each cube. Select the first group, hit Ctrl + C then hit Ctrl + F. This will create a copy of your group. Select it and hit the D key. This will fill your shapes with the default colors (a white fill and a black stroke). Change the fill color to none, decrease the stroke size to 0,25px, make it white then open the Stroke panel and click on the Round Join button. Finally, select the entire group copy and lower its opacity to 50%.
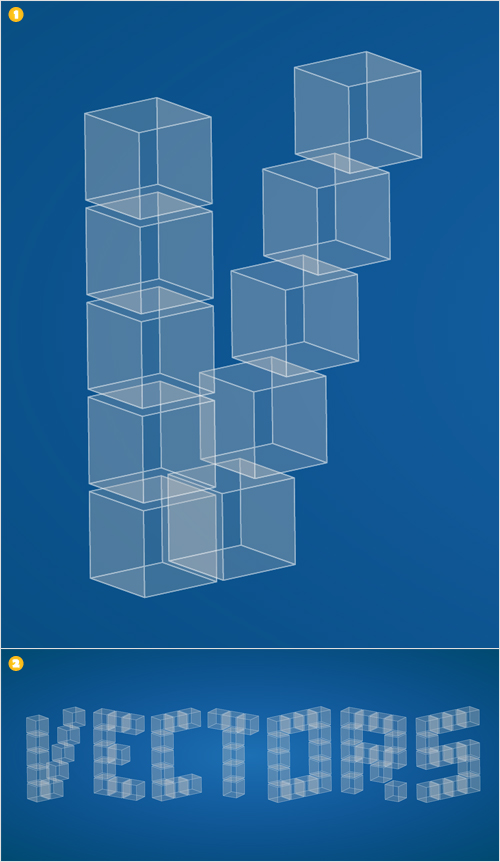
15. Repeat the same techniques for the rest of the cubes then move to the next letters.
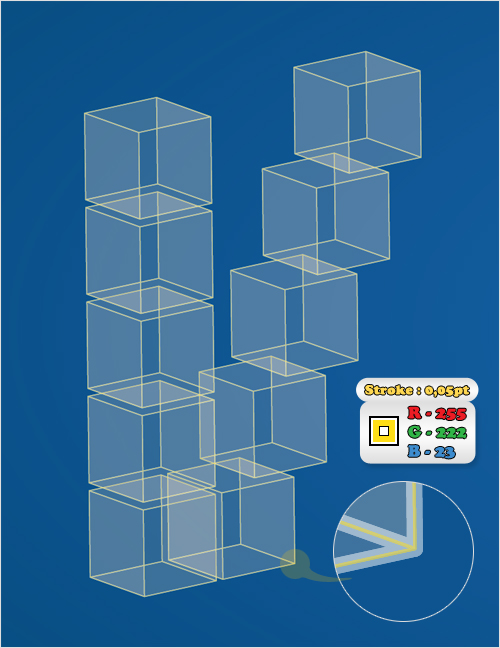
16. Again, focus on the first group. Duplicate the groups made in the previous step (the ones with the white stroke). Select these copies, decrease the stroke size to 0,05px and change the color to R=255 G=222 B=23.
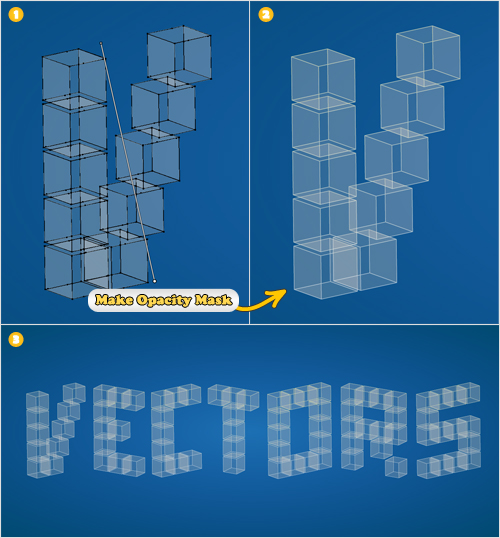
17. Duplicate the groups made in the previous step. Select all these copies and go to Object > Expand. Select the resulting shapes and click on the Unite button from the Pathfinder panel. Fill the resulting shape with the linear gradient shown in the final image.

18. Now you’ll mask a part of the yellow strokes. First, open the Transparency panel then select the groups with yellow stroke and group them (Ctrl + G). Select this new group along with the shape made in the previous step, open the fly-out menu of the Transparency panel and click on Make Opacity Mask.
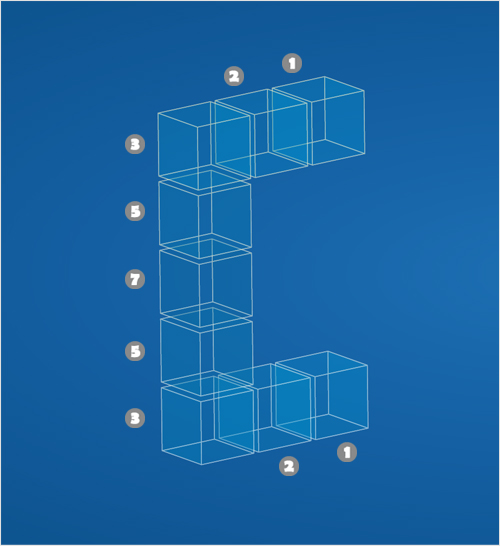
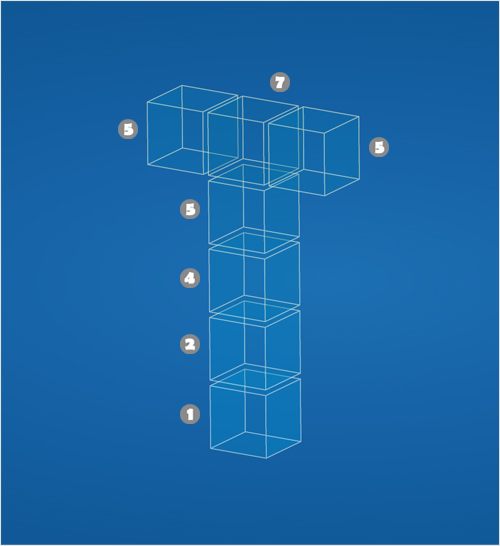
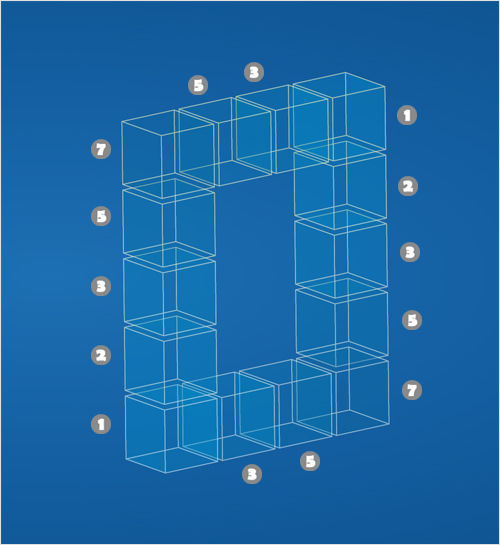
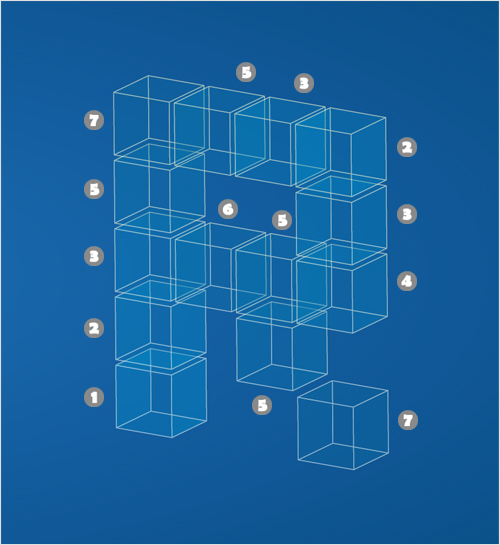
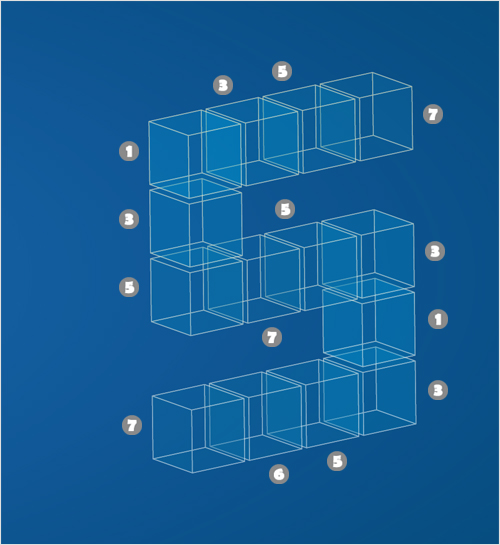
19. Add a new color group in your Swatches panel and fill it with the seven colors shown below. I named them from 1 to 7. You can do the same.
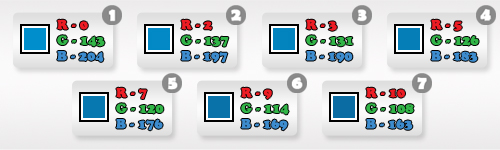
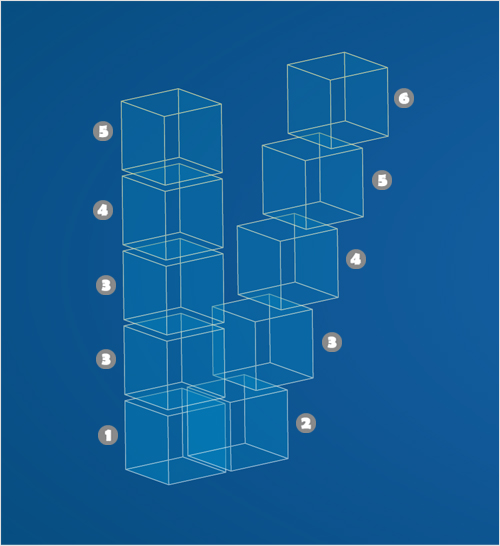
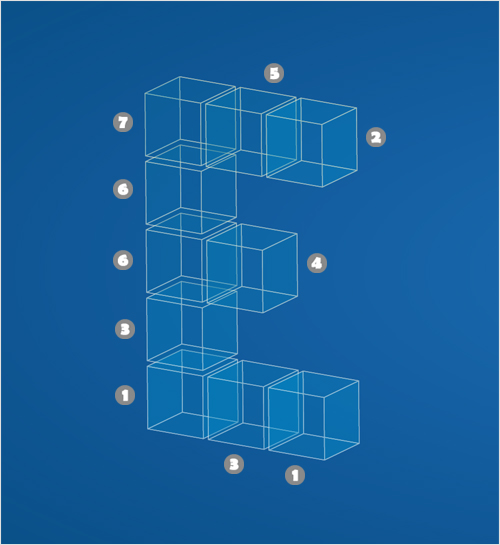
20. Now it’s time to replace the fill color for each cube group. Make sure that you’re not selecting the stroked groups. Select each groups separately and fill it with the colors shown below. If you’re using different letters try to use the saved colors to get a nice fade effect.
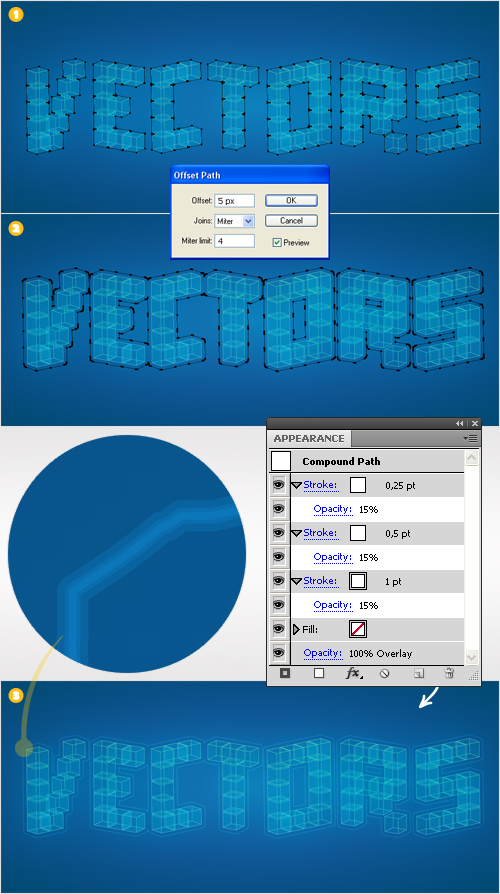
21. Next, we’ll add some effect for the entire text. Duplicate the groups edited in the previous step. Select these copies, click on the Unite button from the Pathfinder panel then go to Object > Compound Path > Make. Fill the resulting path with R=0 G=167 B=157. Change its blending mode to Overlay then go to Effect > Stylize > Outer Glow. Enter the data shown below then click OK. Finally, select the fill from the Appearance panel and lower its opacity to 15%.

22. Select the shape made in the previous step and go to Object > Path > Offset Path. Enter a 5px Offset and click OK. Select the resulting shape, remove the Inner Glow effect and fill it with none. Add a 1px, white stroke and lower its opacity to 15%. Select it (from the Appearance panel), open the Stroke panel, click on Round Join button then click on the Duplicate Selected Item from the Appearance panel. This will add a copy of the existing stroke. Select it and decrease its size to 0,5px. Duplicate this new stroke. Select this new copy and decrease its size to 0,25px.
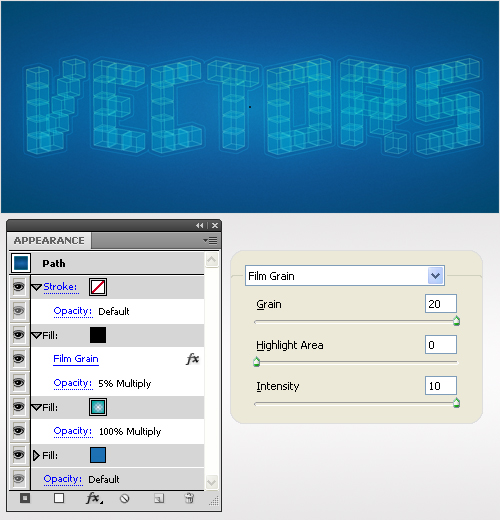
23. Finally, unlock the background shape and add a new, black fill. Change its blending mode to Multiply, lower its opacity to 5% then go to Effect > Artistic > Film Grain. Enter the data shown below, click OK and you’re done.
Let us know what other text effects you will like to learn!
To download the source file for this tutorial, you will need to login as a member.
Sign up today to access all exclusive members content!
Kindly comment what other packaging tutorial you would like to learn so that we can publish it on the next round!

You lost me on step 8. Is something missing here? When I expand appearance, ungroup three times then group once, apparently the result I’m supposed to get is image 2 which shows a semi-transparent three-dimensional cube. But I don’t get that. If I select a face and delete it there’s nothing behind it.
I think there’s an error in step 9 as well. You write that we are to use the Selection Tool to select the front shape, but since we performed a group in the previous step, the selection tool will select the group. It seems like the Direct Selection tool (A) is what is required here.
It would also have been helpful if you had mentioned in step one that we needed to create an RGB document. The default is CMYK.
Mea culpa. First, you get nothing behind because I forgot to mention that you need to click on the More Option button (from the 3D Extrude&Bevel effect) and check the Draw Hidden Faces box. Second, you’re right. It’s Direct Selection Tool, not Selection Tool. Third, I will remember the RGB thing for my future tutorials. Thanks for your comment and let me know if you spot any other errors.
Here is my result. Took a couple of tries because I didn’t understand how the yellow stroke was masked and grouping each blocks to form the text took forever. However, I did learn something new out of this. Thanks again.
http://img.photobucket.com/albums/v645/duceduc/themes/tgif-cubic-text-effect-vector.png
Next time I read a blog, Hopefully it won’t fail me just as much as this particular one. I mean, Yes, it was my choice to read through, nonetheless I really thought you would have something interesting to talk about. All I hear is a bunch of moaning about something that you could possibly fix if you were not too busy searching for attention.
I wanted to thank you for this very good read!
! I absolutely enjoyed every little bit of it.
I have got you bookmarked to check out new things you post…
Hello, i believe that i saw you visited my site so i came
to return the desire?.I’m attempting to in finding issues to enhance my web site!I assume its adequate to make use of some of your ideas!!