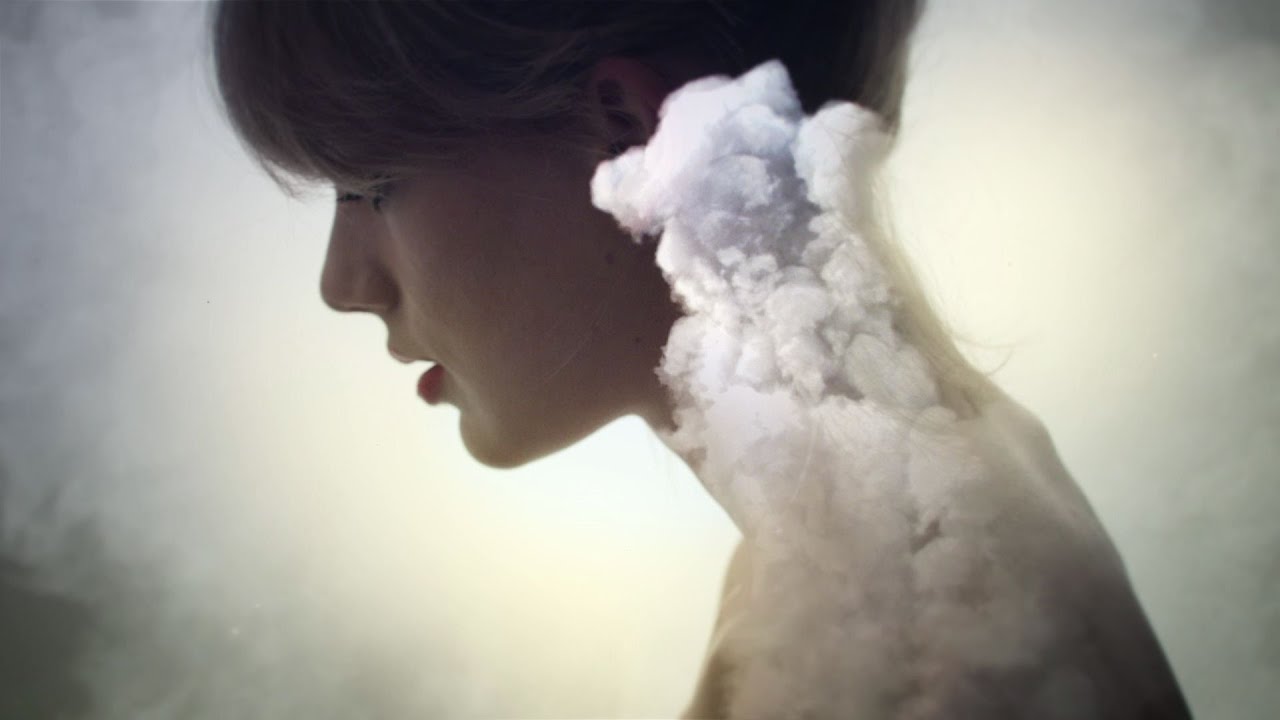
Quick Tip: Expanding on the Style-Inspired Double Exposure Effect


If you haven't seen Taylor Swift's video for her hit song, Style, then do yourself a favor and check it out! Not surprisingly it's a "stylistic" video, and it contains some wonderfully inspiring effects using silhouettes and double exposures.
In this series of tutorials I'm going to deconstruct some of those effects and show how to reproduce them in Adobe Photoshop.
In this Quick Tip we explore that idea and replicate two of the double exposure effects from the video.
1. The Smoke Profile Effect
To create the smoke profile effect, we will use resources from previous projects. The profile shot was created in the same photo shoot as the first double exposure effect tutorial for the cave profile effect.
The smoke images were created in the Custom Smoke Brushes tutorial. Both the starter profile and the smoke images are included in the attached zip file for this project.
Step 1
Open the starter image named StarterProfile.jpg in Photoshop and add a New Layer (Shift-Control-N), naming the layer Dodge and Burn.
Set the layer's blending mode to Overlay. Then go to Edit > Fill and set the contents to 50% Gray. The overlay blending mode makes the gray fill completely invisible, so you won't see the fill effect at this point.


Step 2
Use the Burn Tool (O) with Range set at Midtones and Exposure at 9% to gently darken the neck and shoulder area of the model. Use the Dodge Tool (O) with similar settings to increase the brightness of the soft highlights along her cheek and eyes.


Step 3
Open one of the custom smoke images and drop it onto the profile project. Change the blending mode to Screen and transform the smoke layer to fit along the neck area. Use the Eraser (E) tool with a soft brush tip to remove any hard edges.


Step 4
Layer in several of the smoke layers, always using the Screen blending mode to build up the smoke effect. You can intentionally place curls of smoke to fit the curves of her neck by using Edit > Transform > Warp.


Step 5
Add a new Layer (Shift-Control-N) and use the Gradient Tool with the Radial mode set to Foreground to Transparent. Use a pale yellow color, #fdf6bc as the foreground color. Then create a gradient that originates near the center of the profile.


Step 6
Set the blending mode to Multiply and use a soft Eraser to remove the yellow areas directly over the smoke and closest to the face profile.


Step 7
Create a merged layer by holding down the Alt key and going Layer > Merge Visible. Then convert that layer to a smart object with Layer > Smart Objects > Convert to Smart Object.


Step 8
Now to create that final, softened look of the original effect. Go to Filter > Camera Raw Filter and in the Basic tab make these settings:
-
Clarity: -30
-
Vibrance: +12


Change over to the Effects tab and in the Post Crop Vignette area set:
- Amount: -40
This will give a subtle darkening effect to the corners of the canvas.


Then your final image should look similar to this.


2. The Glowing Forest Effect
Another inspiring effect in the video is Taylor turning towards the
camera with the image of a glowing forest double exposed into the
contours of her frame. Duplicating that effect uses the same techniques
as the smoke profile, but it's even simpler.


Step 1
In the source files for this tutorial is a starter image called StarterThreeQuarter.jpg. You will also need an image of a forest with bright colorful lights shining through the trees. I used this one.


Step 2
Just like in the previous project, use a gray filled layer, set to Overlay. Then work with the Dodge and Burn Tools to create a deep shadow area along her back and intensify the highlights on her face.


Step 3
Drop the forest image onto the project as its own layer and set the blending mode to Linear Dodge (Add). This mode is more intense than the screen mode and gives a brighter mix to the colors.


Step 4
Mask out the forest effect by going to Layer > Layer Mask > Hide All. Then use a large soft edged brush with white paint on the mask to reveal the forest over the darkest portions of her silhouette.


Step 5
Now add the yellow gradient to give a warmer hue to the image. Be sure to use the Multiply blending mode and a pale yellow color.


Step 6
Create a merged layer at the top of the layer stack by holding down the Alt key while going to Layer > Merge Visible. Then turn that layer into a Smart Object with Layer > Smart Objects > Convert to Smart Object.


Step 7
To finish off the effect, let's use Camera Raw to give the image a softening appearance, and a slight lens vignette too. Go to Filter > Camera Raw Filter and in the Basic tab make the following settings:
- Contrast: -23
-
Highlights: +52
- Whites: +23
- Clarity -40


Switch to the Details tab, and make this setting under Noise Reduction:
-
Luminance: 17


Then finally in the Effects tab, go to the Post Crop Vignette and set:
-
Amount: -40


Apply the filter and your finished image should look a little like this:


Want More?
Are you inspired to tackle more photo manipulation projects? Want to try your hand at some custom Photoshop brushes? Check out my profile here at Tuts+ for my other Tutorials, Quick Tips, and Courses.


