Young Adult Fiction is an ever-growing sector of the publishing industry, and a popular genre for self-publishers. Grown-up novels for teens need cover designs that bridge the gap between childish and mature, while exploring themes of emotional angst, growing up, relationships, family and school. Design elements can be put together to convey the mood and message of the book, as well as to directly appeal to a potential reader.
Here, we’ll look at how handwritten typography, papery collage-inspired textures and strong color combinations can be combined to create an attractive cover design. We’ll explore how you can create a genre-appropriate design using the typefaces, tools and techniques available to you in Adobe InDesign. We’ll also hop over to Adobe Illustrator to create a simple vector image.
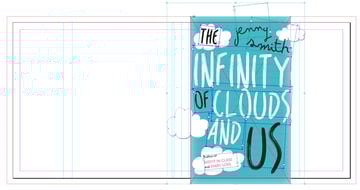
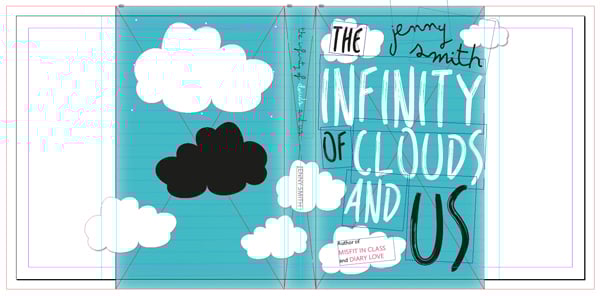
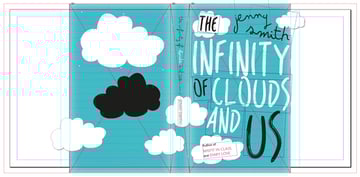
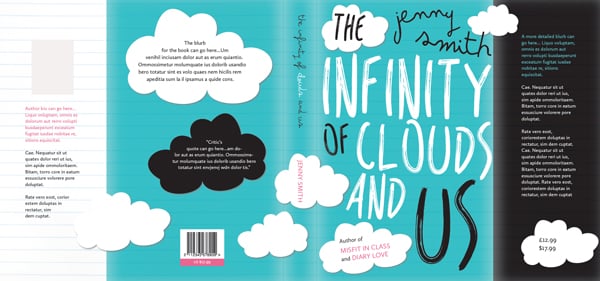
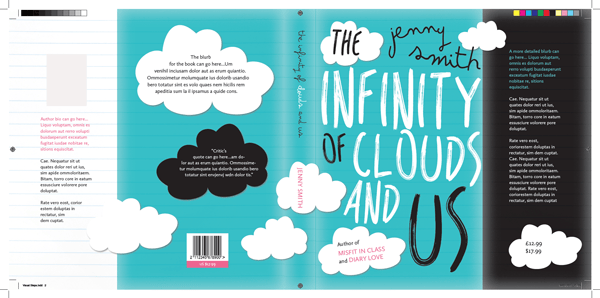
In this tutorial we’ll be creating a design for a hardback dust jacket, with flaps that allow the jacket to fold over the hardcover.
1. Set Up the Layout of Your Cover in InDesign
In this tutorial, we’ll be creating a dust jacket for a hardback (hardcover) book, with Demy dimensions (8 1/2 x 5 7/16 inches [216 x 138 mm]) and a 26 mm spine. This is a standard size for some hardback covers, though there are a number of other standard sizes you can design to as well.
Note: A 26 mm spine will result in a relatively slim book. You can adjust the width of the spine to suit your own purposes by using the Page Tool (Shift-P) to adjust the width of the document later.
The spine width should accommodate for the number of pages and the weight (thickness) of the paper used for the inside pages. For hardback covers you should also allow an additional 3 mm either side of the spine for the shoulder of the book, i.e. the fold of the hardcover leading to the edge of the back cover and the edge of the front cover.
So in this tutorial we are creating a jacket with a 26 mm spine, but 6 mm of this (3 mm each on the left and right sides) will form the shoulders of the book.
Firstly, however, we’ll put together the front of the dust jacket only. This will allow you to look at the front cover in isolation, before completing the full jacket.
Step 1
Open InDesign and select New Document from the Welcome window, or go to File > New > Document.
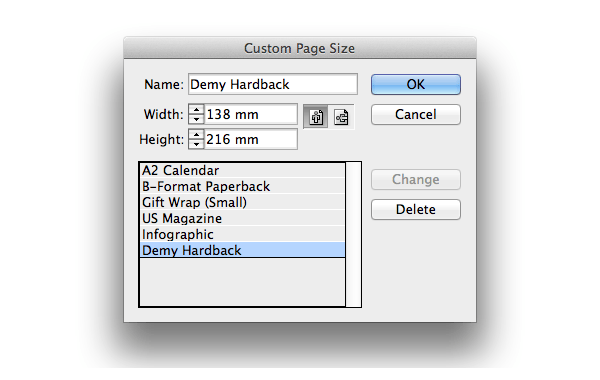
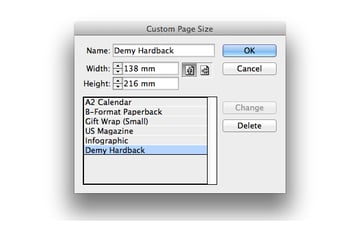
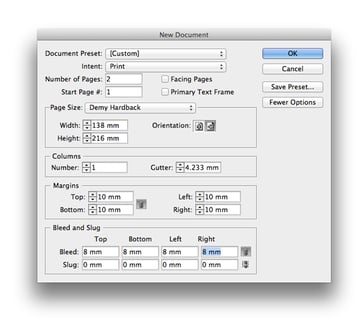
In the New Document window set the Intent to Print, No. of Pages to 2 and uncheck Facing Pages. From the Page Size drop-down menu select Custom... to open the Custom Page Size window.
Set the Width to 138 mm and Height to 216 mm. Type ‘Demy Hardback’ into the Name text box and click Add, and then OK.
Step 2
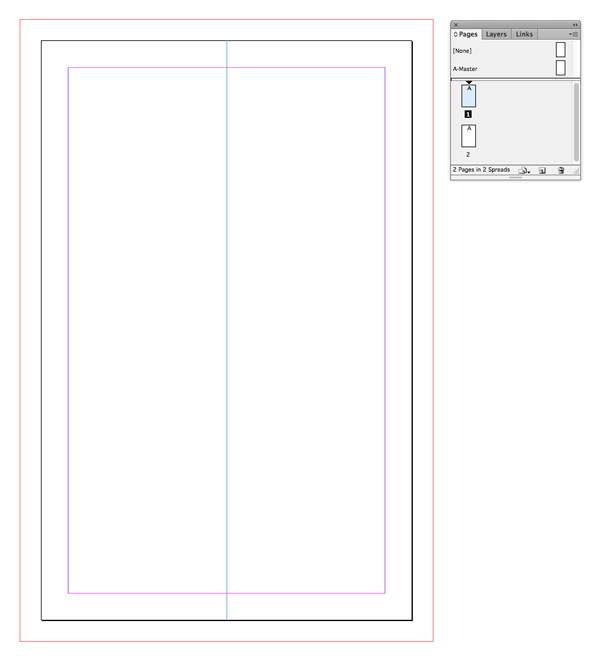
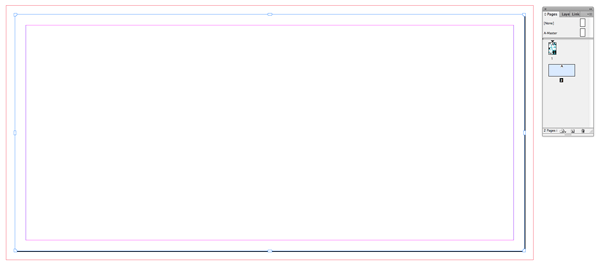
Back in the New Document window, set the Margins to 10 mm on all sides, and set the Bleed to 8 mm on all sides. Click OK.
This page is the correct size for the front of your cover only. Though we will want to submit a whole cover to the printer, complete with spine, back cover, and flaps, it’s a really good idea to design your front cover only at first. This allows you to judge better how the cover will look from a reader’s perspective, when the book is on display.
We’ll use the Page Tool (Shift-P) later in the tutorial to add the spine, back cover and flaps to the document.
From the left-hand Ruler drag a vertical guide out to 69 mm. This marks the center point of the front cover, which is useful to have when you start to place elements on the page.
2. Layer Color and Texture to Create a Backdrop
What elevates professional cover designs is often the subtle use of background texture, to make the cover feel tactile.
Step 1
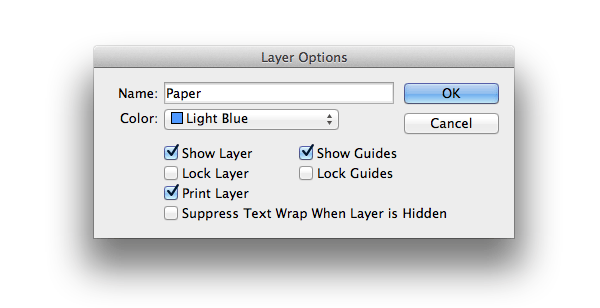
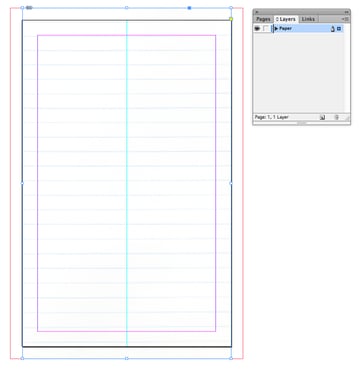
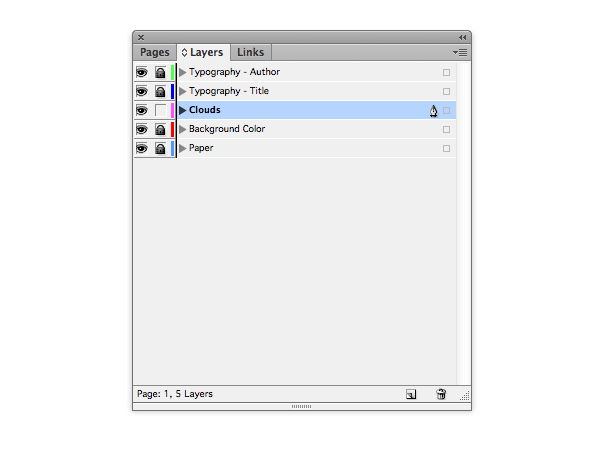
Open the Layers panel (Window > Layers) and double-click on the default Layer 1 name. Rename the layer as Paper and click OK.
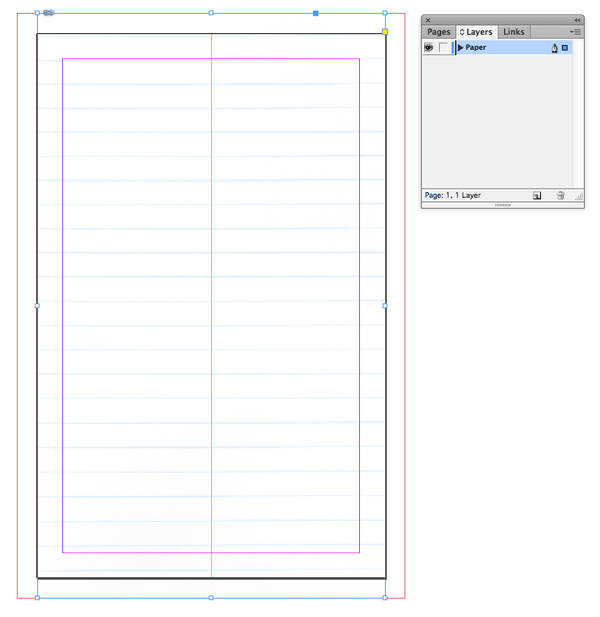
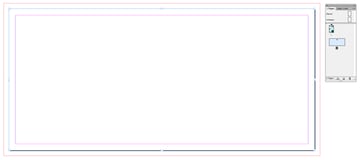
Remaining on Page 1, select the Rectangle Frame Tool (F) and drag to create a frame 138 mm in Width and 232 mm in Height. Position centrally on the page, so that the frame extends up to the edge of the top bleed and the edge of the bottom bleed.
Step 2
Teen heroes and heroines are often found scribbling in their diaries or doodling on their school exercise books. You can introduce this idea by giving the dust jacket a paper background.
You can either take your camera and photograph the open page of a lined notebook, as I’ve done here, uploading the image to your computer via a scanner, or download a suitable stock image. Try this photo for a scrunched-up effect, or this image for a cleaner, simpler look.
With the image frame you created in Step 1 selected, go to File > Open. Select the paper photo and click Open. Arrange the image in the frame (double-click to directly select, and hold Shift to resize) so none of the paper edges are visible.
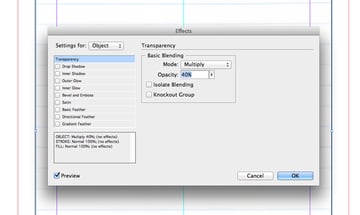
With the image frame selected, go to Object > Effects > Transparency and set the Mode to Multiply. Reduce the Opacity to 40% and click OK.
Step 3
Return to the Layers panel and Lock the Paper layer.
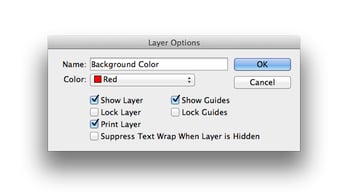
Click the Create New Layer icon at the bottom right of the panel. As before, double-click the layer name to open the Layer Options window. Rename the layer as Background Color and click OK.
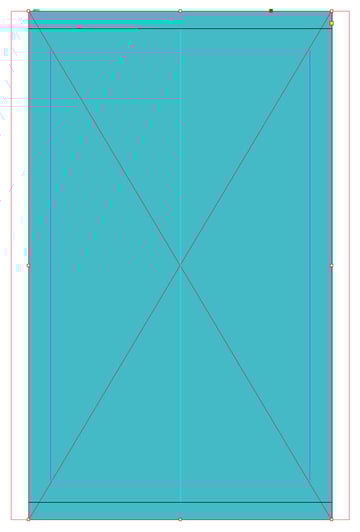
Select the Rectangle Tool (M) and drag to create a frame 138 mm in Width and 232 mm in Height. Layer over the top of the paper image frame.
Open the Swatches panel (Window > Color > Swatches) and select New Color Swatch... from the panel’s drop-down menu, accessible at the top right of the panel. Create a new CMYK Swatch, C=68 M=0 Y=24 K=0, and click Add and OK.
Set the Fill Color of the rectangular frame to this new blue swatch. Set the Stroke Color to [None].
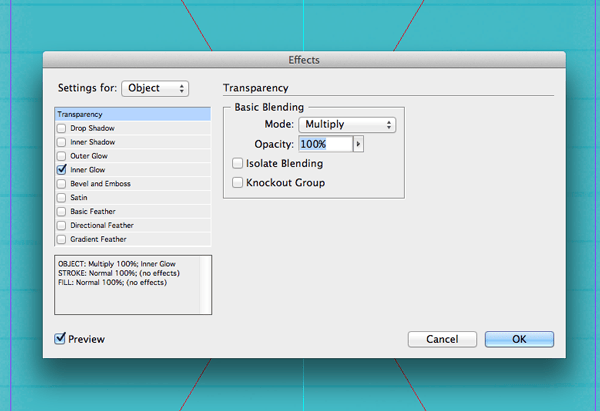
With the colored frame selected, go to Object > Effects > Transparency and set the Mode to Multiply and Opacity to 100%. This brings through the texture of the background paper.
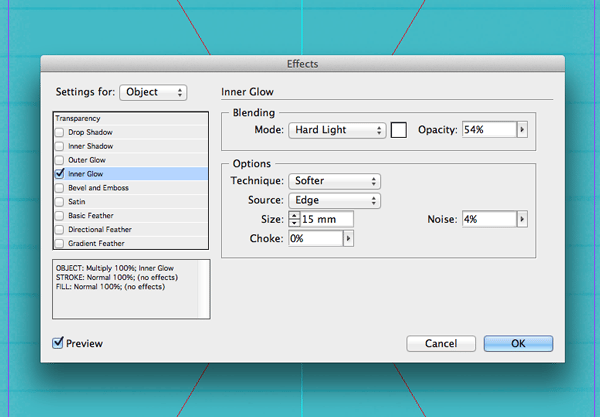
You can also add a bit more depth to the background with an Inner Glow. Select Inner Glow from the left-hand menu in the Effects window and set the Mode to Hard Light. Reduce the Opacity to 54%. Set the Technique to Softer, Source to Edge, Size to 15 mm and Noise to 4%. Click OK.
3. Introduce Handwritten Type
Handwritten or hand-drawn typefaces give cover designs a less formal, more personal feel.
Step 1
Pick out three fonts for use on the cover design:
One font needs to be a legible, clean sans serif. Here, I’ve used Calluna Sans.
Your second font will be used for the title, and should be an attractive, informal hand-drawn typeface that looks great at large size. I’ve gone for the lovely REIS.
We’ll need to choose a third font for rendering the author’s name. A naive, handwritten type like Arsenale White looks playful and diary-like.
Once you’ve downloaded and installed your chosen fonts, return to InDesign and to the Layers panel.
Create a New Layer, and rename it as Typography - Title. Lock the Background Color layer.
Step 2
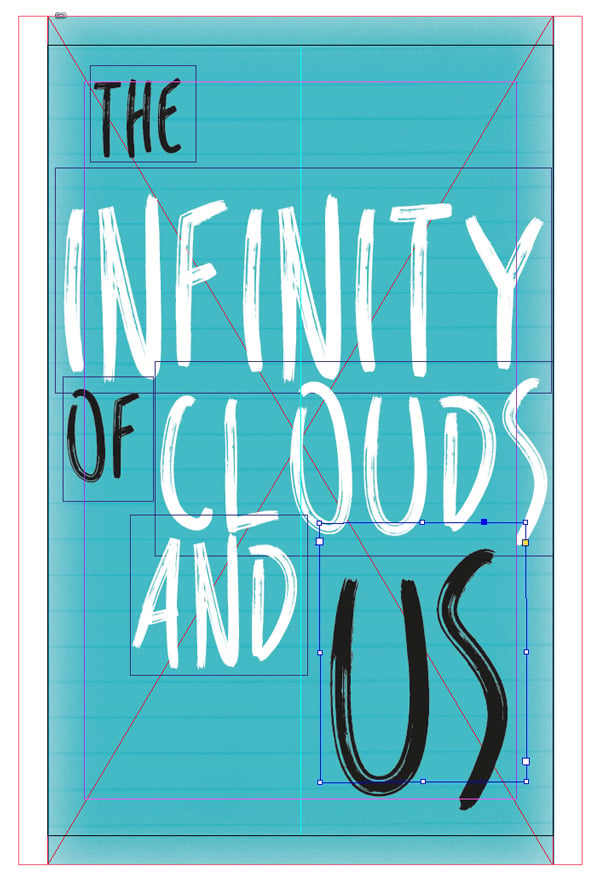
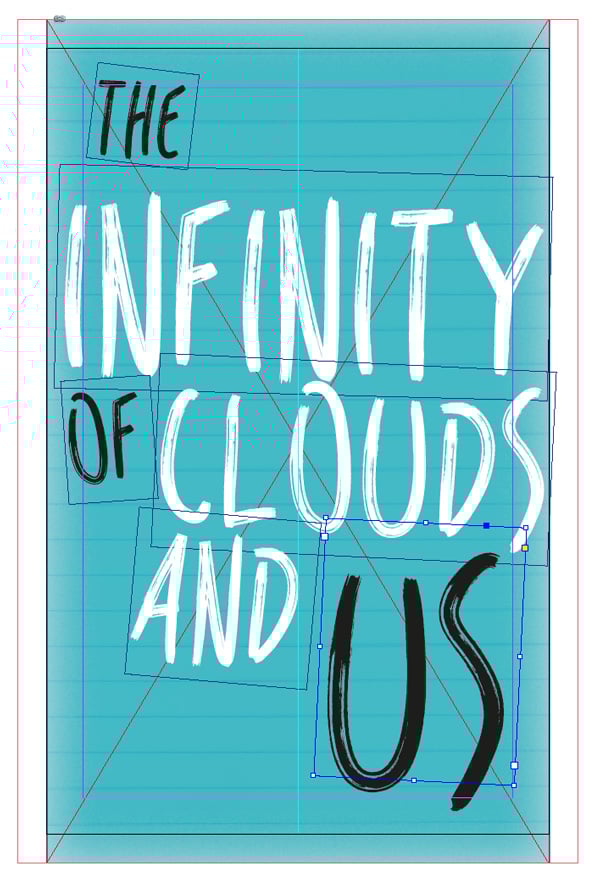
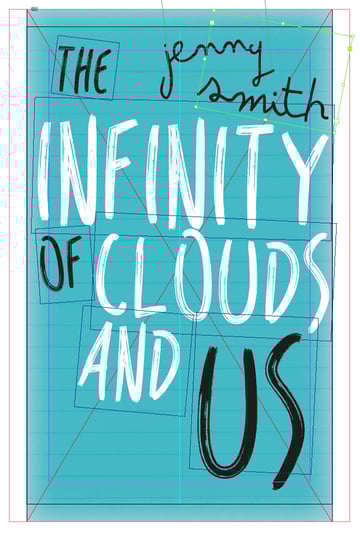
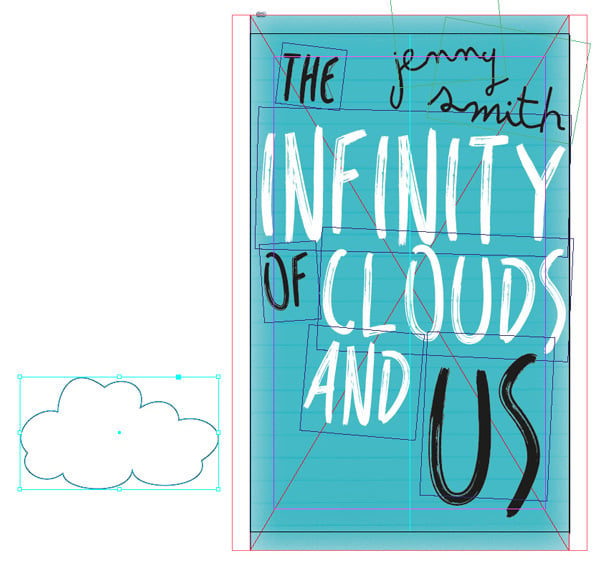
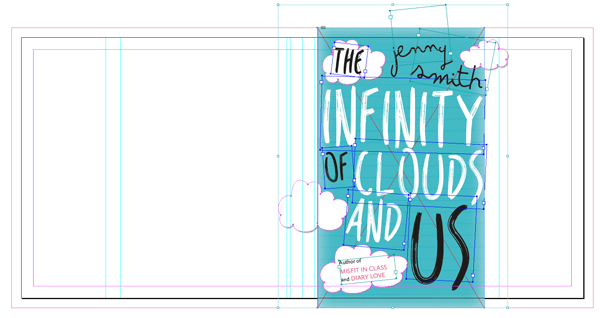
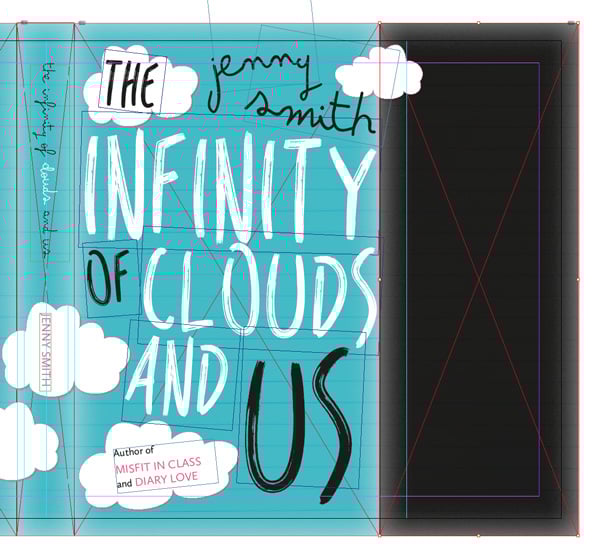
We’re going to create separate frames for each word of the book’s title: ‘The Infinity of Clouds and Us’.
Select the Type Tool (T) and drag to create a new text frame about 29 mm in Width and 26 mm in Height. Type ‘The’ and set the Font to REIS Regular, Size 77 pt and Font Color to [Black]. Position the frame towards the top left corner of the page.
Select the Type Tool (T) and drag to create a second text frame about 135 mm in Width and 60 mm in Height, positioning it centrally on the page just below ‘The’. Type ‘Infinity’ into this new frame and set the Font to REIS Regular, Size 175 pt and Font Color to [Paper].
Create a further four text frames and set the type to the following sizes and colors:
‘Of’: Size 90 pt, Font Color [Black]
‘Clouds’: Size 147 pt, Font Color [Paper]
‘And’: Size 126 pt, Font Color [Paper]
‘Us’: Size 230 pt, Font Color [Black]
Position the frames roughly as shown in the layout below:
Select each frame individually and hover your mouse over the bottom right corner of the frame until a Rotate icon appears. Rotate each frame a little either to the right or left to give the text a jaunty look.
Step 3
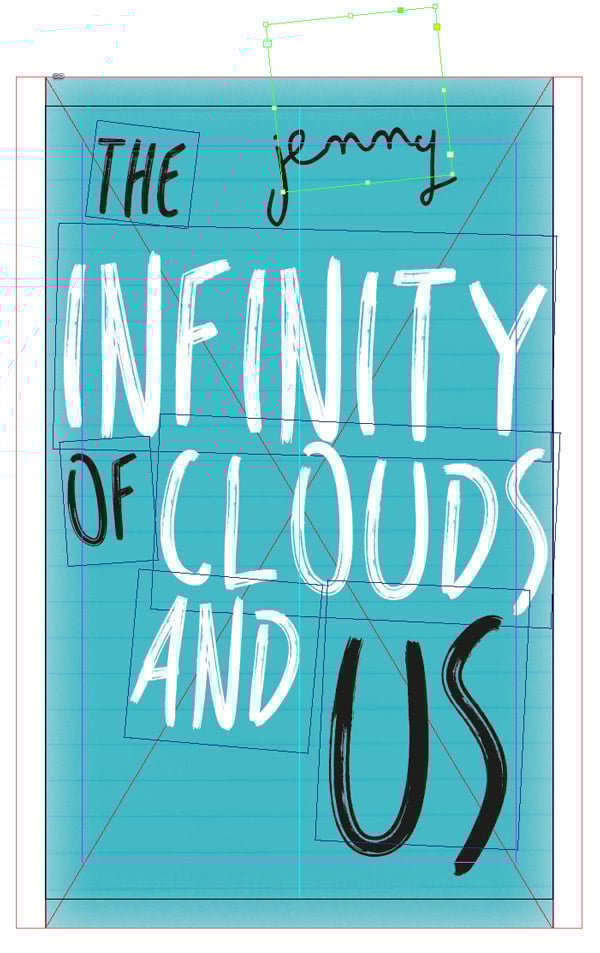
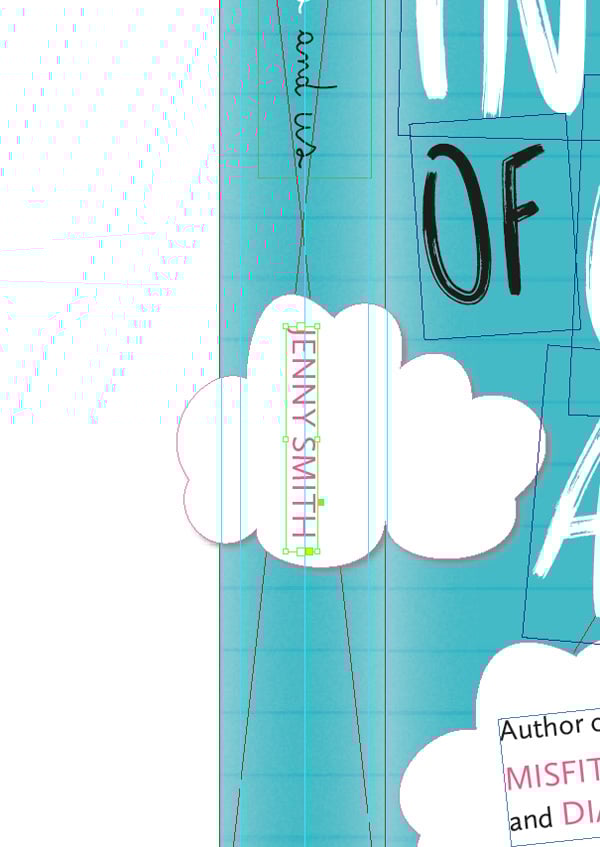
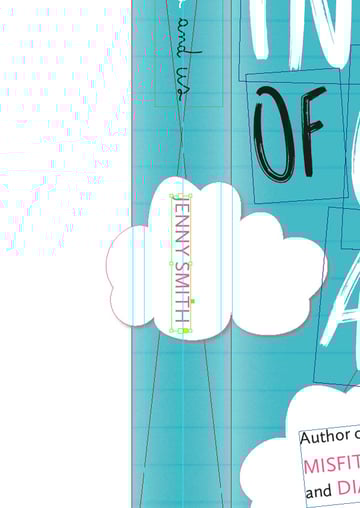
Now we need to add in the author’s name: ‘Jenny Smith’.
Lock the Typography - Title layer. Create a fourth new layer, from the Layers panel, and name it Typography - Author.
Create a new text frame, about 45 mm in diameter. Type ‘jenny’ and set the Font to Arsenale White, Size 100 pt, Font Color to [Black], and set the text to All Caps from the Character Formatting Controls panel running along the top of the screen.
Position the text frame in the top right corner of the page.
As we did with the other text frames, hover over the bottom right corner of the frame and rotate a little upwards, anti-clockwise.
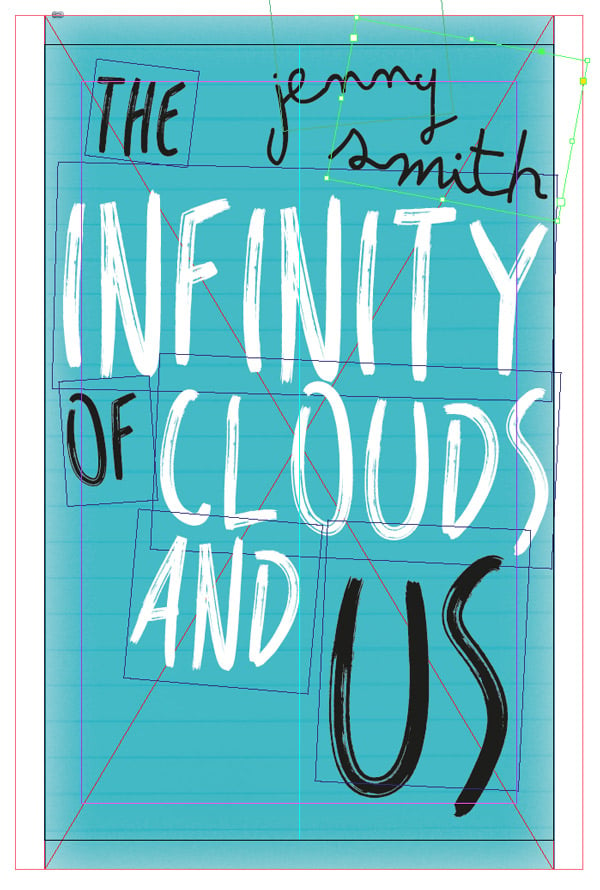
Edit > Copy and Edit > Paste the text frame and edit the text to read ‘smith’. Increase the Font Size to 106 pt. Position the frame below ‘jenny’, and slightly to the right, so that the ‘h’ almost touches the edge of the colored background.
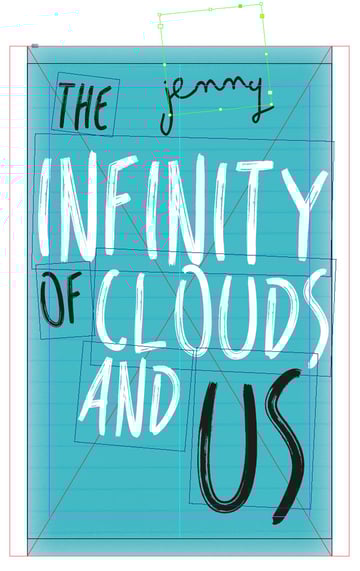
4. Create a Dreamy Design With a Cloud Vector
Step 1
Lock the Typography - Author layer and create a new layer; name it Clouds. Drag the layer down so that it sits below the Typography - Title layer.
Open Adobe Illustrator and create a new document at any size.
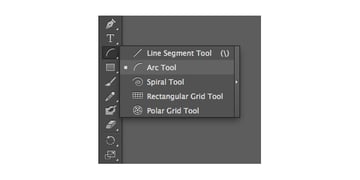
You can create a very simple cloud shape using the Arc Tool (find it under the Line Segment Tool drop-down menu, in the Tools panel).
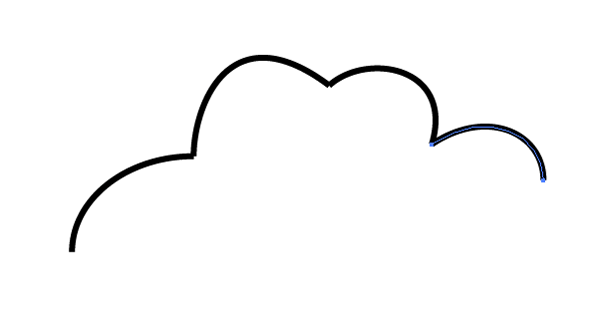
Click and drag to create a simple sequence of curves, working from left to right. Use the Direct Selection Tool (A) to edit the depth of the curves until you’re happy with the shape.
Move around in a rough oval, until you have a cloud shape like this:
Then, with all the lines selected, go to Object > Path > Join to create an enclosed shape. Finally, select the shape and go to Edit > Copy.
Step 2
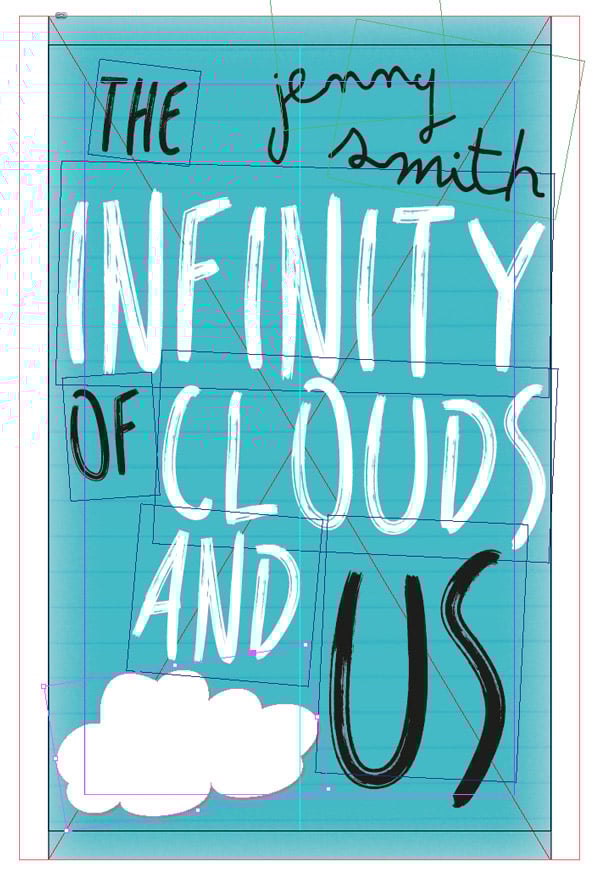
Return to InDesign and your cover document. Go to Edit > Paste to drop in the cloud vector.
You can treat the vector as you would a shape or frame in InDesign. From the top control panel, adjust the Stroke Color to [None] and set the Fill Color to [Paper].
Position the cloud so that it fits snugly in the bottom left corner of the page. Go to Object > Effects > Drop Shadow and set the Mode to Normal. Reduce the Opacity to 45%, Distance to 1 mm and set the Size to 1 mm. Click OK.
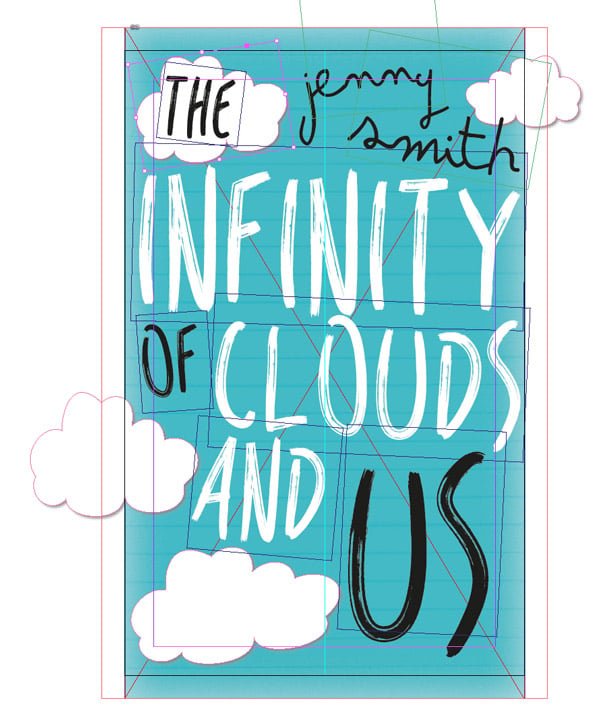
Edit > Copy, Edit > Paste the cloud shape a further three times, positioning them haphazardly across the page layout. Resize and flip them (right-click (Windows) or Control-click (Mac OS) > Transform > Flip Horizontal), layering one cloud behind the top text frame of the title.
Step 3
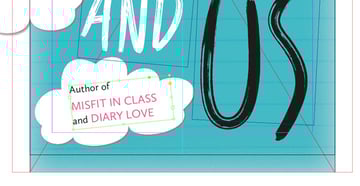
As a final touch to the front cover you can add in a bit more text, maybe a subtitle, or a brief blurb about the author.
Lock the Clouds layer and Unlock the Typography - Author layer. Type ‘Author of (paragraph break) Misfit in Class (paragraph break) and Diary Love’. Set the Font to Calluna Sans Regular, Size 15 pt, Font Color [Black].
Pull out the names of the other books in All Caps, and in a new pink swatch, C=2 M=76 Y=16 K=0 (add from the Swatches panel). Rotate the text frame a little anti-clockwise, and position over the top of the cloud in the bottom left corner of the page.
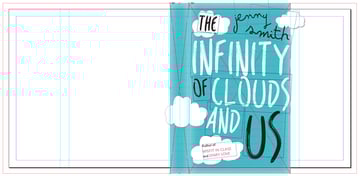
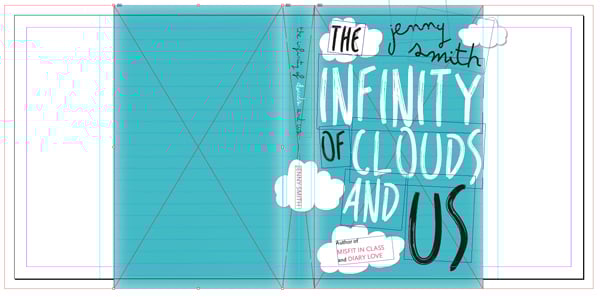
5. Expand Your Dust Jacket
You can keep the front cover artwork as it is, on Page 1. Navigate down to Page 2 of the document—we will expand this page to create the full dust jacket design.
Step 1
We need to expand the page to accommodate the following:
2 x 70 mm width flaps
1 x 138 mm width back cover
1 x 138 mm width front cover
1 x 26 mm width spine (inclusive of 6 mm allowance for shoulder fold)
1 x 12 mm width allowance between the flap edge and back cover edge, to accommodate the fold
1 x 12 mm width allowance between the flap edge and back cover edge, to accommodate the fold
This comes to a total width of 466 mm (plus an 8 mm bleed). The height of the document will remain unchanged.
Select the Page Tool (Shift-P) from the Tools panel. Click once on the page to select it and adjust the Width of the page to 466 mm.
Step 2
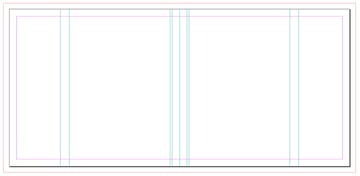
From the left-hand Ruler(View > Show Rulers), pull out a number of vertical guides to the following X positions: 70 mm, 82 mm, 220 mm, 223 mm, 233 mm (the center point of the spine), 243 mm, 246 mm, 384 mm and 396 mm.
Step 3
Return to the Layers panel and Unlock all of your layers. Navigate back to Page 1 of your document and drag your mouse across the page, selecting all the elements from the front cover. Go to Edit > Copy, and return to Page 2.
Edit > Paste the content onto Page 2 and, using the Free Transform Tool (E) to keep it all temporarily grouped together, position it on the right side of the page—the guides have formed a perfect 138 mm-wide gap for the content to sit in.
6. Format the Spine of the Cover
Step 1
Lock all the layers except the Paper and Background Color layers. Drag your mouse over Page 2 to select all elements on those layers. Go to Edit > Copy, Edit > Paste.
Reduce the Width of both the paper image frame and the colored frame to fit the width of the spine (26 mm) and position centrally on the page, to the left of the front cover artwork.
Step 2
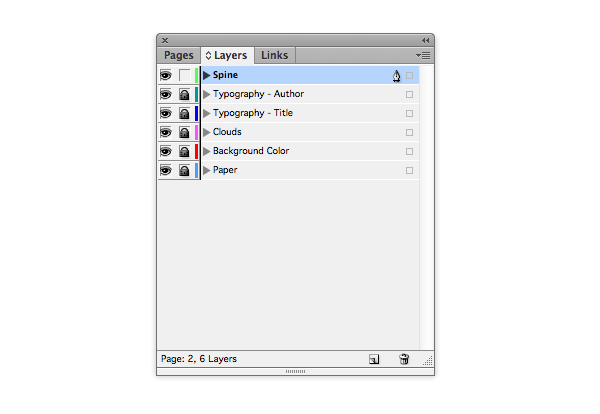
Create a new layer in the Layers panel, named Spine. Lock the other layers.
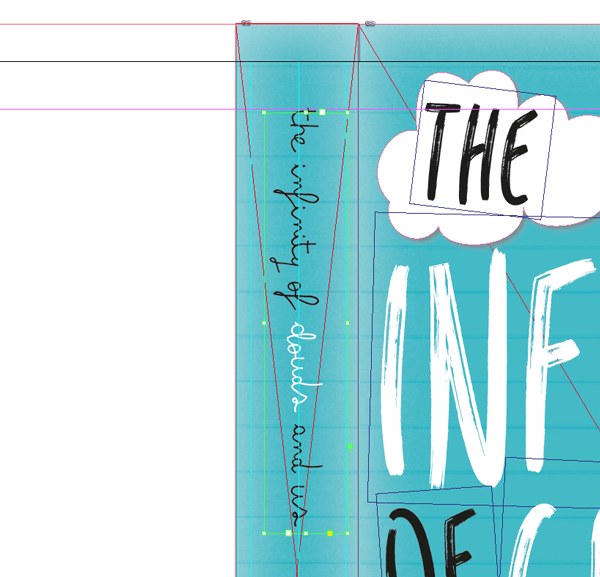
Select the Type Tool (T) and create a long narrow text frame. Type ‘The Infinity of Clouds and Us’ and set the Font to Arsenale White, Size 31 pt, Font Color to [Black] (though set ‘clouds’ in [Paper]), and set the text to All Caps.
Select the text frame and right-click (Windows) or Control-click (Mac OS) > Transform > Rotate 90 Degrees CW. Position towards the top of the spine, using the central guide (at 233 mm) to centralise it.
Create a second text frame and type the author’s name. Set the Font to Calluna Sans Regular, Size 15 pt, All Caps and Font Color to the pink swatch, C=2 M=76 Y=16 K=0. Layer the text frame over the top of one of the cloud shapes if possible. Don’t shy away from allowing the clouds to cross over guides.
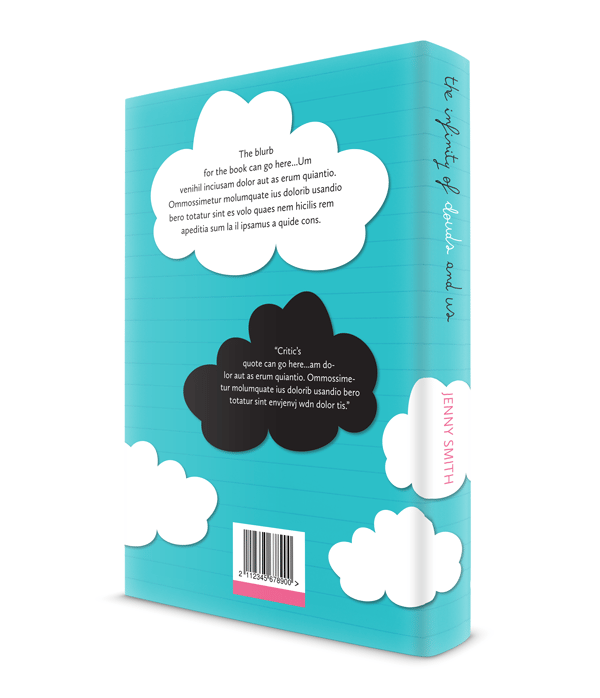
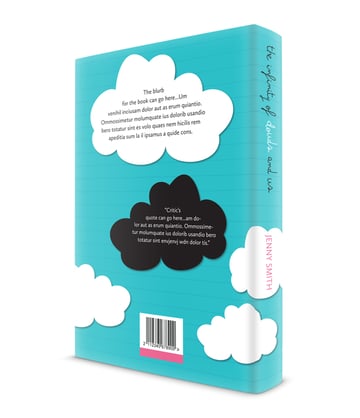
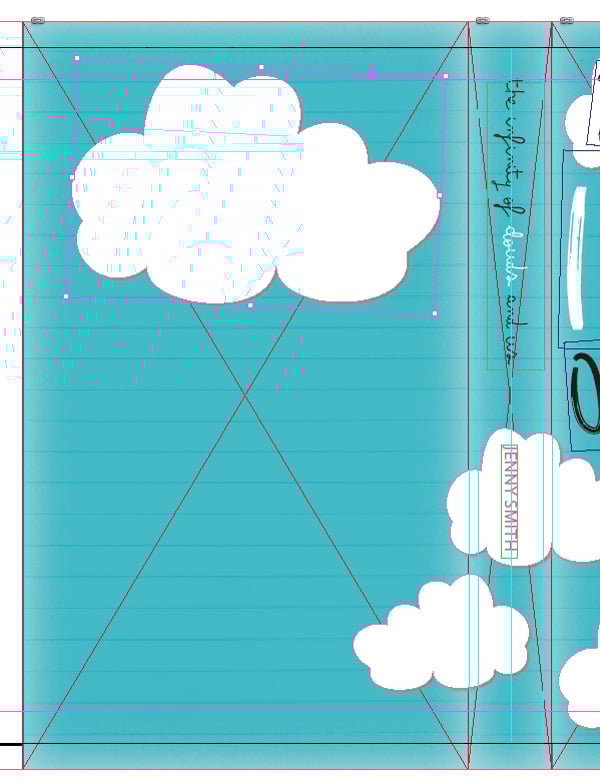
7. Design the Back Cover
Step 1
Lock the Spine layer and Unlock the Paper and Background Color layers.
Select both the paper image frame and the colored frame that form the background of the front cover artwork (don’t select the spine background) and Edit > Copy, Edit > Paste. Position to the left of the spine artwork.
Lock the Paper and Background Color layers and Unlock the Clouds layer.
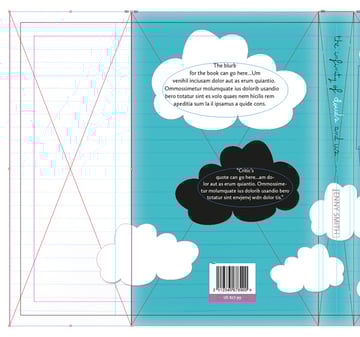
Select one of the cloud shapes and Edit > Copy, Edit > Paste. Enlarge the size so that it almost fills the width of the back cover, and position towards the top of the page, centrally on the back cover section.
Repeat the process, copying and pasting three more cloud shapes, setting two in [Paper] and one in [Black]. Place the black cloud at larger scale, centrally on the back cover, slightly pushed to the right. Place a smaller white cloud bridging across the left flap and left side of the back cover. Place another small white cloud to the bottom right of the back cover, allowing it to cross onto the spine.
Step 2
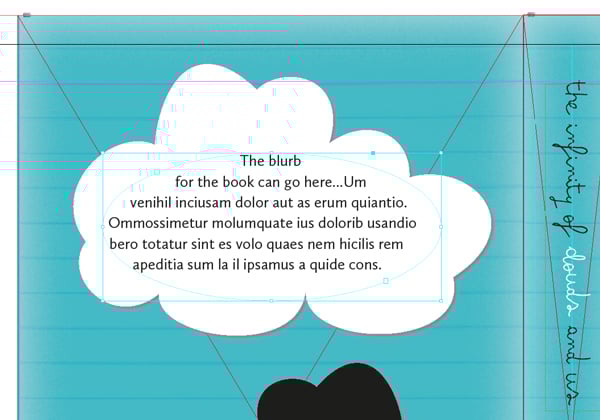
Lock the Clouds layer and create a new layer; name it Back Cover.
Select the Ellipse Tool (L) and drag to create a long oval. Position over the top of the white cloud shape towards the top of the back cover. Select the Type Tool (T) and click once in the oval frame to transform it into a text frame. Set the Font to Calluna Sans Regular, Size 12 pt and Leading 16 pt. You can type in the book’s blurb here, or, for now, just go to Type > Fill with Placeholder Text to insert some ‘dummy’ text into the frame.
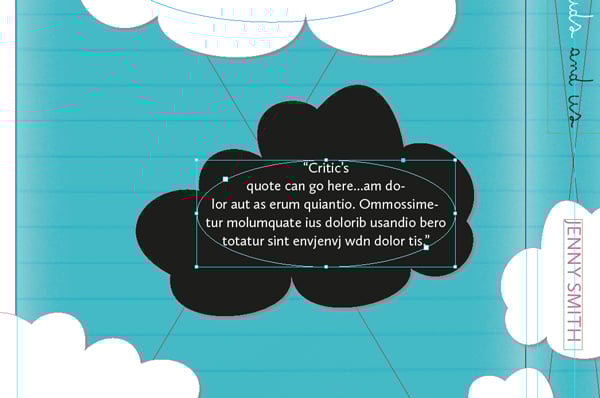
Repeat the same process, creating a second text frame, and layering it over the top of the black cloud shape. Adjust the Font Color to [Paper]. This is the perfect place for a critic’s quote or short review to go.
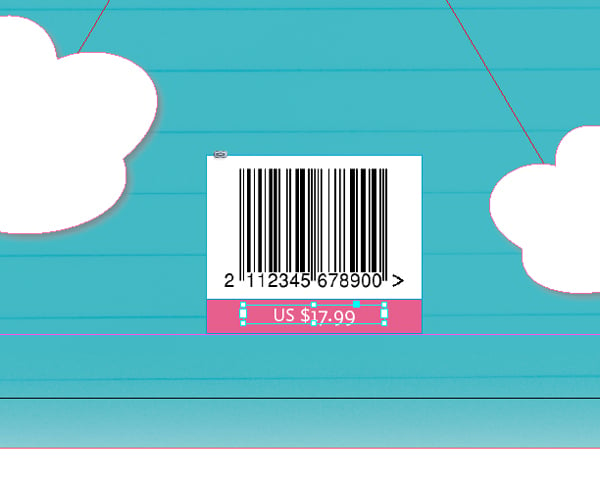
You can also add in a barcode at the bottom of the cover. Use the Rectangle Frame Tool (F) to File > Place an image of the barcode, and you can add a pink rectangle frame underneath it, which might be a suitable place to put pricing information.
8. Think About the Flaps!
A dust jacket wraps around the hardcover, and has flaps that fold over the far edges of the front and back cover, which are only visible on opening the book. These are great places to put extra information that might intrigue the reader who picks up the book—a brief biography of the author and a more detailed blurb of the book.
Step 1
Lock the Back Cover layer and Unlock the Paper and Background Color layers.
Edit > Copy the paper image frame and colored background from the back cover artwork and Edit > Paste. Reduce the width so that both frames fit on the right flap, extending up to the edge of the right-hand bleed.
Adjust the Fill Color of the top frame to [Black].
Drag your mouse over the right-hand flap to select the paper image frame and colored background and Edit > Copy, Edit > Paste. Manoeuvre the two pasted frames over to the left-hand flap, and adjust the Fill Color of the top frame to [Paper].
Step 2
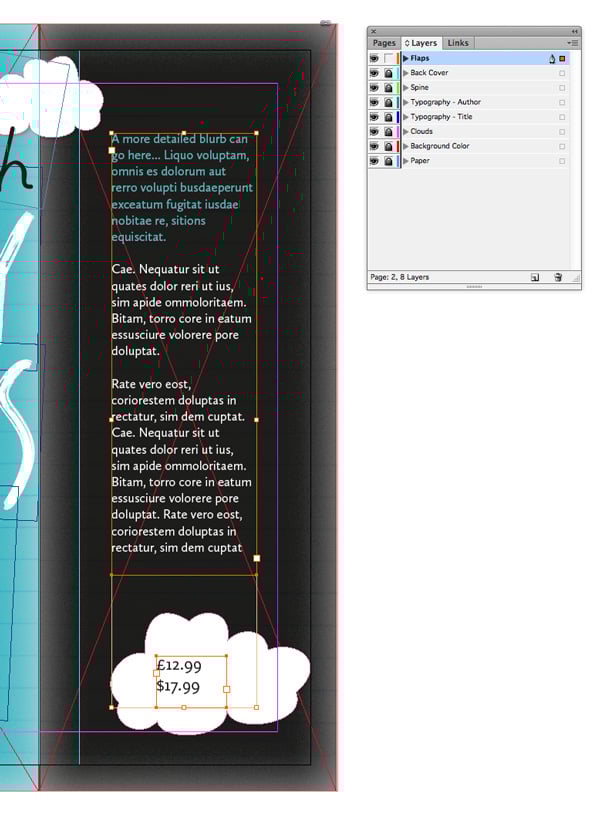
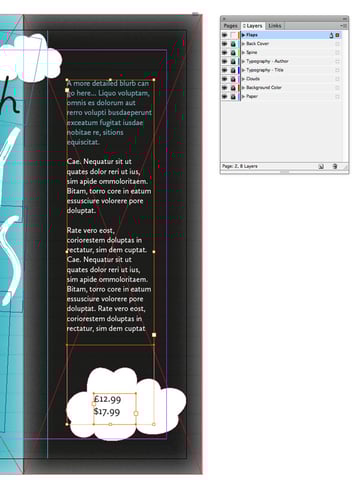
Lock the Paper and Background Color layers, and create a new layer named Flaps.
Navigate over to the right-hand flap and use the Type Tool (T) to create a tall, narrow text frame, about 43 mm in Width.
You can type in a more detailed blurb for the book here, setting the Font to Calluna Sans Regular, Size 11 pt and Leading 14 pt. Set the first paragraph of text in blue, C=68 M=0 Y=24 K=0, and the remainder of the text to [Paper].
You can also add in pricing at the bottom of the flap, and another cloud shape for decoration (Unlock the Clouds layer to copy and paste an additional shape).
The left-hand flap is traditionally a good place to have a little biography of the author, and perhaps an author photo, if you have one available. Remaining on the Flaps layer, introduce another text frame 43 mm in Width, setting the text to, as before, Calluna Sans Regular, Size 11 pt and Leading 14 pt. Set the first paragraph of text to pink and the remainder of the text to [Black].
Your dust jacket design is complete! Fantastic work, you’re almost ready to send the artwork to print.
9. Export Your Dust Jacket for Print
Step 1
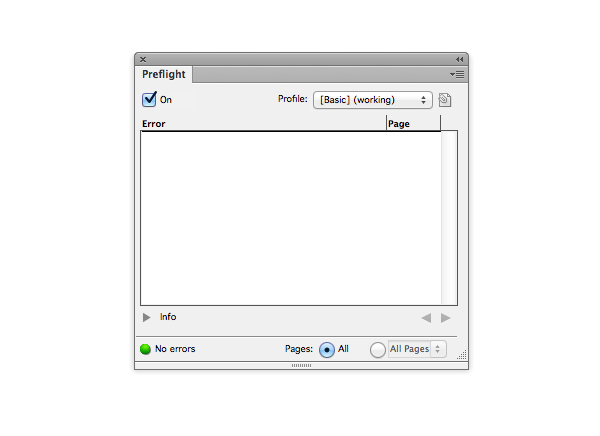
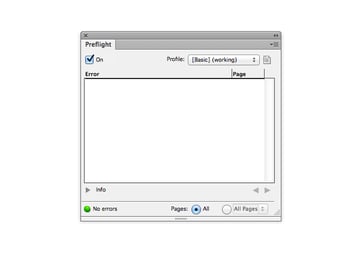
Before you export your work, you should check for any spelling errors and run a Preflight(Window > Output > Preflight) to check for any errors, such as text overspilling text frames. Once the green light shows, you're good to go!
Step 2
All that’s left to do now is to export the artwork to PDF, ready for printing.
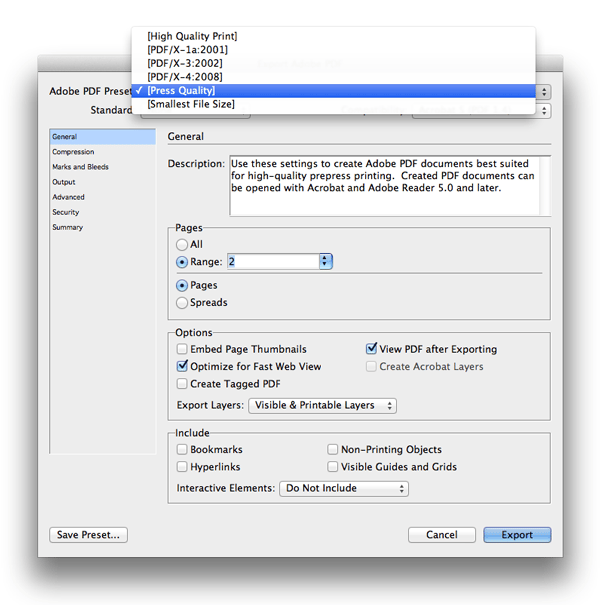
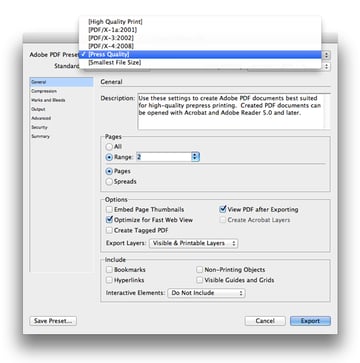
Go to File > Export... to open the Export window. Select Adobe PDF (Print) from the Format drop-down menu. Name the file and click Save.
In the Export Adobe PDF window select Press Quality from the Adobe PDF Preset drop-down menu. In the Pages section, under Range, type 2, if you’ve kept a copy of only your front cover on Page 1.
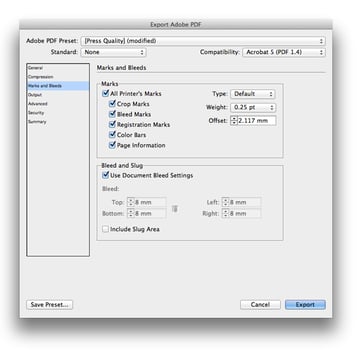
Under the Marks and Bleeds section, click to select All Printer’s Marks under the Marks menu and click to select Use Document Bleed Settings under the Bleed and Slug menu. Click Export.
Conclusion
Congratulations! You now have your book cover ready to be sent to the printers.
Be sure to get in touch with your printer before you send the artwork to print, to receive paper samples and a proof, and to also get their recommendations for paper stock and weight.
In this tutorial, you have learned how to design a fun, informal dust jacket for a hardback book using Adobe InDesign. This type of design would be suitable for a Young Adult Fiction title, but the layout principles could be used for creating any hardback jacket.
If you’re looking to design a cover for an ebook, Placeit’s collection of book cover templates is the perfect tool for you. Create the perfect book cover design for your young adult novel right in your browser and have it ready to post today!
The traits of cover design for this young adult genre include handwritten or hand-drawn typography, bold, contrasting colors, paper- and collage-inspired textures and graphics, and haphazard, naive layouts (a relaxed grid). Now, why not try creating your own version of a young adult fiction cover, using some of these common elements?
Subscribe below and we’ll send you a weekly email summary of all new Design & Illustration tutorials. Never miss out on learning about the next big thing.
Grace is a graphic designer and design writer, and heads up creative agency Blue Whippet Studio, based in Manchester, UK. A self-confessed 'print geek', Grace loves to share her experiences of graphic design with others and has written about creative trends and design history for a wide range of publications and blogs, including Adobe, Shutterstock, Envato and InDesign Magazine.
Grace studied social anthropology and the anthropology of design at Cambridge University and UCL, before working in marketing and graphic design roles in agencies and in-house. Today she balances running Blue Whippet alongside top-ranking design blog InDesignSkills.com.
Visit bluewhippetstudio.com and indesignskills.com.