While the FBI continues to investigate the MedStar attacks and a series of other recent ransomware attacks, I decided to describe a case from my own experience when I received an encrypted file and opened it. What steps should I have been undertaking to protect my system from file-encrypting malware?
Background
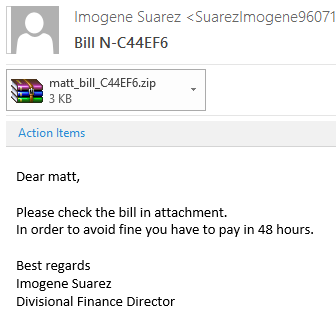
Well, I received an email with the usual ‘please see attached document, or it’ll cost you lots of money’. Attached was a zip file with 2 files inside – a Word document and a JavaScript file:
I was surprised that the spammers are now using the latest version of Office as an excuse as to why you can’t read their (macro-enabled) document.
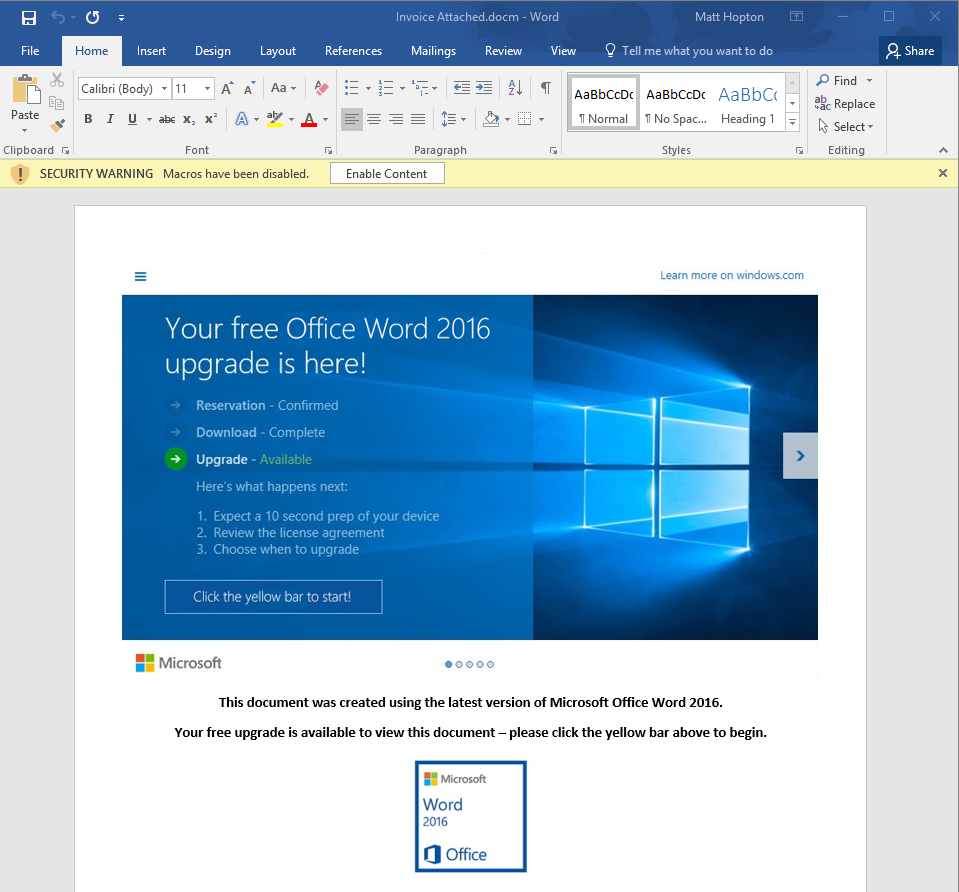
By the way – if you’re thinking that the image looks genuine, it’s because it is! It’s the ‘Upgrade to Windows 10’ box that pops up, just with some minor edits to the text.
Just for fun, I enabled macros in an isolated network environment and monitored what happened next using Process Monitor from Sysinternals.
The Word document downloaded a base64-encoded text document, wrote it to the user’s %temp% folder, renamed it to .exe and executed it. (The JavaScript file that was in the original zip file provides a similar experience.)
This appears to be a variant of the ‘Teslacrypt’ malware family and proceeds to encrypt all of the user’s documents, desktop and pretty much anything else that it can touch.
In a real-life environment however; hopefully most, if not all, of the user’s files are being stored on a file server through one means or another – be it Work Folders, Folder Redirection etc.
We are also assuming that the malware has bypassed any software restriction policies, restrictions on running macros in Office polices that you might have had in place. This is a last attempt to stop the ransomware from encrypting everything…
Using File Server Resource Manager
We can use File Server Resource Manager (FSRM) as a system to help prevent the already-executing malware from infecting the entire file server.
We will setup FSRM to monitor the shares for suspicious activity associated with Ransomware, email designated admin addresses and then block the infected user’s access to the shares on that server.
If you don’t already have File Server Resource Manager installed on your file server, go ahead and install it now from Server Manager -> Add Roles and Features:
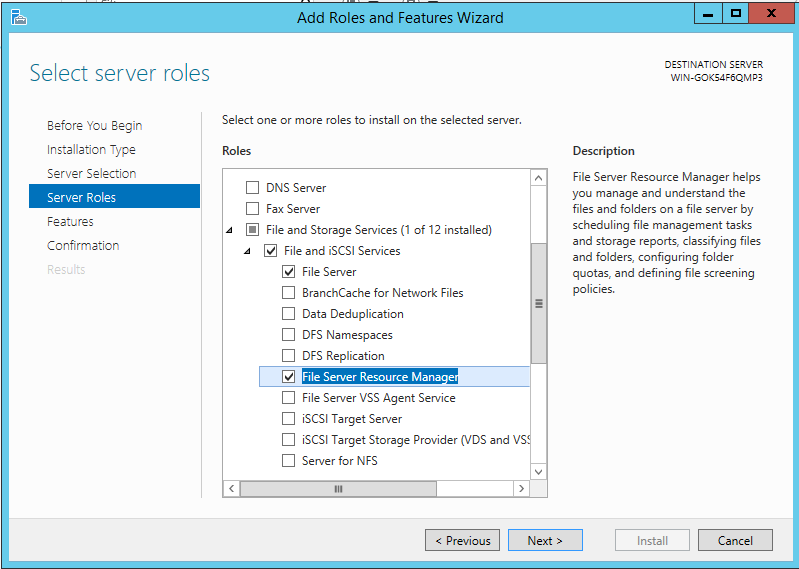
Once installed, launch it from the Server Manager’s Tools menu.
The first thing we need to do is setup the email alert system with your mail server. To do this, choose ‘Configure Options’ from the right hand ‘actions’ panel. A window appears on the ‘Email Notifications’ tab.
Enter your mail server’s fully qualified domain name (FQDN), or IP address in the first box, a semicolon-separated list of emails to receive the alerts in the 2nd, and a valid email address on your email server in the 3rd.
Press Send Test E-mail and wait for it to be sent. If you don’t receive anything, you may need to enable unauthenticated relaying for this file server on your email system. Press OK to finish.
Setting up the File Screen
FSRM has an excellent function called File Screening, whereby you can set actions to be performed when users attempt to save certain types of files to the network. In our environment, we use this to prevent users from saving executable files to their home folders.
In this case, we’re going to setup screening on the regular file share and on a new file share that will act as a honeypot for ransomware.
- In the navigation pane, click ‘File Screens’ and ‘Create File Screen’ on the action pane. Hit browse and navigate to the top level of your file shares. For example, I’ve setup some shares in D:Shares… so that’s the path to pick here.
- Click ‘Define custom file screen properties’ -> Custom Properties.
- Leave the ‘screening type’ as ‘active’, which will help prevent your file server being filled with encrypted files.
- Click ‘Create’ under ‘Maintain file groups’
- Give the group a name like ‘Known Ransomware Files’ and add ‘testfile.txt’ into the first box: (We will be updating this list via a script later.)
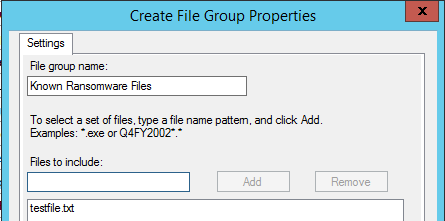
- Click OK, then tick the group in the list:
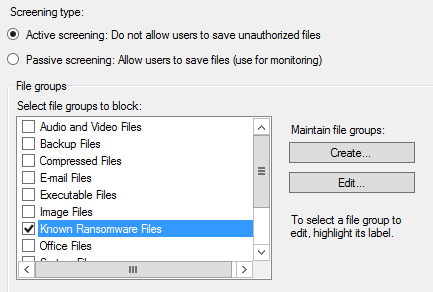
- On the second tab, tick the ‘Send e-mail’ box and customise the message if you wish.
- In the ‘Command’ tab, tick the box and enter the path to PowerShell.exe in the first box. On my system, it is as below:
C:WindowsSystem32WindowsPowerShellv1.0powershell.exe
- In the second box, ‘command arguments’, enter the PowerShell script below:
-ExecutionPolicy Unrestricted -NoLogo -Command "& { Get-SmbShare -Special $false | ForEach-Object { Block-SmbShareAccess -Name $_.Name -AccountName '[Source Io Owner]' -Force } }"
This script will block the user’s access to all shares on this server whenever it is detected that they have written a file that matches the ransomware file screen pattern, effectively preventing the malware doing more damage, but without causing downtime for other users of the server. (Hooray, finally a genuine use for share permissions!)
If you’re still running Server 2008, the Get-SmbShare command isn’t available. Instead, you can use Windows Firewall to block access for all users to the server. In the first box, enter:
c:windowssystem32netsh.exe
Then, in the second:
advfirewall firewall add rule name="*TEMPORARY BLOCK RANSOMWARE DETECTED*" dir=in protocol=tcp interface=any action=block localport=139,443,445
But be warned – this blocks everyone’s access to the server!
Finally, click ‘Local System’ in the ‘run as’ section and press OK.
Click create and save the properties as ‘Ransomware Screen Template’. This will allow you to easily apply it to any other shares that you might have.
The Honeypot
To take this a step further, we can create a new Share to act as a ‘honeypot’ and entice the ransomware to write to it without damaging user’s files.
Using Server Manager -> File and Storage Services -> Shares, create a new Share called ‘$Honeypot’. Make sure you give ‘Authenticated Users’ full control over both the file permissions and the share permissions.
We use the dollar sign at the start in order to place the honeypot first in the list of shares when browsing the file server, in the hope that the ransomware will attempt to encrypt it first.
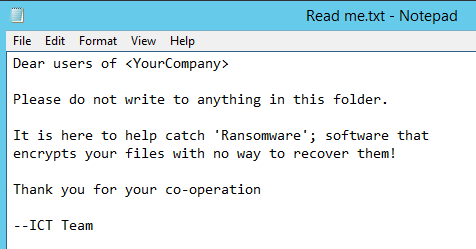
Create a ‘read-me’ file in the honeypot folder:
This file is here to help instruct users if they come across the folder, but also as a trap for ransomware, as it will attempt to encrypt the file when it discovers it.
Go ahead and create a new File Screen on this new share, selecting ‘Derive Properties from template’ and choosing our ‘Ransomware Template’ that we saved earlier.
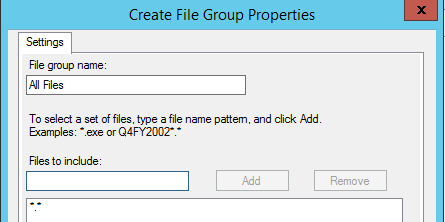
Modify the file screen so that it includes an ‘All Files’ group: *.* – this will help to protect against new unknown file names as nobody should be writing to the honeypot folder.
Testing
Remotely, attempt to create a file called ‘testfile.txt’ on the server; either in one of the protected shares, or in the honeypot share. Within seconds, you should get an email along the following lines:

Then that user’s access to the shares on that server should be denied.
Updating the File Screen
Run the script below in PowerShell to download the latest known file extensions and apply to your file group. This will update all file screens that use that particular group.
You will need to change the name in the last line if you called it something else earlier.
$decryptreadme = (Invoke-WebRequest "https://raw.githubusercontent.com/thephoton/ransomware/master/filescreendecryptreadme.txt").Content

$fileexts = (Invoke-WebRequest "https://raw.githubusercontent.com/thephoton/ransomware/master/filescreenextensions.txt").Content

$filescreengroup = @()

foreach($line in $decryptreadme.Split("`r`n")){ if ($line -ne "") {$filescreengroup += $line} }
  foreach($line in $fileexts.Split("`r`n")){ if ($line -ne "") {$filescreengroup += $line} }

Get-FsrmFileGroup "Known Ransomware Files" | Set-FsrmFileGroup -IncludePattern $filescreengroup
If you should get an infection and the user has their access to the server blocked, run the script below to undo that access (after making sure everything is clear of course!)
Get-SmbShare -Special $false | ForEach-Object { Unblock-SmbShareAccess -Name $_.Name -AccountName ‘ACCOUNT NAME TO UNBLOCK’ -Force }
Good luck in your quest to block Ransomware!
